Electronic door handle with fingerprint, RFID card and PIN, touch keypad, SecureEntry-HL100
GTIN: 5907614668822 · SKU: SecureEntry-HL100
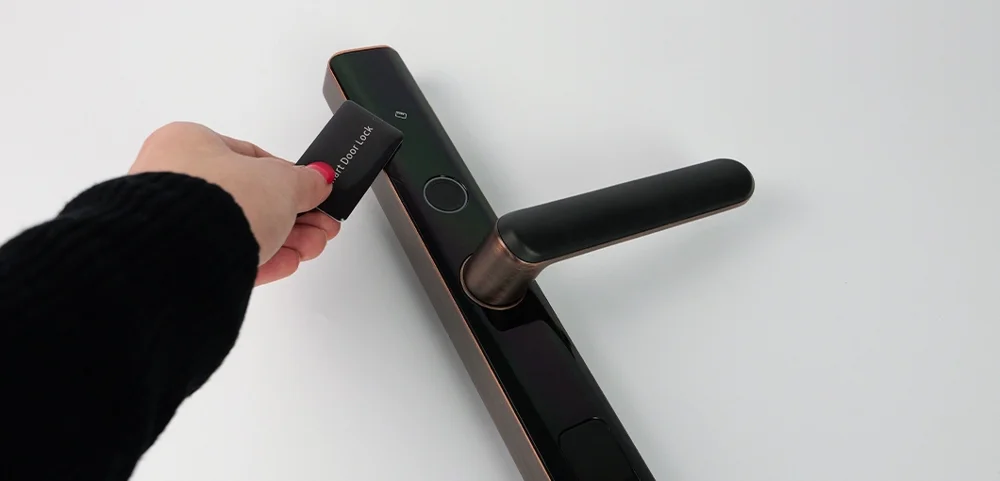
The SecureEntry-HL100 is an electronic door handle with a built-in lock for entrance doors of buildings and rooms. The door can be opened in four ways: with a fingerprint, a 13.56 MHz RFID card, a PIN code typed on the touch keypad or a classic key. Users are added and removed from the menu on the keypad, protected by an administrator password. The handle runs on four AAA batteries, fits doors 41–55 mm thick and can be mounted as a left or right handle.
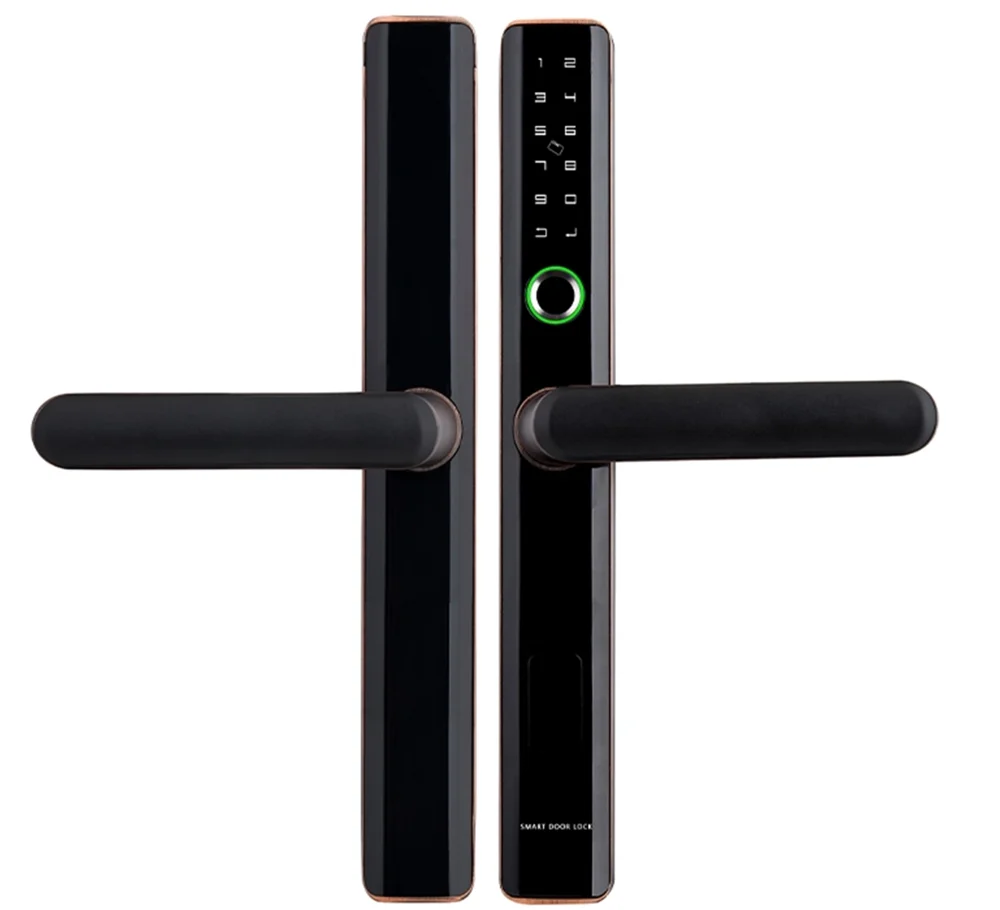
Table of contents
Specifications
- Device type: electronic door handle with RFID access control
- Verification types: password, fingerprint, RFID card, classic key
- User capacity: 300
- Supported RFID cards: 13.56 MHz, MIFARE Classic 1K-compatible
- Suitable door thickness: 41–55 mm
- Additional functions: touch keypad, doorbell/alarm
- Mortise lock: 35 × 85 mm
- Compatibility: compatible with more than 10 mortise locks, including the European standard lock body
- Handle direction: universal, left or right
- Power supply: 6 V DC, 4 × AAA alkaline batteries
- Working voltage range: 3.8–6.5 V
- Low battery alarm voltage: 4.8 V
- Standby current: below 50 µA
- Backup power: 5 V through the USB port
- Lock size: 38 × 290 mm
- Volume levels: 1–6
- Password length: 4–10 digits
- Dummy password: up to 20 digits in total
- Administrators: up to 5
- Voice prompt languages: Chinese, English
- Interface: USB
- Package dimensions: 40 × 26 × 9.2 cm
- Product weight: 1 kg
Kit contents
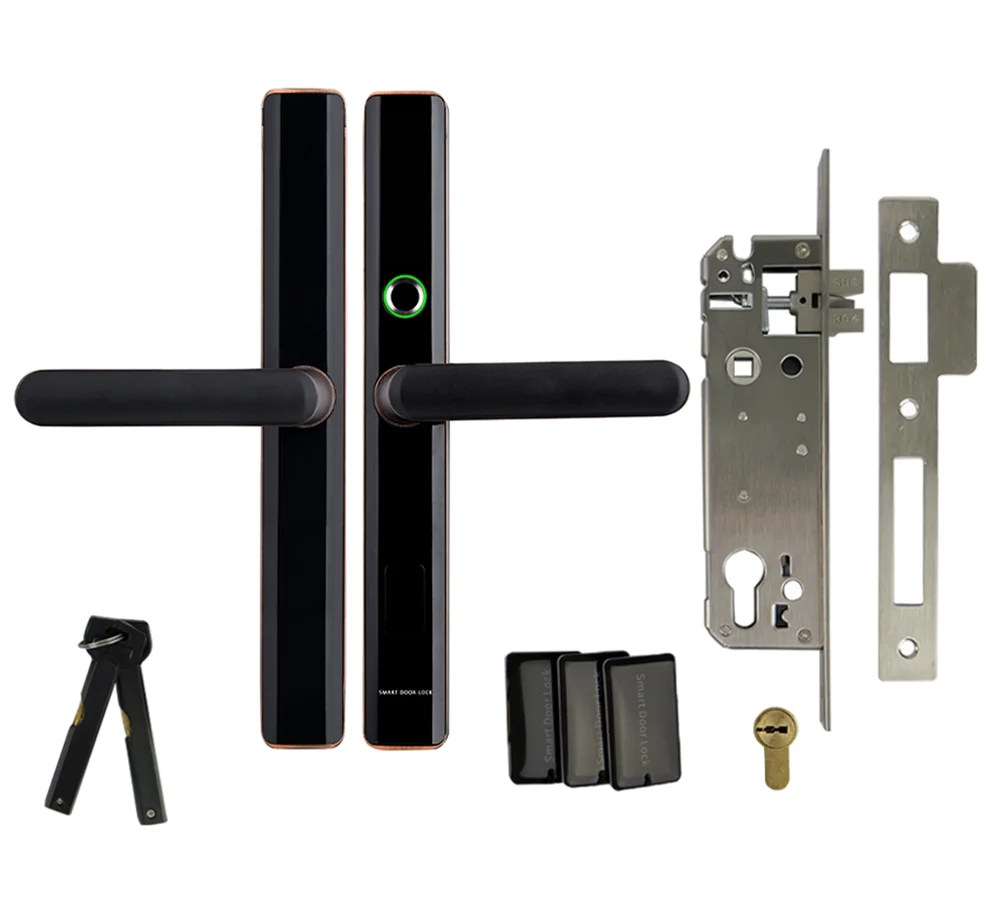
- Indoor panel with handle
- Outdoor panel with handle
- 2 × rubber seal
- Lock body
- Spindle
- Blade lock core
- Plastic cap
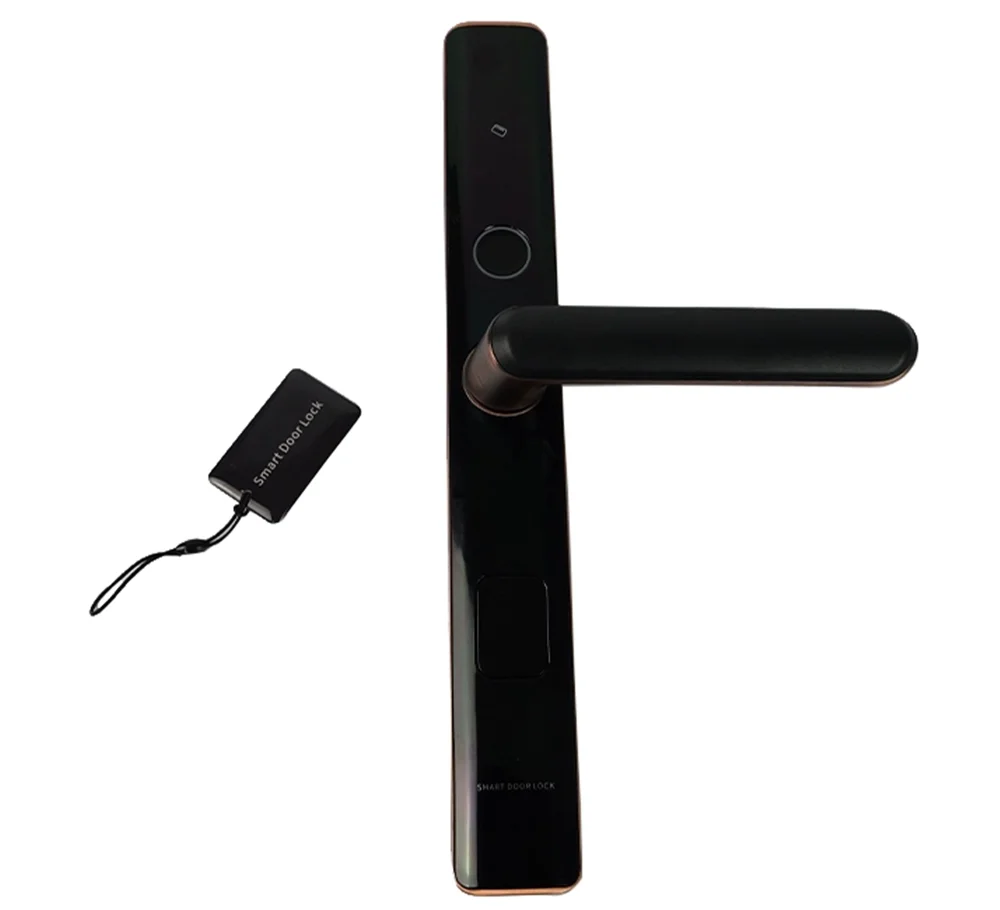
- 3 × 13.56 MHz RFID card compatible with MIFARE Classic 1K
- 2 × classic key
- 4 × AAA battery
- Door cut-out template
- User manual
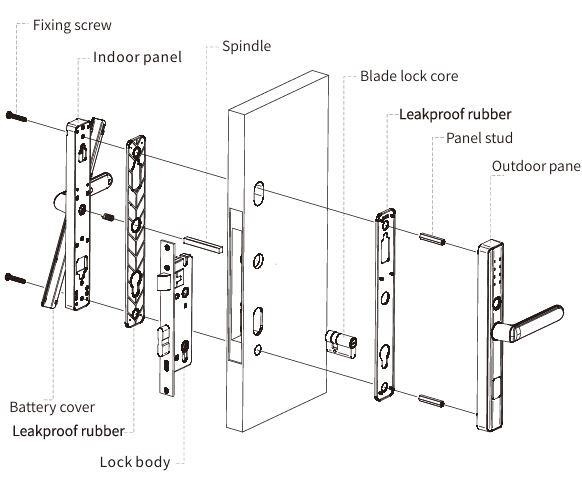
Assembly diagram
Installation
Measuring the length of the blade
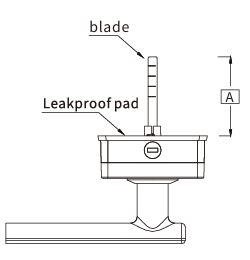
- The required length is marked with the letter A in the drawing.
- Measured from the leakproof pad, length A equals the thickness of the door.
Keep the cutting tolerance within 5 mm.
Door cut-out template
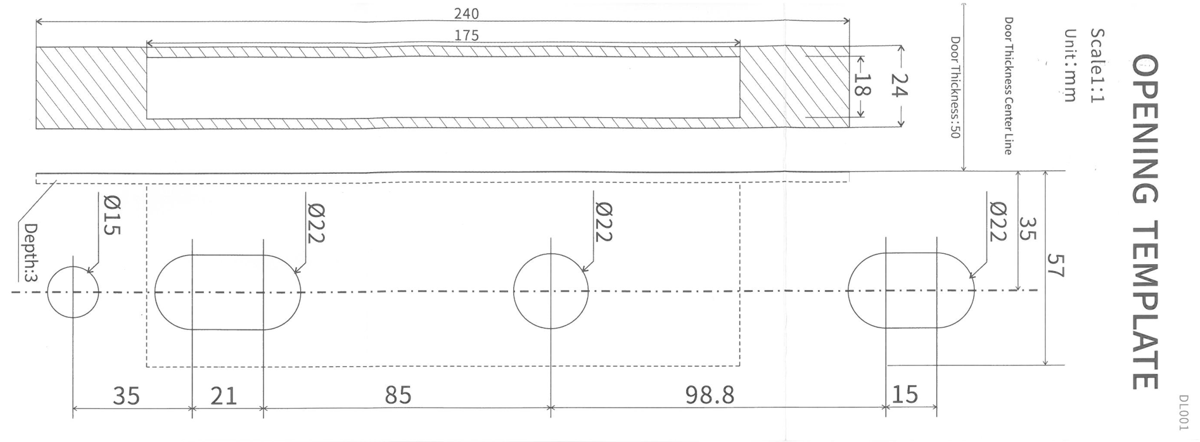
The template in the kit is printed at 1:1 scale, with dimensions in millimetres. Use it to mark the holes for the lock body and the panels.
Installation procedure
1. Marking and drilling the holes
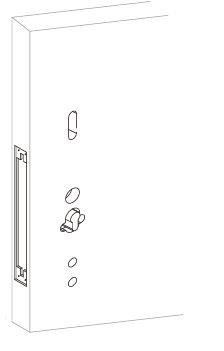
- Marking: place the opening template on the door and mark the mounting holes.
- Cutting: with a drill, a wire saw and other tools, cut the pocket for the side plate in the door edge and drill the holes for the lock body.
2. Installing the lock body
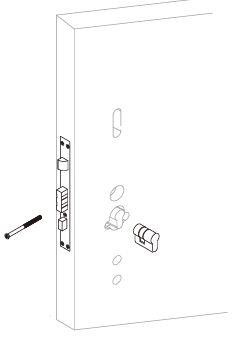
- Insert the lock body into the pocket in the door so that the rod passes through it, then set the lock body in place.
- Fix the lock body with the 4 screws and tighten them.
- Insert the sleeve into its position in the lock body and fix it with the tapered screw. Fit the side plate to secure it.
Make sure the latch faces the right direction and the bars are seated properly. Test the lock with the key: it should unlock smoothly.
3. Mounting the outdoor panel
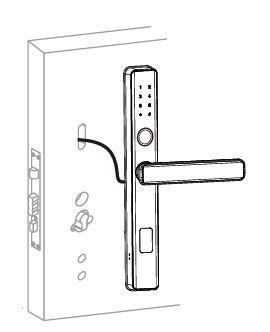
- Pass the cable connector of the outdoor panel through the door. Insert the square spindle into the large square hole in the lock body.
- Fasten the outdoor panel to the door with its studs.
After mounting, check that pressing the handle does not jam and that turning the handle the other way locks the main latch.
4. Mounting the indoor panel
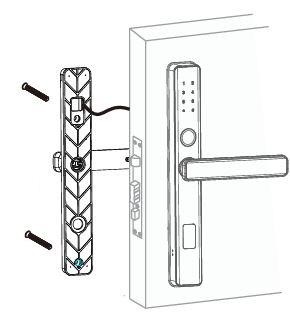
- Connect the cable connector of the indoor panel to the matching connector of the outdoor panel.
- Place the spring in the handle hole of the indoor panel, then turn the knob and the large shaft into the matching holes. Fit the flat part and mount the panel on the inside of the door.
- Put the screws into the matching holes, fix the indoor panel and tighten the screws. Insert the batteries and close the battery cover.
After mounting, check again that pressing the handle does not jam and that turning the handle the other way locks the main latch.
5. Installing the strike plate and box
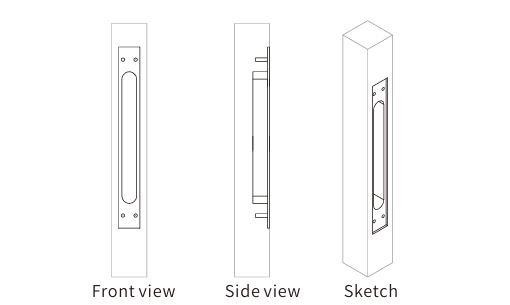
At the same height as the lock body, cut a groove in the door frame and install the strike plate and box.
6. Checking after installation
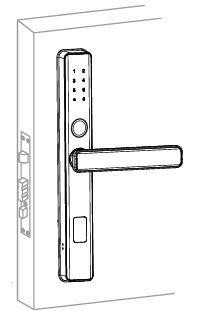
- Unlock the door with a fingerprint, password or RFID card. At the same time, turn the handle both ways to check that it moves smoothly.
- Unlock the door with the mechanical key to check that it works properly.
Functions
- When you touch the number keys, the voice guide starts. If nothing is done, it switches off automatically after 15 seconds.
- The default administrator (management) password is 123456. Change it after installation.
- Each administrator and user card, password or fingerprint gets a 1–3 digit ID, which makes it easy to delete a user or administrator later.
- There are 93 groups of unlocking information, numbered 1–93: 5 administrator groups (numbers 1–5) and 88 user groups (numbers 6–93). Cards, passwords and fingerprints together make up the 93 groups.
- A dummy password can be typed before and after the real password. The real password is 4–10 digits long.
- The device has a USB port for backup power.
- After 5 wrong passwords, 5 wrong cards or 5 wrong fingerprints in a row, the keypad is locked immediately for about 180 seconds.
- The menu closes automatically after 20 seconds without action, and the verification screen after 10 seconds.
Keys and terms
- Administrator information: the administrator's fingerprint, password or RFID card.
- Unlocking information: any registered fingerprint, password or RFID card (of administrators and normal users).
- Back key (⮌): the clear/back key. While typing a password, press it to delete the last entry; press it 3 times to clear the whole entry.
- Confirm key (↵): the confirmation key, also used to enter the menu.
Menu
To open the menu settings, press ⮌ + ↵ and enter the administrator password (in the factory state: 123456).
- Add user
- Add administrator
- Add administrator fingerprint
- Add administrator card
- Add administrator password
- Add normal user
- Add normal user fingerprint
- Add normal user card
- Add normal user password
- Add administrator
- Delete users
- Delete by group
- Clear non-administrator fingerprints
- Clear non-administrator cards
- Clear non-administrator passwords
- Delete by number
- Delete by group
- System settings
- Time setting
- Language setting: 1 Chinese, 2 English
- Volume setting: press 2 to turn the volume up or 8 to turn it down, then press ↵ to confirm
- Unlock mode: 1 single mode, 2 double mode
- Network configuration: 1 smart mode, 2 hotspot mode, 3 delete network
- Reset
- Record query
- The Add normal user menu appears only after at least one administrator has been added.
- Normally open mode: after a successful unlock, press and hold 0 for 5 seconds before the lock switches off (you hear 5 beeps). The lock announces "Normally open" and stays unlocked. The mode ends after any user unlocks the lock once.
- Network configuration works only when a WiFi module is installed in the lock.
Low battery and backup power
- When the batteries are low, the lock warns you with a "low battery" prompt after unlocking. Replace all four AAA batteries.
- Backup power: if the batteries are flat, connect a 5 V USB power source to the USB port of the lock to power it and open the door.
Alarms
Alarm lock: if wrong unlocking information is entered more than 5 times within 5 minutes, the system locks and unlocks itself automatically after 180 seconds.
Anti-pry alarm: if the anti-pry switch is triggered, the lock sounds an alarm for 30 seconds. The alarm can be stopped only by entering valid unlocking information.
Factory reset
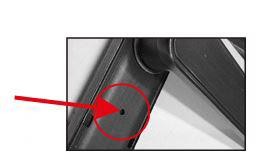
With the power off, press and hold the RESET button, then switch the power on. After holding RESET for 5 seconds, the lock announces "Restore factory settings, press the button to confirm". Confirm as prompted.
Restoring the factory settings deletes all registered users, cards, passwords and fingerprints.
Frequently asked questions
What verification methods does the SecureEntry-HL100 support?
What is the default administrator password?
What happens if someone enters wrong credentials or tries to break in?
Which doors is it suitable for?
How is it powered, and what if the batteries run out?
How do I restore the factory settings?
Downloads
The manuals and datasheets as PDF, in case an offline copy is needed. Everything in them is also on this page.