Industrial wireless 2D barcode scanner with charging cradle, 2.4G / Bluetooth / USB, HDWR HD9500
SKU: HD9500
Table of contents
- Table of contents
- Introduction
- Specifications
- Set contents
- Features
- How to use the programming barcodes
- System settings
- Power management
- Feedback indicators
- Wired mode (USB)
- Wireless mode (2.4G)
- Bluetooth mode
- Keyboard settings
- Keyboard layout
- Data editing (prefix, suffix, hidden characters)
- Scan mode
- Scan-engine settings
- Character reference tables
- Frequently asked questions
Introduction
The HD9500 is a rugged handheld 2D barcode scanner for warehouses, production lines and logistics. It reads 1D and 2D codes (QR Code, Data Matrix, PDF417 and more) from paper and screens, and connects to the computer in three ways: over the USB cable, wirelessly through the supplied 2.4 GHz USB receiver, or over Bluetooth to a PC, tablet or phone. The charging cradle keeps the scanner ready for the next shift and can also serve as the Bluetooth base.
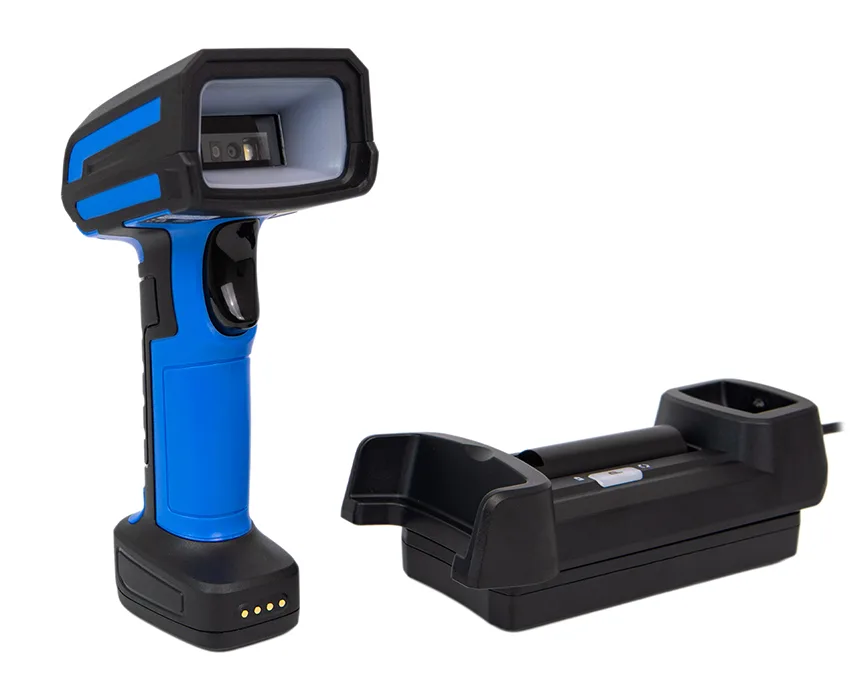
Out of range of the receiver the scanner can store the scanned codes in its memory (storage mode) and upload them later. All settings are made by scanning the programming barcodes on this page — no software is required.
Specifications
- Scanner type: handheld 2D imager (1D and 2D barcodes)
- Interfaces: USB (HID keyboard, virtual COM port), 2.4 GHz wireless with USB receiver, Bluetooth (HID keyboard, SPP, BLE)
- Wireless modes: 2.4G one-to-one or one-to-many pairing, Bluetooth with PC / iOS / Android, Bluetooth cradle mode
- Storage mode: scanned codes are stored in the scanner memory and uploaded later; automatic storage of codes that fail to transmit
- Power supply: built-in rechargeable battery, charging cradle with pogo-pin contacts
- Sleep: after 1 min to 2 h or never, hibernate on demand
- Feedback: buzzer (3 volume levels, 2 pitches), vibration, red/green charging LEDs, blue Bluetooth/decode LED
- Scan modes: trigger (key), continuous, key pulse, presentation (auto-sense); engine level trigger / presentation / continuous
- Keyboard layouts: 29 (US, UK, German, French, Spanish, Italian, Portuguese, Czech, Slovak, Hungarian, Polish, Dutch, Nordic and more, plus ALT international)
- Data editing: up to 10 prefixes and 10 suffixes, hiding of leading / middle / trailing characters, character replacement, terminator, GS1 AI brackets, Code ID (AIM or NETUM)
- Readable 1D codes: UPC-A, UPC-E, EAN-8, EAN-13, Code 128 / GS1-128, Code 39, Code 93, Code 32, Code 11, Codabar, Plessey, MSI Plessey, Interleaved 2 of 5, IATA 2 of 5, Matrix 2 of 5, Straight 2 of 5, Pharmacode, GS1 DataBar 14 / Expanded / Limited (and stacked variants)
- Readable 2D codes: QR Code, Micro QR, Data Matrix (incl. rectangular), PDF417, MicroPDF417, Aztec, MaxiCode, Composite CC-A / CC-B / CC-C
Detailed hardware data (dimensions, weight, battery capacity, range, GTIN) will be added when the HDWR data sheet is published.
Set contents
- HD9500 wireless barcode scanner
- Charging cradle
- 2.4 GHz USB receiver
- USB cable
Features
- Three ways to connect: USB cable, 2.4 GHz USB receiver or Bluetooth — the scanner can switch between wired and wireless automatically
- Works off-line: storage mode keeps scanned codes in memory and uploads them when the connection is back
- Rugged housing with a large trigger, vibration feedback and a charging cradle with pogo-pin contacts
- Full keyboard support: 29 keyboard layouts, Windows / macOS / iOS / Android host modes, character set selection
- Configurable output: prefixes, suffixes, hidden characters, character replacement, terminator, Code ID and GS1 brackets
- Every symbology under control: enable or disable each 1D / 2D code, check digits, supplementals, mirror decode and length limits
How to use the programming barcodes
The HD9500 has two groups of programming barcodes:
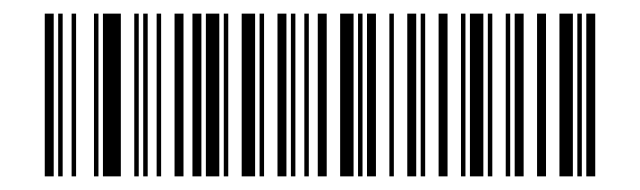
- Scanner and connection settings (sections "System settings" to "Scan mode") are Code 128 barcodes. Scan the code once — the scanner confirms it with a beep and the setting is applied immediately. No setup mode is needed.
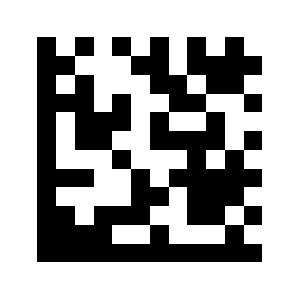
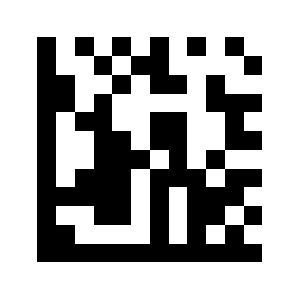
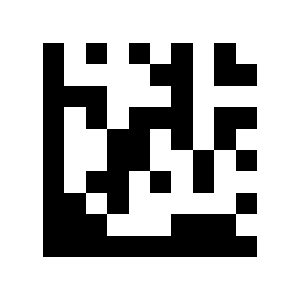
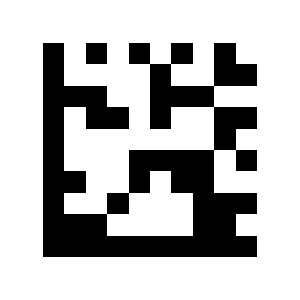
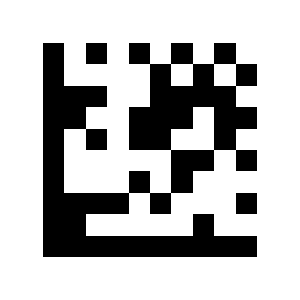
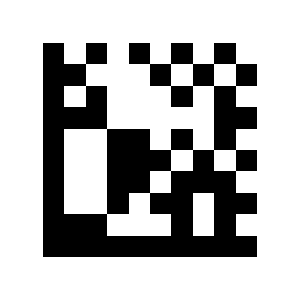
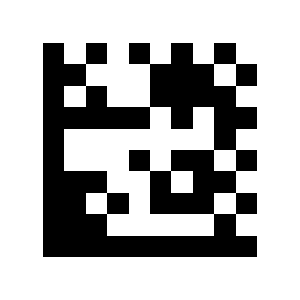
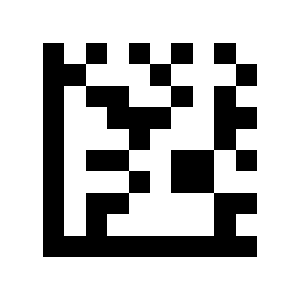
- Scan-engine settings (section "Scan-engine settings": aiming, trigger, Code ID, symbologies, decode lengths, character table) are Data Matrix barcodes. For these, always scan Start Setup first, then the setting code, and finish with End Setup.
Options marked (default) are the factory setting. A code labelled "on/off" toggles the function each time it is scanned: two short beeps mean the function is now disabled, one three-tone beep means it is enabled.
Print this page (the "Download this page as PDF" button above) to keep the codes at hand during configuration.
Start Setup and End Setup (scan-engine settings only)
Start Setup:
End Setup:
System settings
Firmware version
Scan the code to send the firmware version to the host.
Read firmware version:
Factory and custom defaults
If Write custom default values has been performed, Restore custom defaults restores those custom defaults; otherwise it restores the factory defaults.
Set factory defaults clears all custom defaults and restores the factory defaults.
Restore custom defaults:
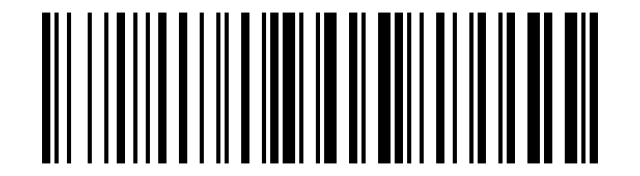
Write custom default values:
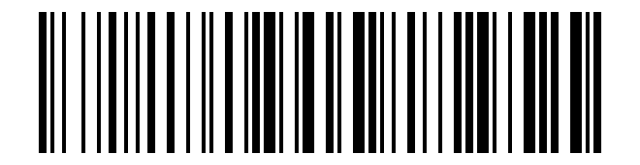
Set factory defaults:
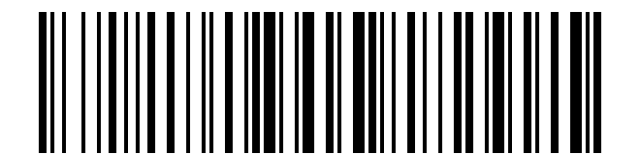
Work mode (normal / storage)
In normal mode every scanned code is sent to the host immediately. In storage mode the scanner keeps the codes in its memory — useful for stocktaking out of range of the receiver. Upload the stored data when the scanner is connected again.
During a data upload, scanning the Upload storage data code again cancels or stops the current upload.
In wireless transmission mode, if automatic storage is on, codes that fail to be transmitted are saved automatically and can be read later with Upload storage data.
Normal mode (default):
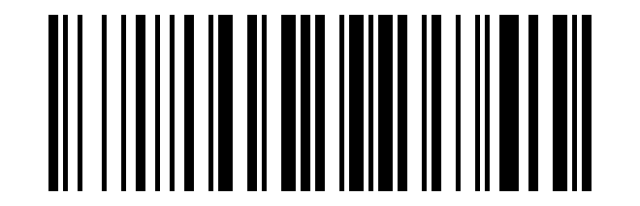
Storage (inventory) mode:
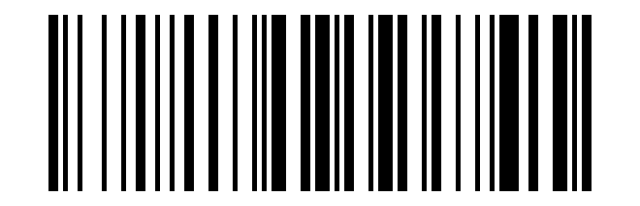
Upload storage data:
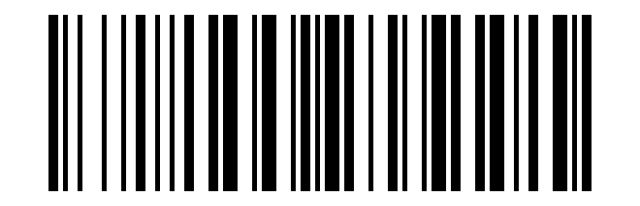
Read the total number of stored barcodes:
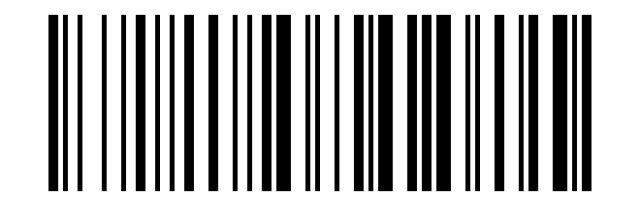
Clear storage data after uploading:
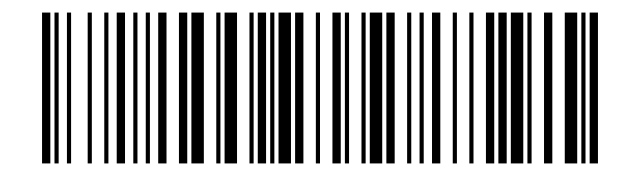
Read storage space usage:
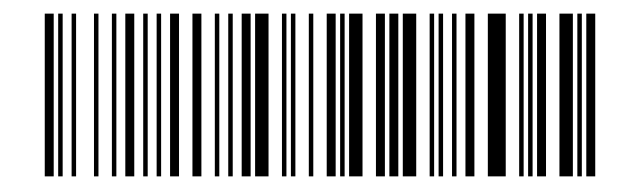
Clear stored barcode:
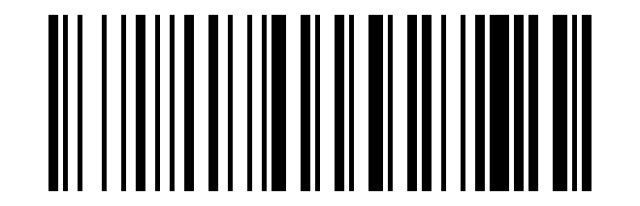
Autosave mode off (default):
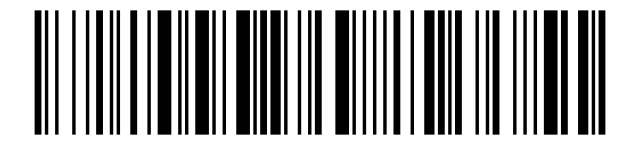
Automatic storage mode on:
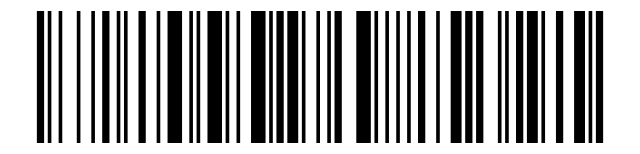
Power management
Sleep time
The scanner goes to sleep after the selected idle time to save the battery. Press the trigger to wake it up.
Read sleep time:
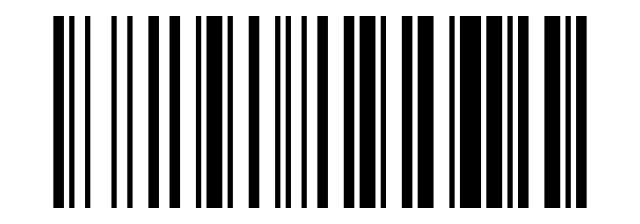
Hibernate now:
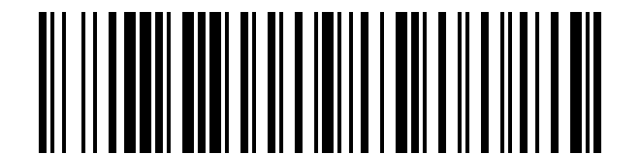
Sleep after 1 minute:
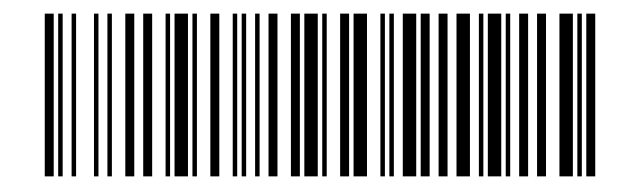
Sleep after 3 minutes (default):
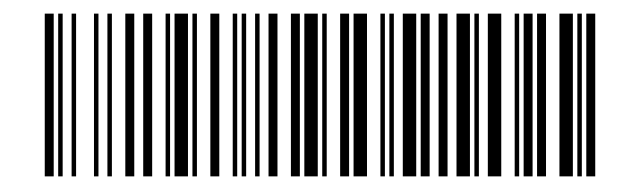
Sleep after 5 minutes:
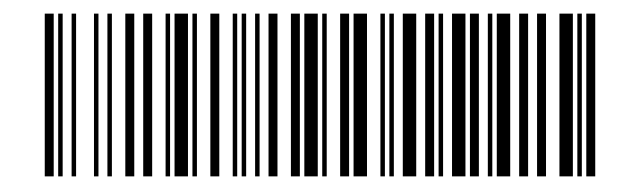
Sleep after 10 minutes:
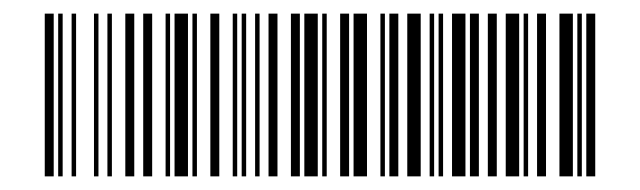
Sleep after 30 minutes:
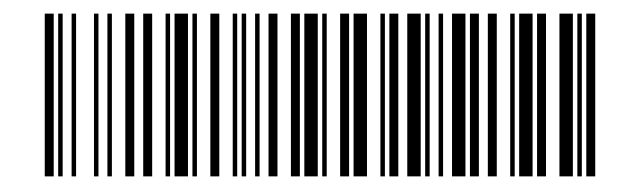
Sleep after 1 hour:
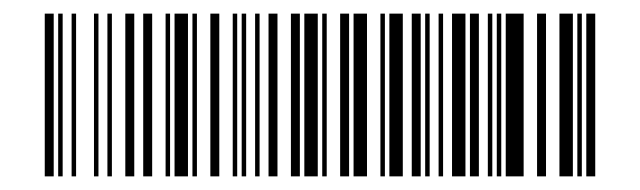
Sleep after 2 hours:
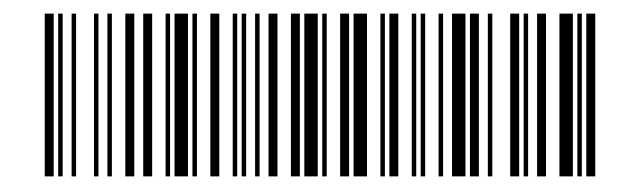
Never sleep:
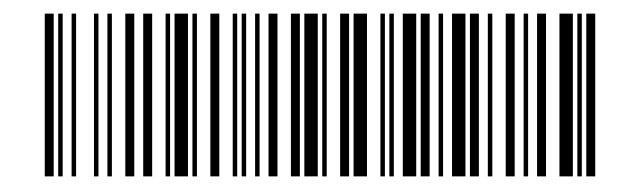
Battery level
Scan the code to send the current battery level to the host.
Get battery level:
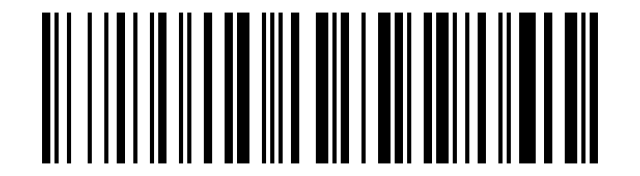
Feedback indicators
Buzzer
Mute:
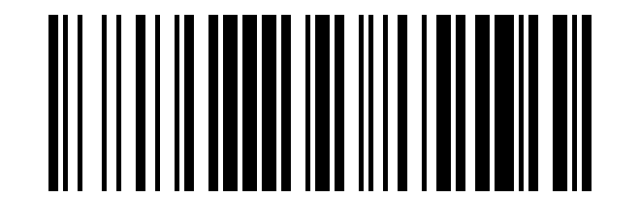
High volume (default):
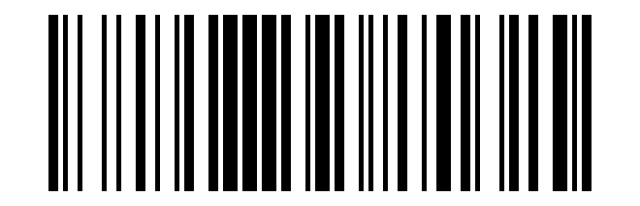
Medium volume:
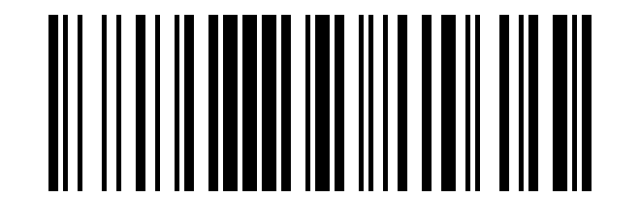
Low volume:
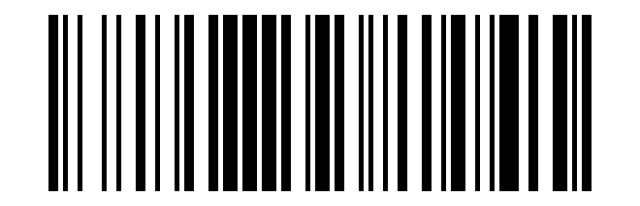
High pitch (default):
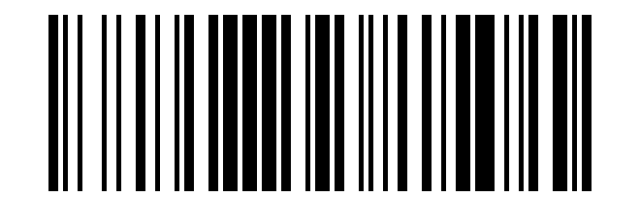
Low pitch:
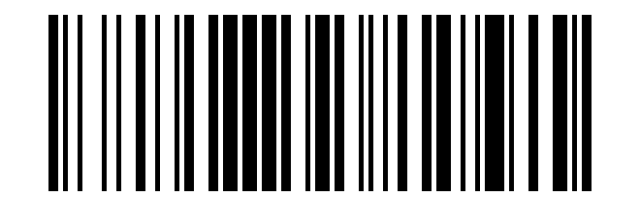
SDK voice response off (default):
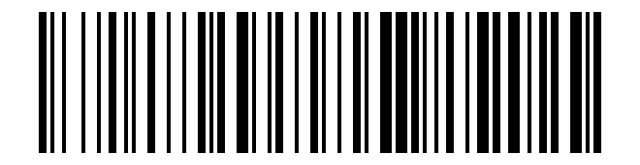
SDK voice response on:
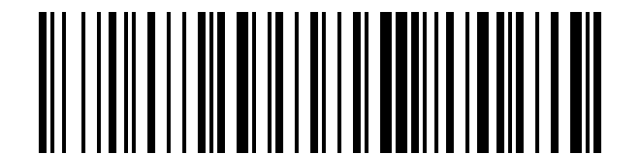
Cradle connection beep on/off:

Vibration
The vibration motor works together with the beep. Not all models support this feature.
Vibration off:
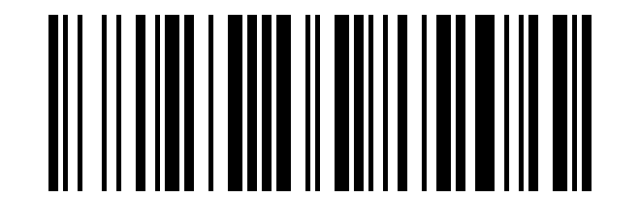
Vibration on:
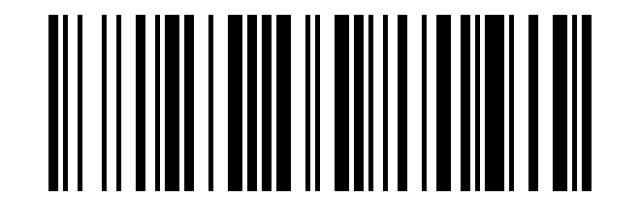
Buzzer sounds
| Type | Sound | Meaning |
|---|---|---|
| Beep | Single tone (2 pitches) | Decode in storage mode; power-off prompt |
| Beep | Single tone (3 pitches) | Power-on prompt; setting saved; upload complete |
| Beep | Short single tone | Successful decode |
| Beep | 30-second continuous short tone | 2.4G pairing is waiting for the receiver; stops after pairing |
| Alarm | Two tones (same pitch) | Low battery during decoding |
| Alarm | Three tones (same pitch) | Storage error or storage capacity exceeded |
| Alarm | Transmission failure beep | Barcode transmission failed |
| Alarm | Five tones (same pitch) | Power-on failed because of low battery |
LED indicators
| Indicator | Meaning |
|---|---|
| Red / green LED | While charging the red LED is on and the green LED is off; when fully charged the red LED is off and the green LED is on. |
| Blue LED | Follows the buzzer: lights up when the buzzer sounds and goes out when it is silent. On models with Bluetooth it also shows the Bluetooth connection status. |
Wired mode (USB)
Only applicable when the scanner is connected with the USB cable.
USB transfer method
USB keyboard mode (default):
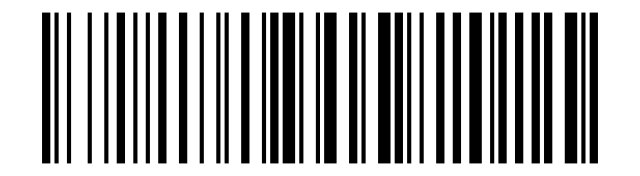
USB virtual COM port mode:
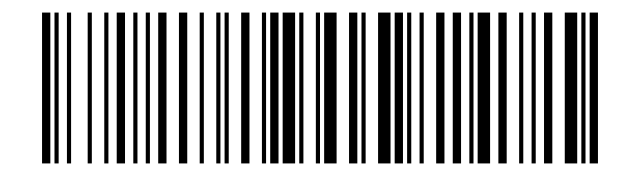
With automatic interface selection on, the scanner switches between wired and wireless by itself: with the USB cable plugged in it works in wired mode; without the cable (or when USB is unavailable) it works in 2.4G mode. Some models may not support this feature.
Wired/wireless automatic selection on (default):
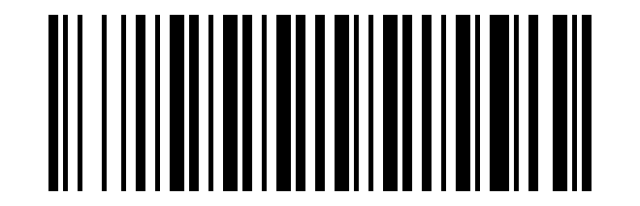
Wired/wireless automatic selection off:
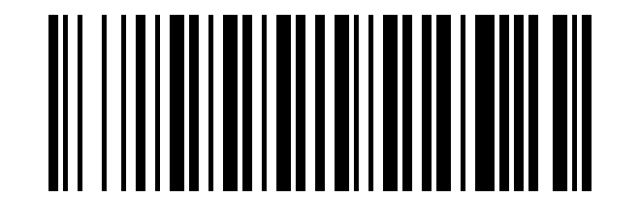
USB keyboard transfer speed
This setting also affects the speed of 2.4G and Bluetooth transmission of very long barcodes and of stored-data uploads.
Top speed (1 ms) (default):
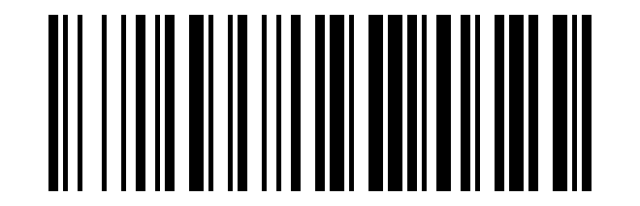
High speed (4 ms):
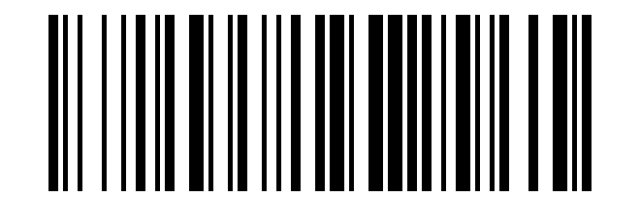
Medium speed (7 ms):
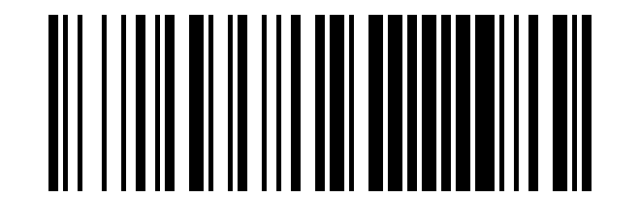
Medium speed (9 ms):
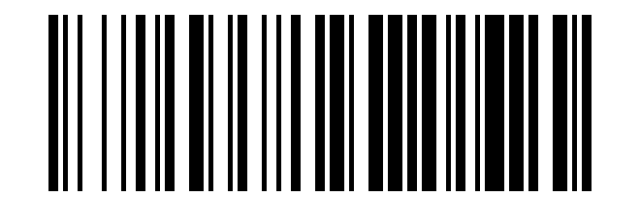
Read USB keyboard speed:
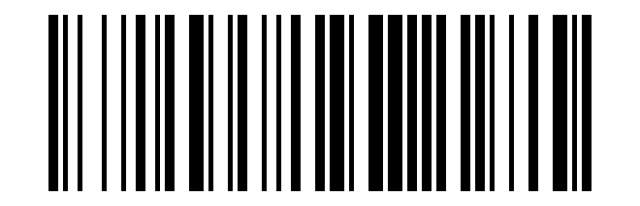
Read keyboard speed (scanner and receiver):

USB HID multi-key sending
This setting applies to Windows systems only.
USB HID multi-key sending on:
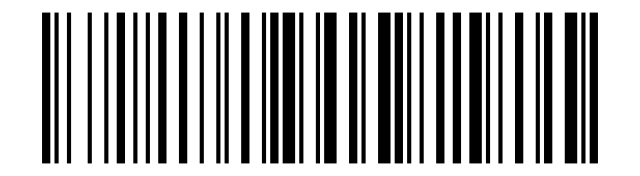
USB HID multi-key sending off (default):
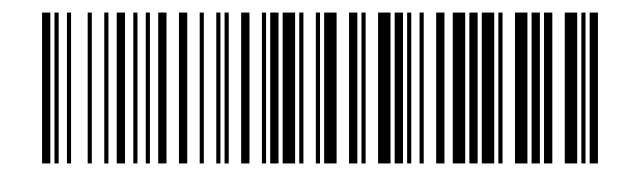
Wireless mode (2.4G)
Only applicable to scanners with 2.4G transmission.
Read interface settings
Read current interface settings:
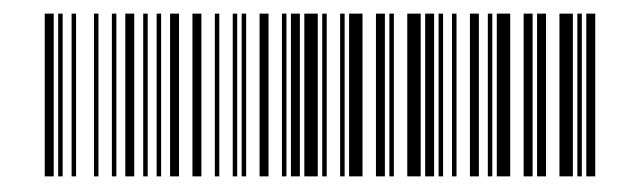
Wireless transmission method
A blue LED that is on or flashing means Bluetooth mode; a blue LED that is off means 2.4G mode or USB wired mode.
2.4G transmission mode:
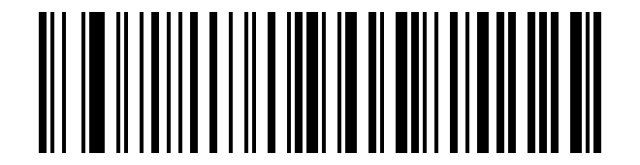
2.4G pairing
Valid only in wireless 2.4G mode.
Scan a pairing code, then plug the receiver into the computer (or re-plug it) while the scanner beeps continuously — pairing is complete when the beeping stops. One-to-one pairs one scanner with one receiver; one-to-many lets several scanners send to the same receiver.
One-to-one pairing:
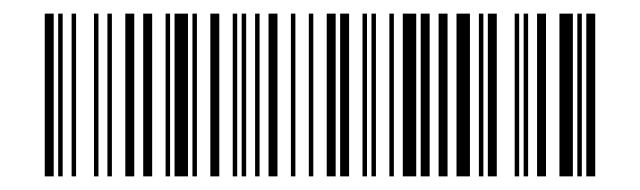
One-to-many pairing:
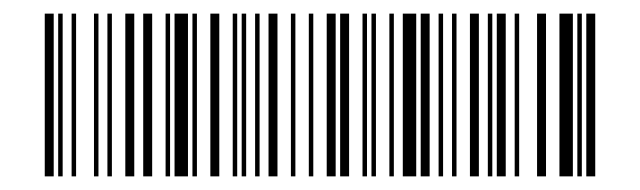
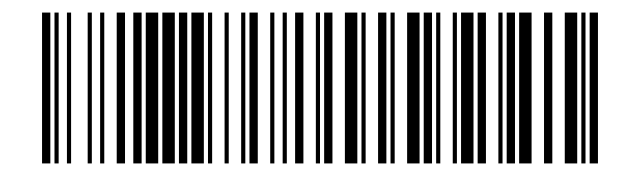
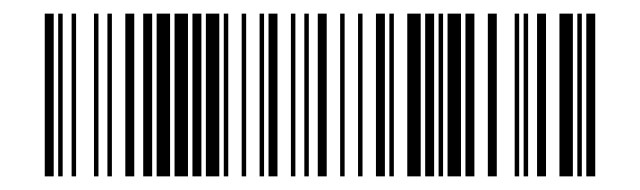
Receiver working mode
Composite device mode is available only on receivers with firmware FWVerL or later. You can also generate a pairing barcode with the ReceiverAddress.exe tool and pair by scanning it.
Virtual serial port mode requires the virtual serial port driver to be installed.
Receiver as composite device:
Receiver as virtual serial port:
Receiver as keyboard / receiver keyboard high speed:
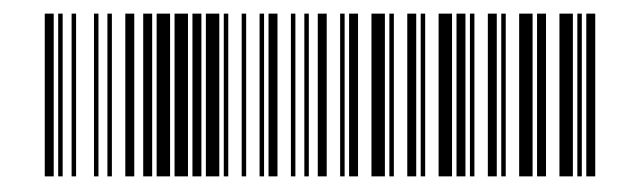
Receiver keyboard transmission speed
Applies to receivers with firmware FWVerL or later. The transmission speeds of the scanner and the receiver must match, otherwise errors may occur with long barcodes.
Valid only in wireless 2.4G mode with the receiver connected.
Example: the response KB SP=2,4 means a USB keyboard speed of 2 ms and a receiver keyboard speed of 4 ms.
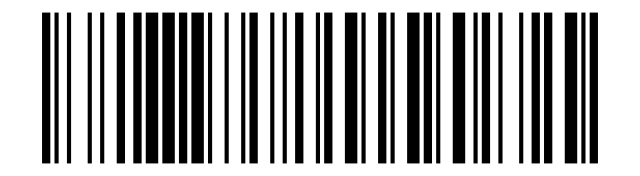
Read keyboard speed (scanner and receiver):
Receiver as keyboard / receiver keyboard high speed:
Receiver keyboard medium speed:
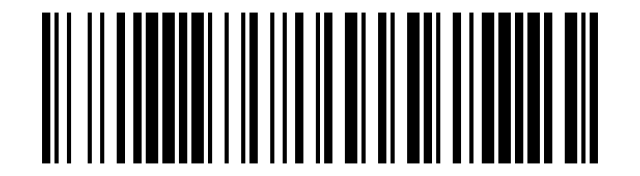
Receiver keyboard low speed:
2.4G transmission cache
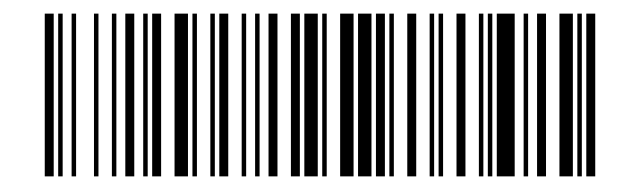
Available only on some scanners. After scanning the code, two short beeps mean disabled and one three-tone beep means enabled. If you scan a lot of data in a short time and it is not uploaded in time, use this code to turn data caching on or off.
SRAM cache on/off:
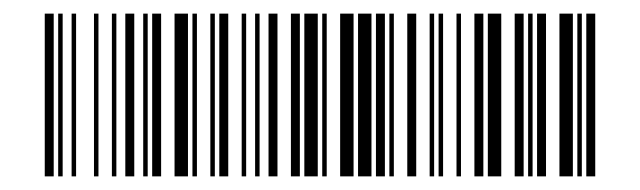
In normal mode, with data caching on, you can choose what happens when the scanner briefly leaves the communication range: wait for the connection and upload the cached data, or clear the cached data.
Offline caching on/off:
Bluetooth mode
Only applicable to scanners with the Bluetooth function.
Read interface settings
Read current interface settings:
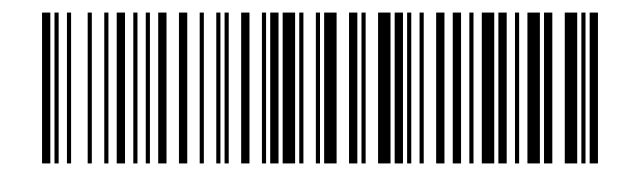
Bluetooth transmission mode
A blue LED that is on or flashing means Bluetooth mode; a blue LED that is off means 2.4G mode or USB wired mode.
Bluetooth transmission mode:
Bluetooth operating mode
Valid only in Bluetooth mode. Before switching the Bluetooth operating mode, delete the pairing between the host device and the scanner.
Bluetooth HID keyboard (default):
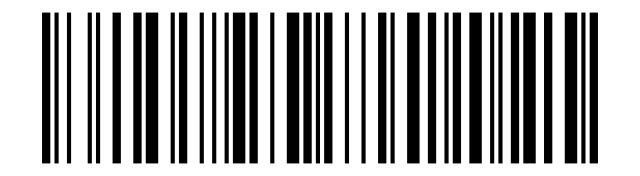
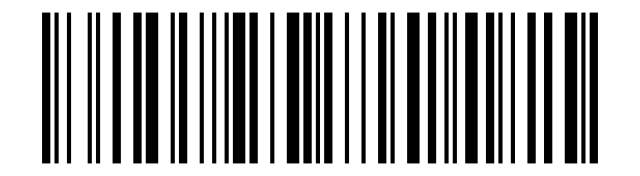
Bluetooth SPP serial port:
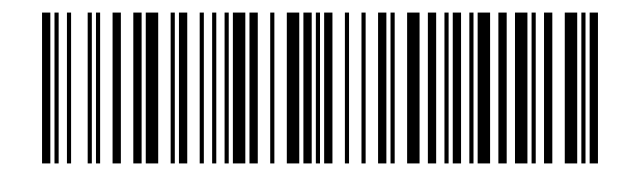
Bluetooth BLE serial port:
Bluetooth cradle transmission mode:
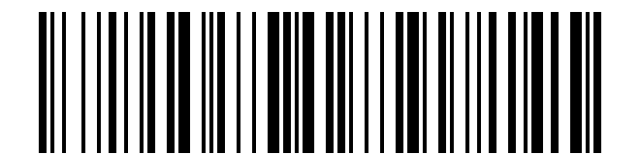
The cradle transmission mode is for a Bluetooth cradle that has already been paired. If the pairing barcode on the cradle is damaged, you can generate a new one with the BluetoothAddress.exe tool.
Change the Bluetooth name
The Bluetooth name is set with the serial command AT+NAME=<bluetooth-name> (sent over the serial port or encoded as a QR code with the supplier's online generator). After changing the name, delete the old pairing on the host and search for the scanner again.
Clear Bluetooth pairing
In Bluetooth transmission mode, scanning Clear Bluetooth pairing disconnects the paired device, clears the pairing list and waits for a new device. Previously paired hosts must delete the scanner and pair again.
Clear Bluetooth pairing:
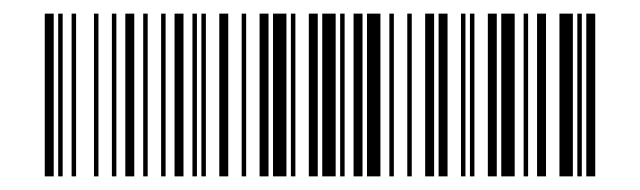
iOS on-screen keyboard
Show / hide the iOS on-screen keyboard:
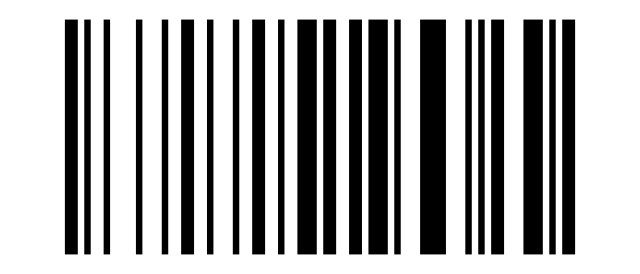
Hold the trigger for 4 s to toggle the iOS keyboard:
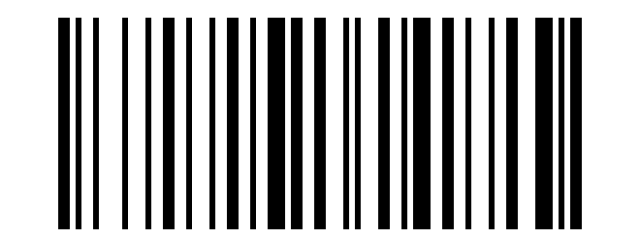
Double-press the trigger to toggle the iOS keyboard:
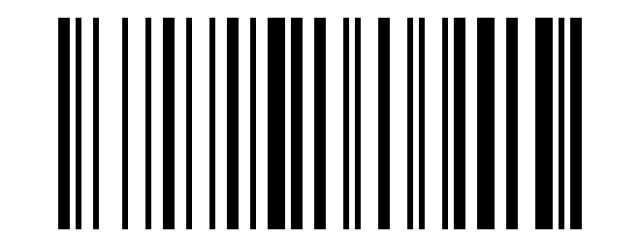
Pop up the iOS keyboard after sending on/off:
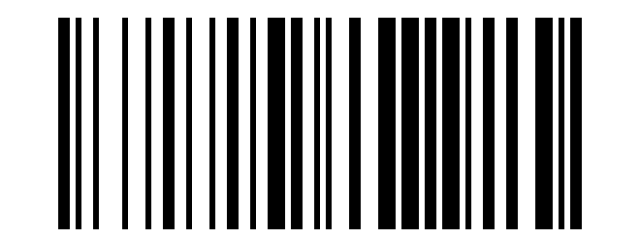
Windows Caps Lock detection
Available only on some Bluetooth scanners. Two short beeps mean disabled, one three-tone beep means enabled.
Windows Caps Lock detection on/off:
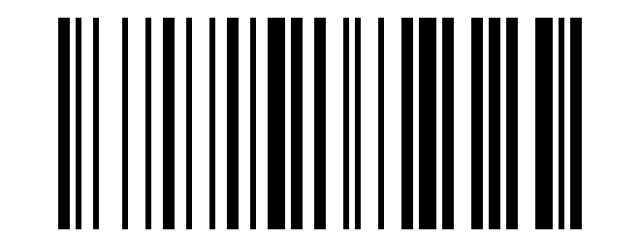
Switch between Bluetooth and 2.4G with the trigger
Available only on some RF+BT scanners. When enabled, hold the trigger for more than 8 seconds and release it to switch between 2.4G and Bluetooth. Holding it for more than 16 seconds turns the scanner off without switching. Two short beeps mean disabled, one three-tone beep means enabled.
Hold the trigger for 8 s to switch RF/BT on/off:
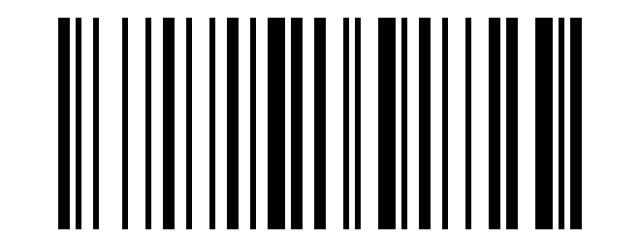
Bluetooth keyboard transmission speed
Valid only in Bluetooth mode.
Read Bluetooth HID delay:
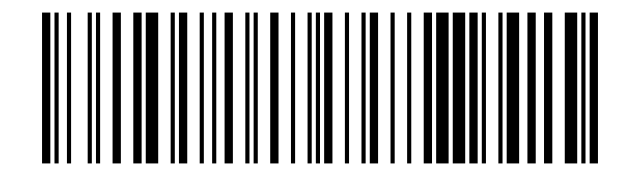
High speed (2 ms):
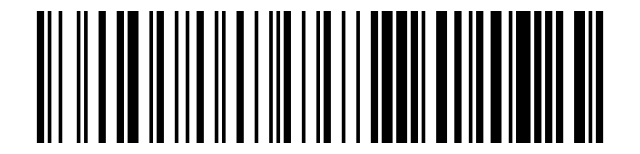
High speed (6 ms):
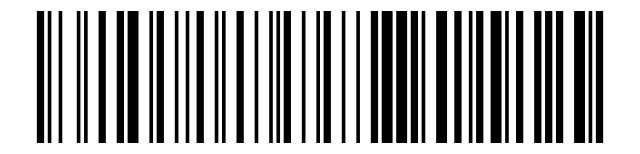
Medium speed (10 ms) (default):
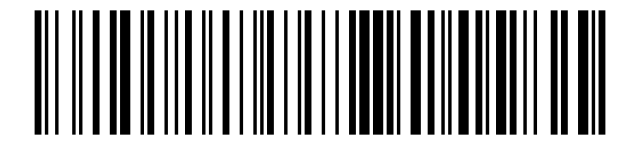
Medium speed (18 ms):
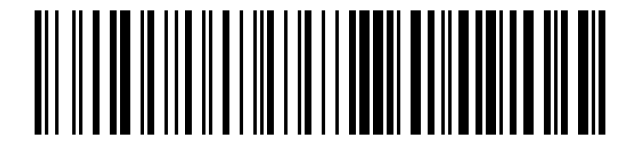
Low speed (25 ms):
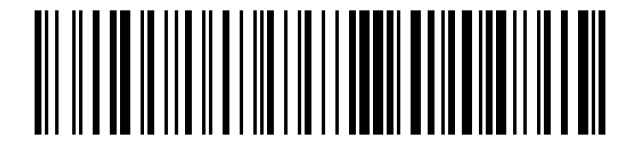
Low speed (30 ms):
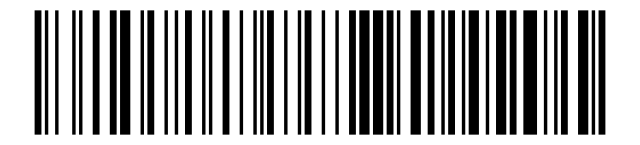
Stay awake while Bluetooth is connected
Two short beeps mean disabled, one three-tone beep means enabled.
Stay awake while Bluetooth is connected on/off:
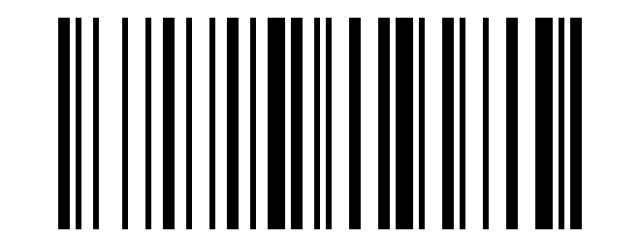
Keyboard settings
The settings in this section apply to USB keyboard, 2.4G keyboard and Bluetooth HID keyboard modes.
Ctrl / Alt key combinations
Combine-key off (default):
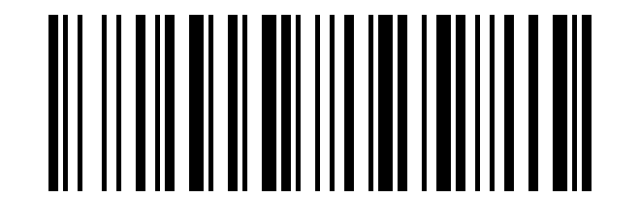
Ctrl + key (Config1):
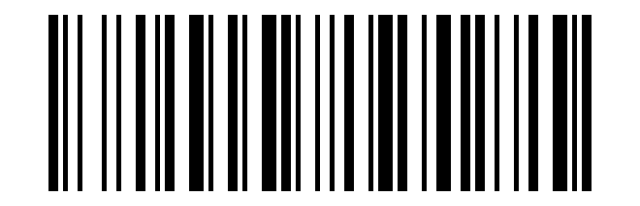
Alt + key (Config2):
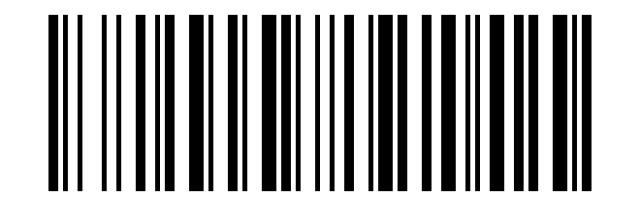
Normal key (Config3):
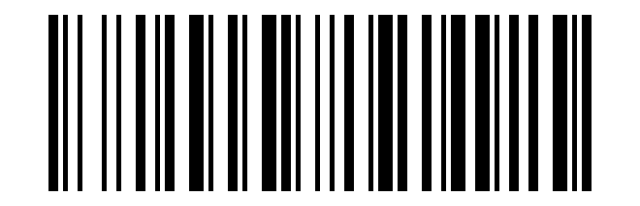
Ctrl + key (Config4):
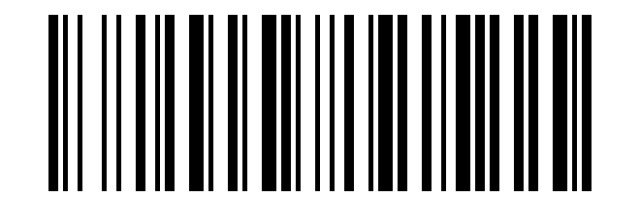
Alt + key (Config5):
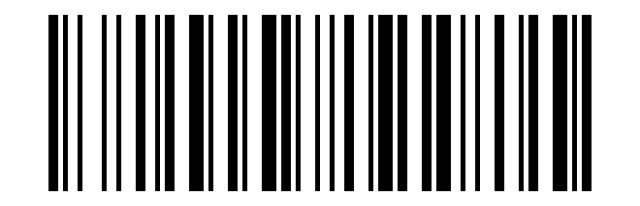
Applies only to ASCII characters below 0x20; Alt + key works on Windows only.
Letter case
Normal case (default):
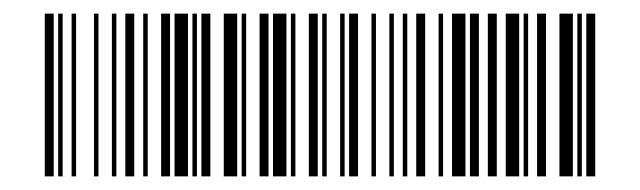
Swap case:
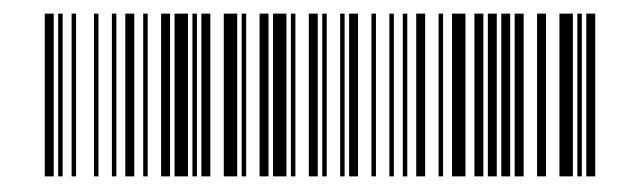
All upper case:
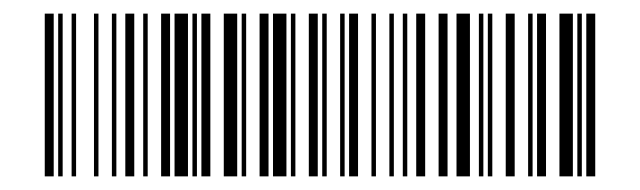
All lower case:
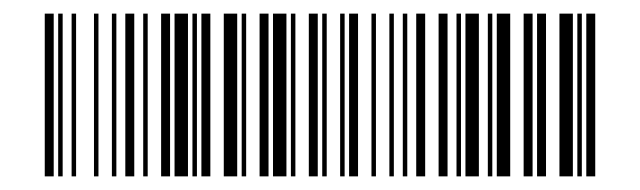
Case conversion does not apply when the keyboard layout is set to ALT or Thai.
Num Lock
Num Lock off:
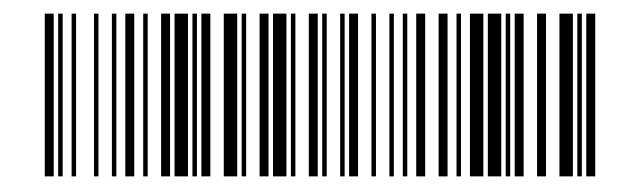
Num Lock on:
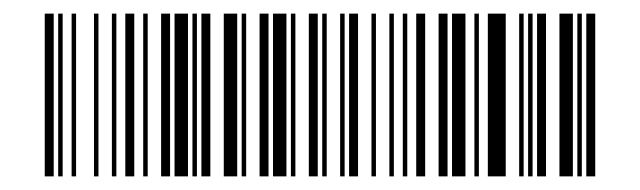
When the receiving device is a phone, keep Num Lock off, otherwise the digits are not displayed.
Character set
Applies only to certain 2D models; this setting must match the output character set of the scan engine.
Read the current character set settings:
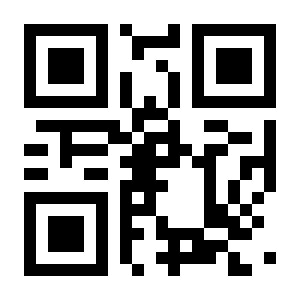
Auto:
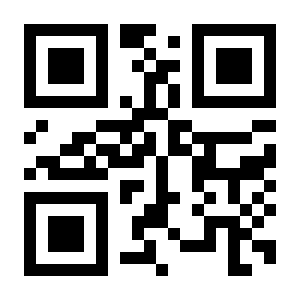
GBK / BIG5 / HANGUL / SJIS:
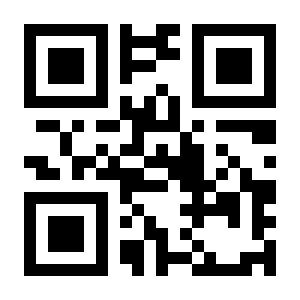
ISO/IEC 8859:
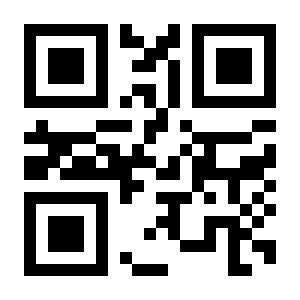
UTF-8 (Word):
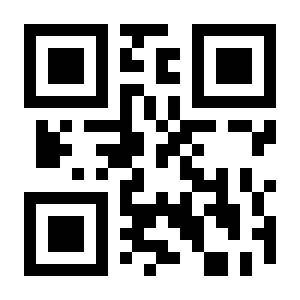
UTF-8 (Txt):
Normal mode:
| Mode | Typical use | Engine output character set | Limitation |
|---|---|---|---|
| Auto | Automatically selects UTF-8 or ISO/IEC 8859 as the input character set; Word or Txt output follows the last UTF-8 setting | raw | none |
| GBK | Chinese input in Windows Notepad and Excel | GBK (GB2312) or raw | Windows only |
| UTF-8 (Word) | Chinese input in Word and QQ | UTF-8 or raw | Windows only |
| ISO/IEC 8859 | European single-byte special characters (≥ 0xC0) for FR, DE, TR, PT, ES, CS, IT, UK, HU, SK | raw | Other languages need customization |
| UTF-8 (Txt) | Special characters in Windows Notepad (the Unicode plug-in must be installed) | UTF-8 or raw | Windows only |
| Normal | Multi-language special characters on FR, DE, TR, PT, ES, CS, IT, UK, HU, SK keyboards | UTF-8 or raw | Other languages need customization |
Receiving device
This setting defines how the host device enters ASCII characters 0x20–0x7F. Use it together with the keyboard layout.
Read the current receiving device:

Windows device:
IPhone / iPad / Mac devices:
Android device:
For iOS / macOS devices the layouts FR, DE, TR, PT, ES, CS, IT, UK, HU and SK are supported. On Android it is recommended to use the Google Gboard keyboard.
Keyboard layout
Set the layout that matches the keyboard language of the host computer, otherwise some characters are sent incorrectly.
Read the current keyboard layout:
US English keyboard (default):
French keyboard:
German keyboard:
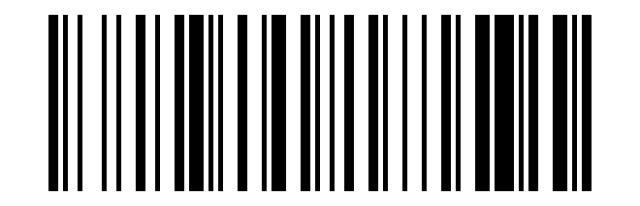
Italian keyboard:
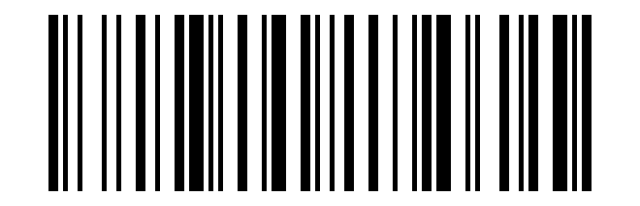
Portuguese keyboard:
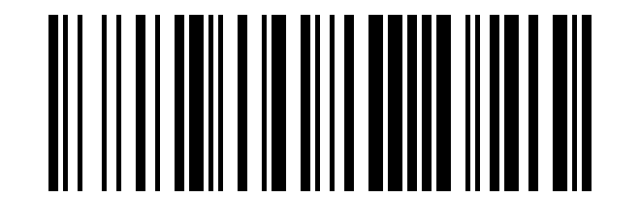
Spanish keyboard:
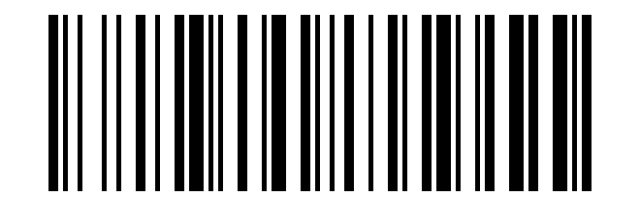
Turkish Q keyboard:
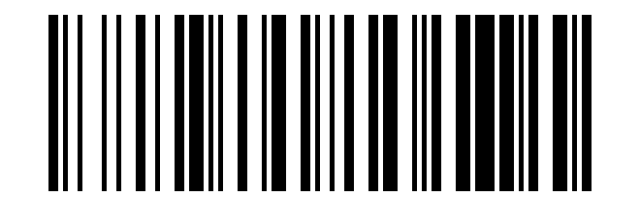
Turkish F keyboard:
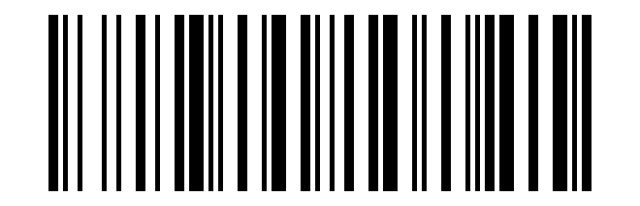
British English keyboard:
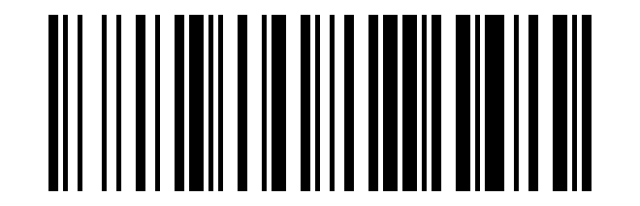
Czech keyboard:
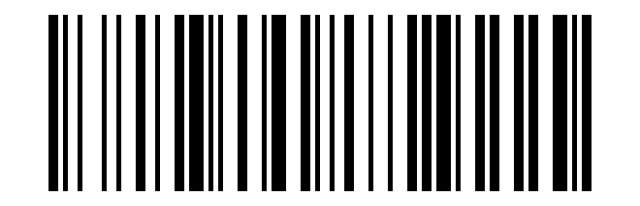
Czech standard keyboard:
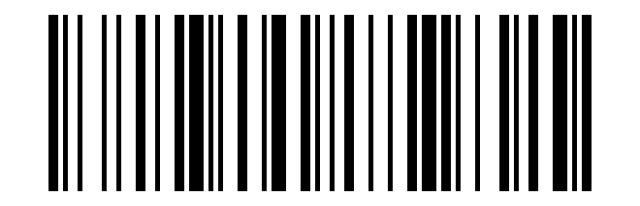
Hungarian keyboard:
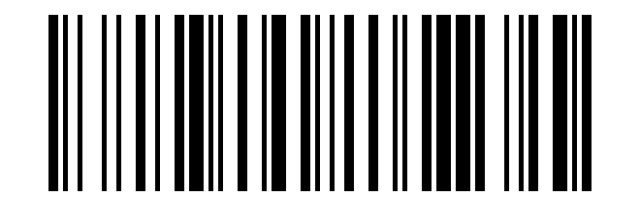
Belgian French keyboard:
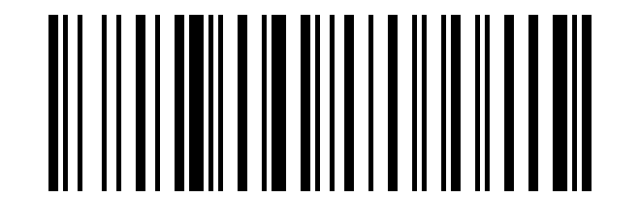
Brazilian Portuguese keyboard:
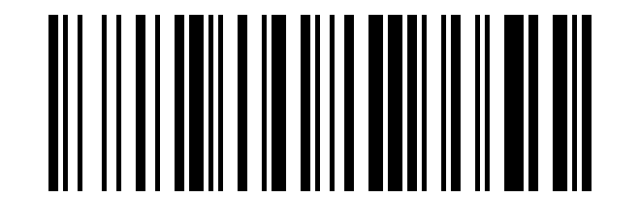
Canadian French (traditional) keyboard:
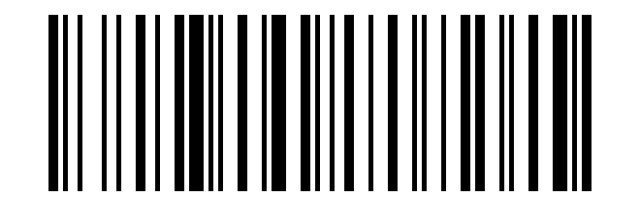
Croatian keyboard:
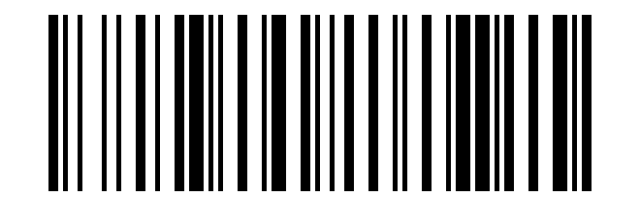
Slovak QWERTY keyboard:
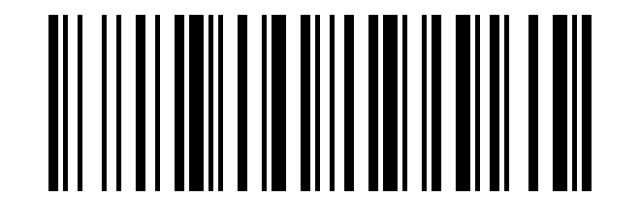
Slovak keyboard:
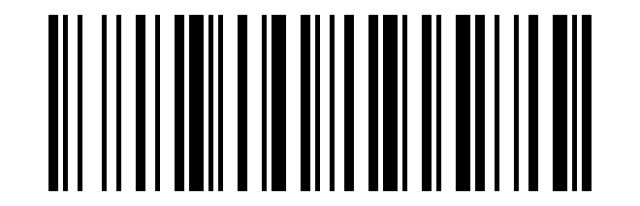
Danish keyboard:
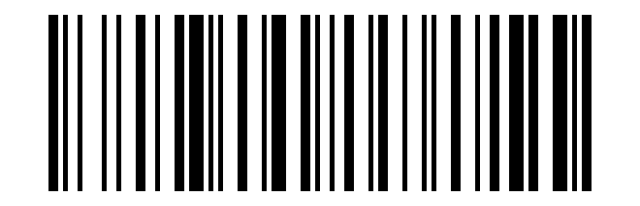
Finnish keyboard:
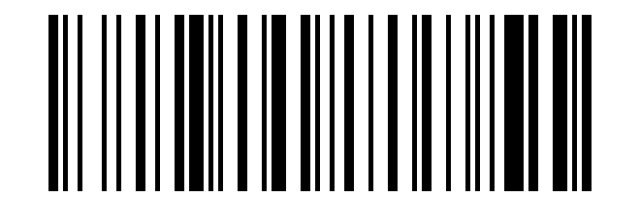
Latin American Spanish keyboard:
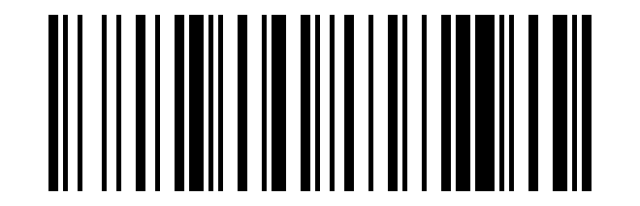
Dutch keyboard:
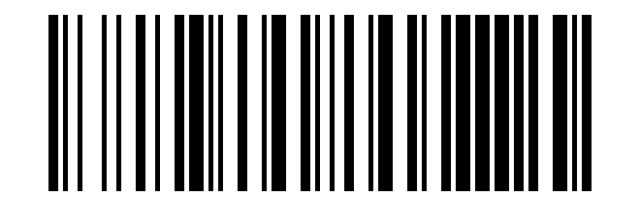
Norwegian keyboard:
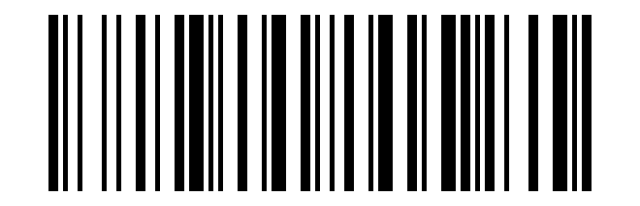
Polish keyboard:
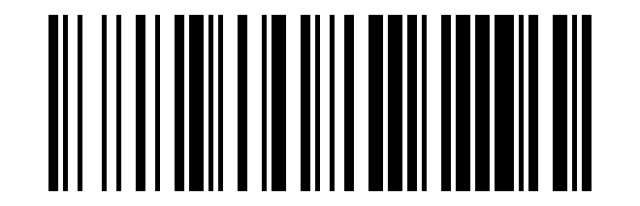
Serbian Latin keyboard:
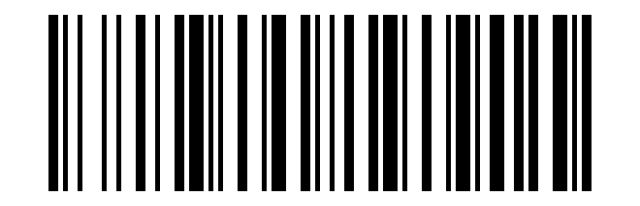
Slovenian keyboard:
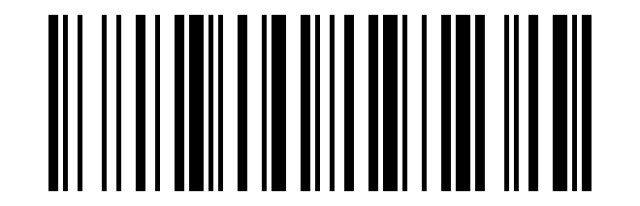
Swedish keyboard:
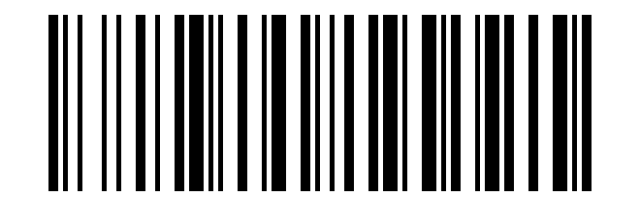
Swiss German keyboard:
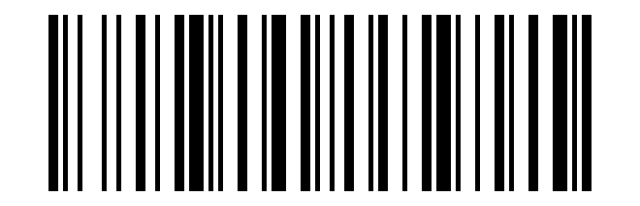
Japanese keyboard:
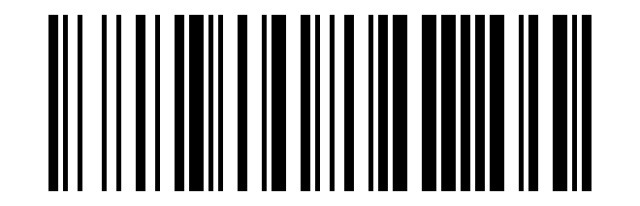
When using the Thai layout, set the scan-engine output to Thai as well.
Thai keyboard:
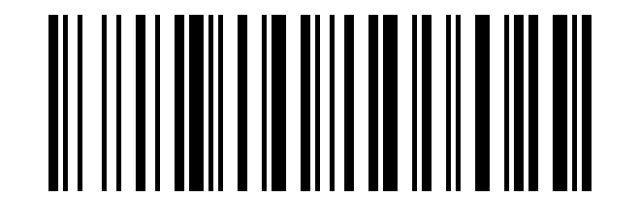
The ALT international layout is available on Windows only. It does not depend on the host keyboard layout, but it slows down transmission.
ALT international keyboard:
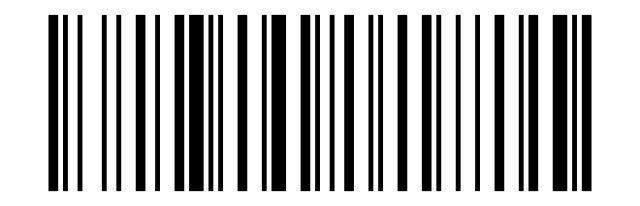
ALT single-byte special character keyboard:
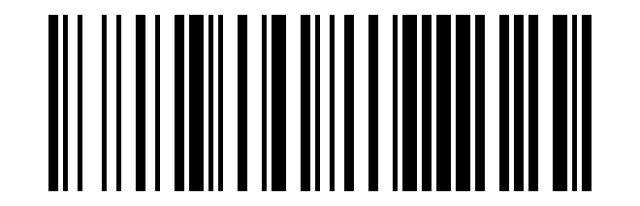
Languages not listed here need to be customized.
Data editing (prefix, suffix, hidden characters)
You can add up to 10 prefixes and 10 suffixes to the output data and hide the first, middle or last characters of the barcode. Characters are entered as two-digit hexadecimal values with the numeric barcodes below (two codes per character); see the character reference tables at the end of this page for the values.
Operation codes
Add prefix:
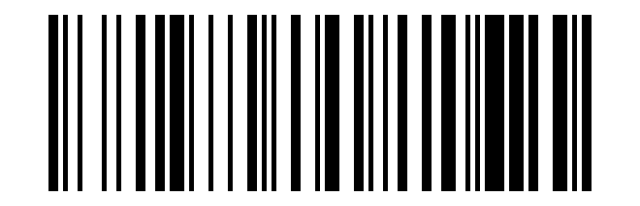
Add suffix:
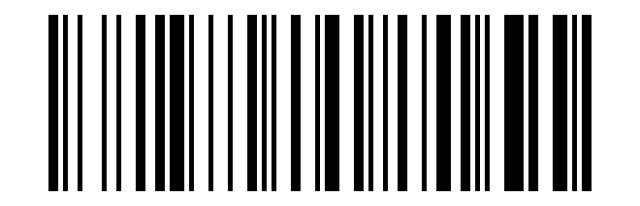
Clear all prefixes:
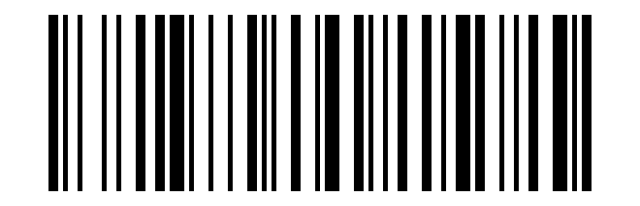
Clear all suffixes:
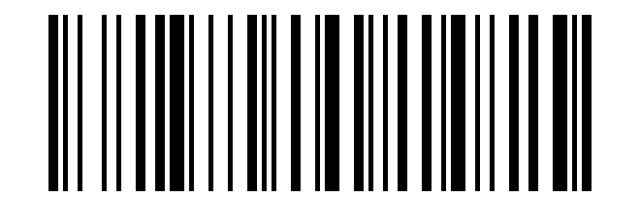
Hide leading characters:
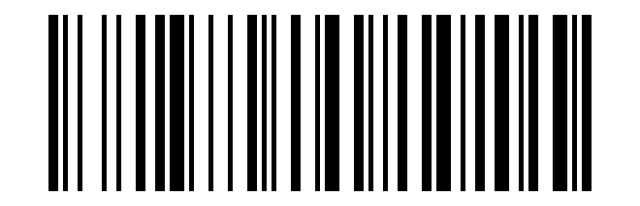
Hide middle characters: start position:
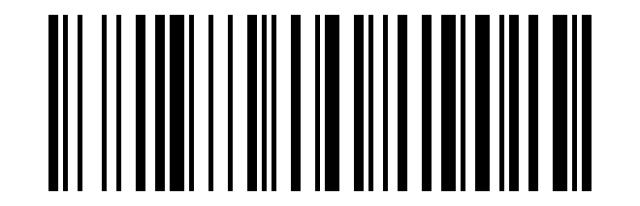
Hide middle characters: length:
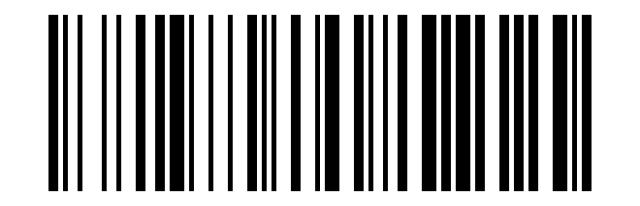
Hide trailing characters:
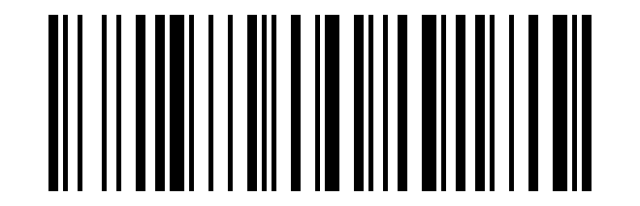
Numeric barcodes (hexadecimal digits)
For parameters that take a numeric value, scan the corresponding numeric barcodes.
Numeric barcode 0:
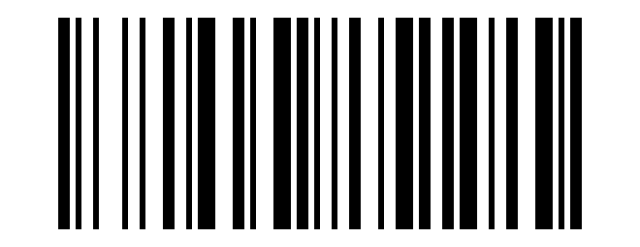
Numeric barcode 1:
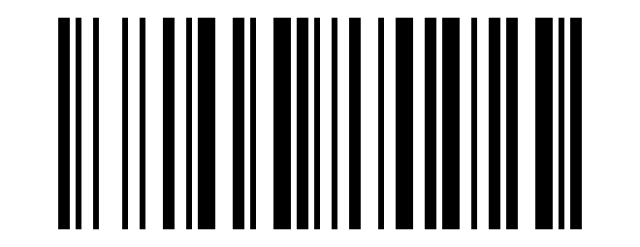
Numeric barcode 2:
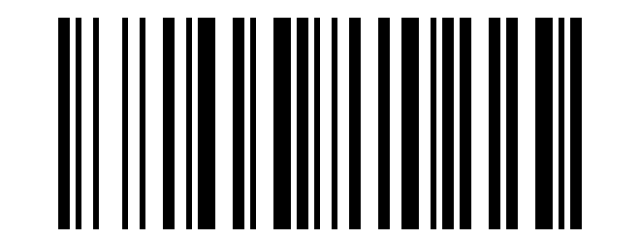
Numeric barcode 3:
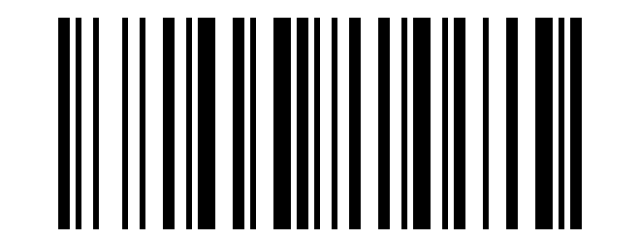
Numeric barcode 4:
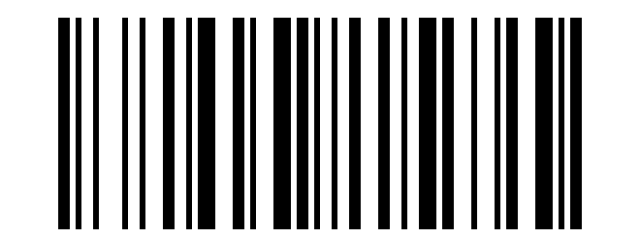
Numeric barcode 5:
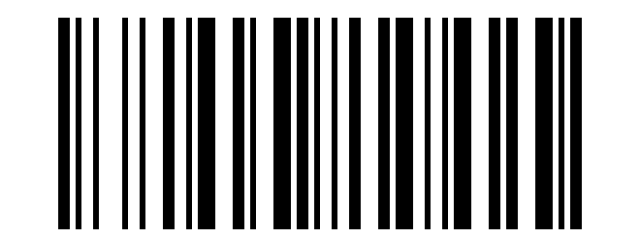
Numeric barcode 6:
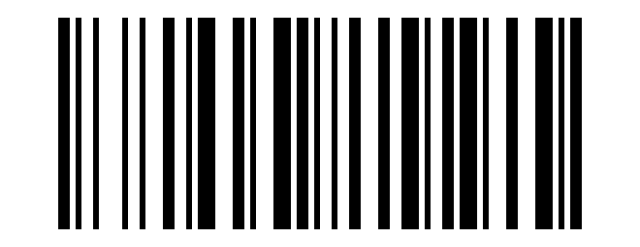
Numeric barcode 7:
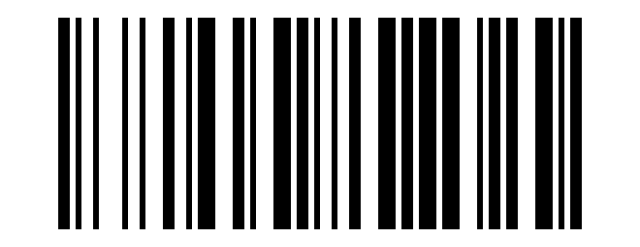
Numeric barcode 8:
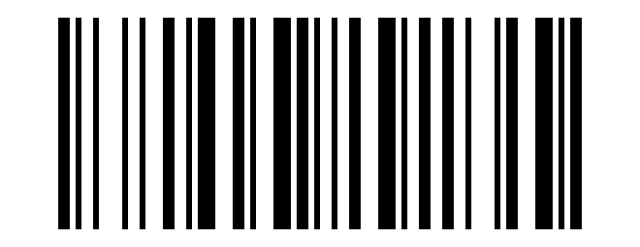
Numeric barcode 9:
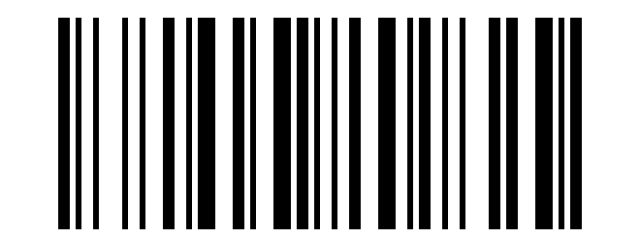
Numeric barcode A:
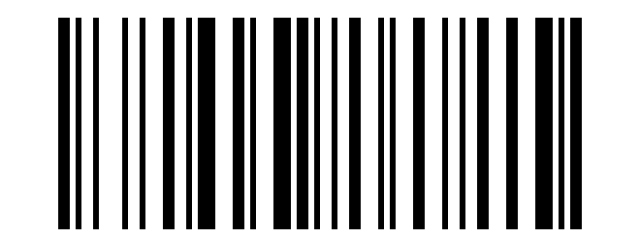
Numeric barcode B:
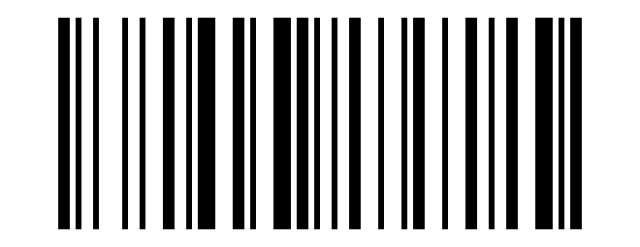
Numeric barcode C:
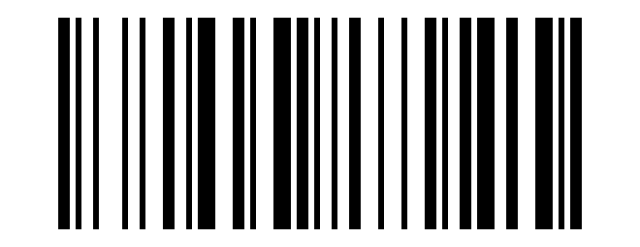
Numeric barcode D:
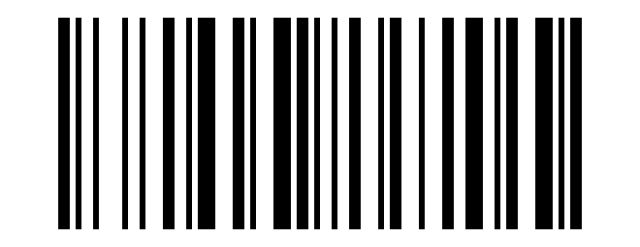
Numeric barcode E:
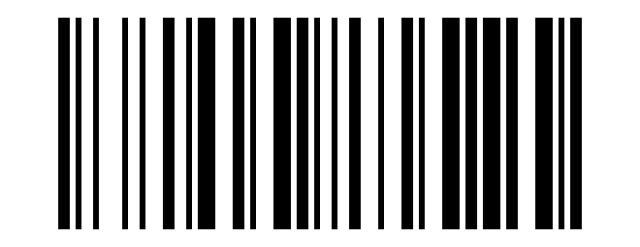
Numeric barcode F:
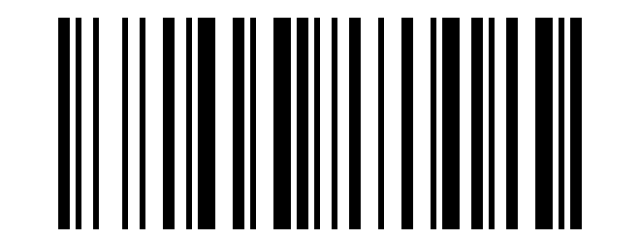
Output format
Enable the prefix, suffix and hidden-character functions with the codes below; Default output format switches them all off.
Default output format:
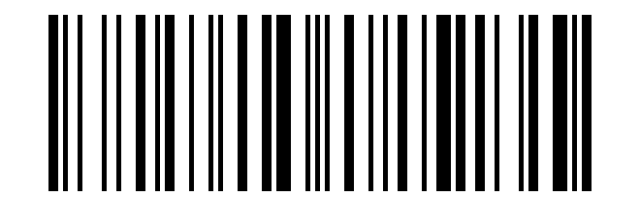
Allow suffix output:
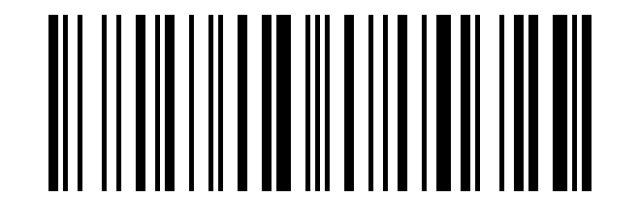
Allow prefix output:
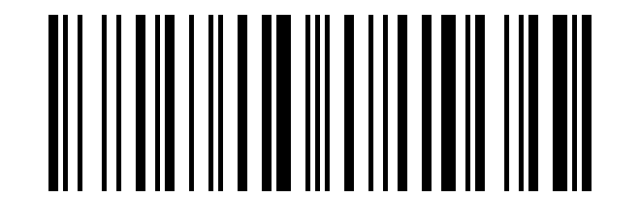
Allow hiding leading data:
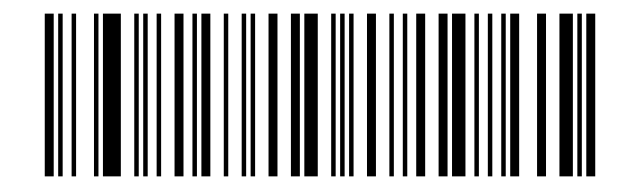
Allow hiding middle data:
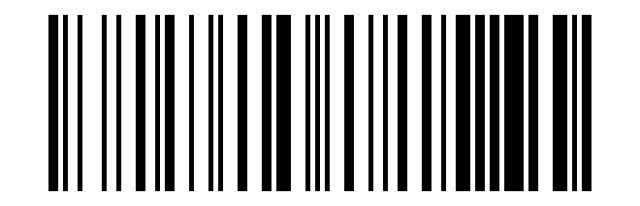
Allow hiding trailing data:
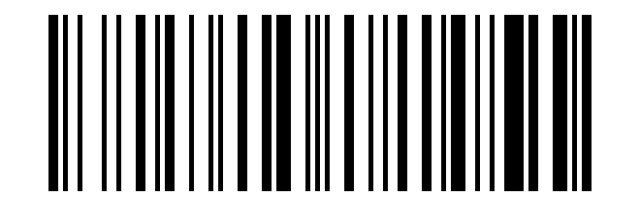
Procedures
Add a prefix or suffix
- If prefix and suffix output has not been enabled yet, scan the corresponding Output format code first.
- New characters are appended to the existing prefix / suffix. To replace the current one, first scan Clear all prefixes / Clear all suffixes.
- Scan Add prefix or Add suffix.
- Look up the hexadecimal value of the character in the character reference tables at the end of this page.
- Scan the two numeric barcodes of that value.
- Repeat steps 4 and 5 for further characters.
Example: to add Ctrl+A as a prefix, scan Add prefix, then 9, 7, 4, 1.
Example: to add Ctrl+Alt+A as a suffix, scan Add suffix, then 9, 7, 9, 9, 4, 1.
Hide the first, middle or last characters
- Scan the code for leading characters, middle start position, middle length or trailing characters.
- Determine the hexadecimal value of the number of characters to hide (for example 4 characters = 0, 4; 12 characters = 0, C).
- Scan the two numeric barcodes of that value.
- Enable or disable hiding with the Output format codes.
Extended data editing (one-code commands)
The supplier's HTML manual contains an online generator that turns a complete command into a single programming barcode. The same commands can be sent over the serial port. Command format: $DATA#ncllxx#
| Field | Meaning |
|---|---|
n | 1 = suffix; 2 = prefix; 3 = hide trailing characters; 4 = hide middle characters; 5 = hide leading characters; 7 = replace characters |
c | Code ID — only 0 (all symbologies) is supported |
ll | Length as a hexadecimal value: prefix / suffix 01–0A, hidden characters 01–FF, replacement data 01–05 |
xx | ASCII characters; a hexadecimal value can be written as \x followed by two characters 0–9, A–F |
| Command | Description |
|---|---|
$DATA#1005abcd\x03# | Add the 5-character suffix abcd + 0x03 |
$DATA#200ANETUM12345# | Add the 10-character prefix NETUM12345 |
$DATA#3008# | Hide the last 8 characters of the barcode |
$DATA#40050A# | Hide 10 characters after the 5th character |
$DATA#5011# | Hide the first 17 characters |
$DATA#7001\x1D02GS# | Replace the GS character (0x1D) with the text "GS" |
$DATA#7002NT01Z# | Replace NT with Z |
Character replacement
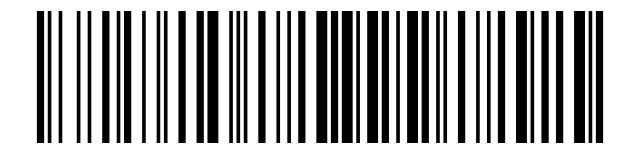
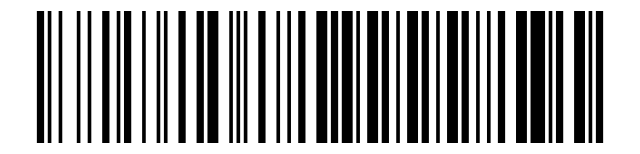
Format: $DATA#70 + length of the replaced string + replaced string + length of the replacement + replacement + #. The two lengths together must not exceed 6: 1–6 characters can be replaced by 5–0 characters. Two ready-made examples follow the read / clear codes; $DATA#7006ABCDEF00# would replace the string ABCDEF with nothing (hide it).
Read replacement settings:
Clear replacement settings:
Replace GS (0x1D) with the text "GS":

Replace LF (0x0A) with CR (0x0D):

Terminator
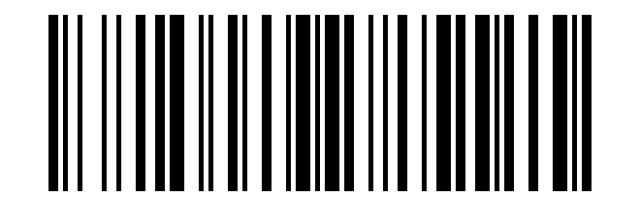
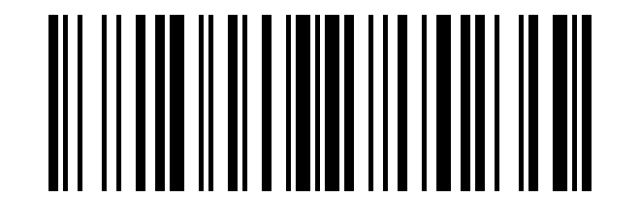
This terminator is independent of the scan-engine suffix and of the wireless prefix / suffix — a quick way to add a terminator when the engine sends none.
None (default):
Carriage return (CR):
Tab (TAB):
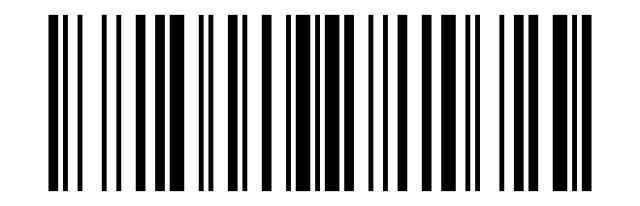
Carriage return + line feed (CRLF):
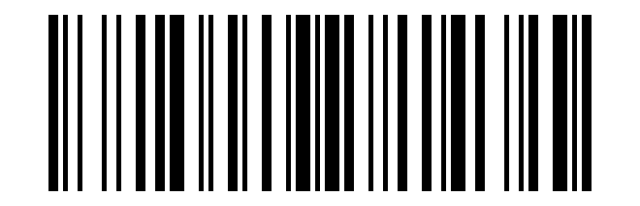
Line feed (LF):
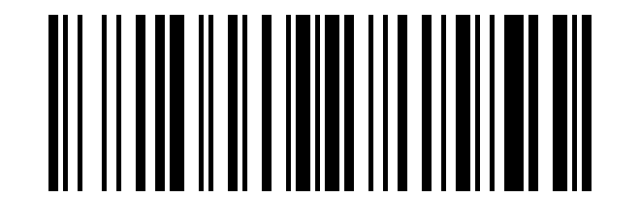
GS1 AI brackets
Applies to some application identifiers only and requires a firmware version that supports it.
Raw format (default):
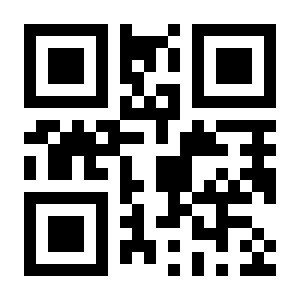
Add parentheses:
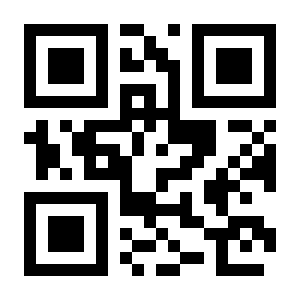
Add parentheses and separate with CR:
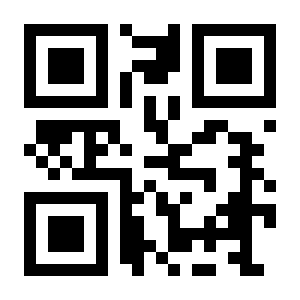
Add parentheses and separate with TAB:
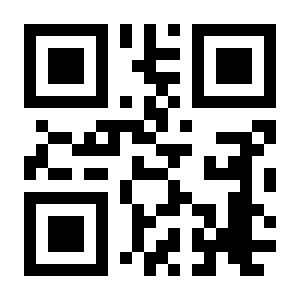
Scan mode
Decode mode
Key (trigger) scan mode (default):
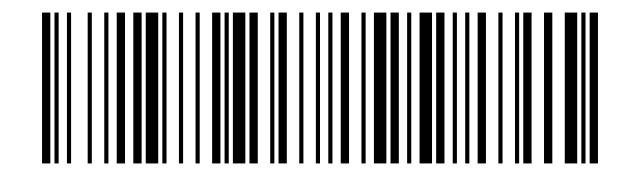
Continuous scan mode:
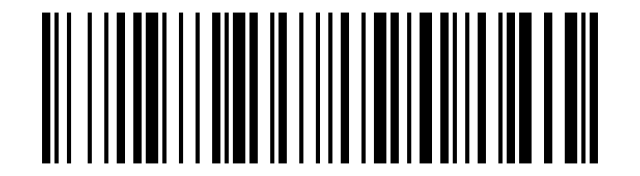
Continuous scan mode suits high-volume workflows: press the trigger once to start scanning and once again to stop.
Key pulse scan mode:
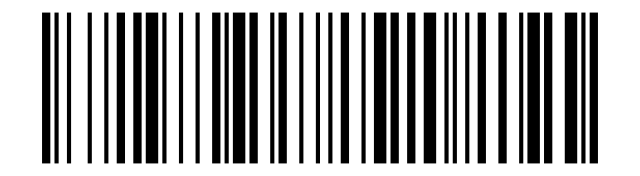
In key pulse mode scanning starts when a trigger change is detected and held for about 30 ms, and stops at the next trigger change, after a successful decode or on timeout.
Host trigger mode (customized models only):
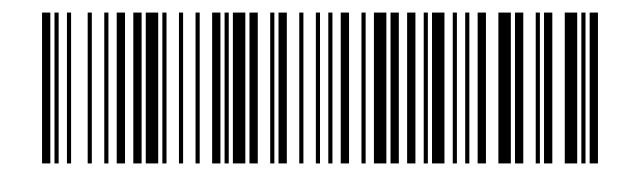
Batch scanning mode (customized models only):
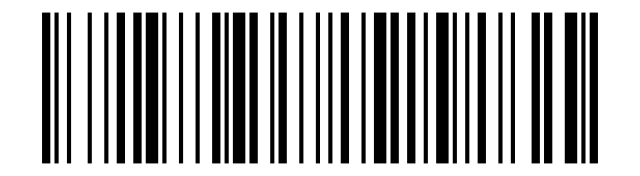
Host trigger mode and batch scanning mode are available on some customized models only.
Decode timeout
Maximum time allowed for decoding during one scan attempt. Default 3000 ms, range 0500–9999 ms.
3 seconds (default):
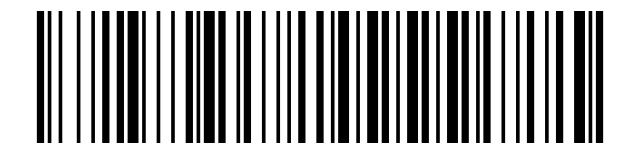
6 seconds:
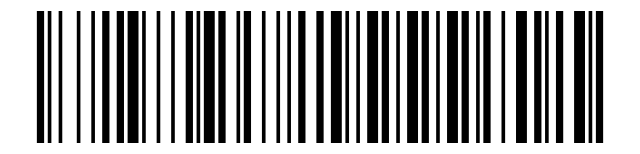
Scan interval
Interval between reads in continuous mode. Default 0500 ms, range 0100–9999 ms.
0.5 seconds (default):
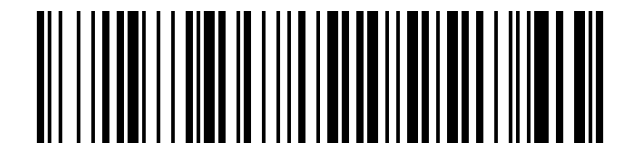
1 second:
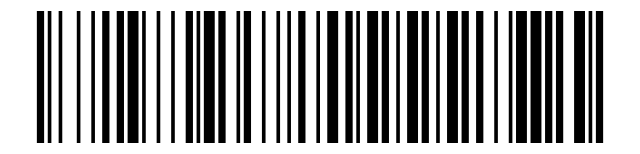
Scan-engine settings
For every setting in this section scan Start Setup, then the setting code, then End Setup.
Start Setup:
End Setup:
Device features
Aiming light
Aiming light on while scanning:
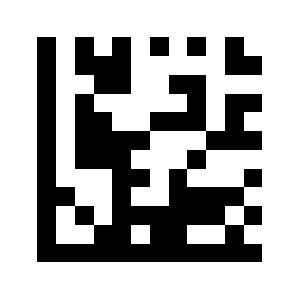
Aiming light always on (default):
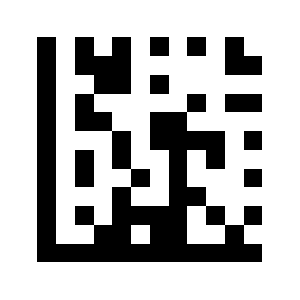
Aiming light off:
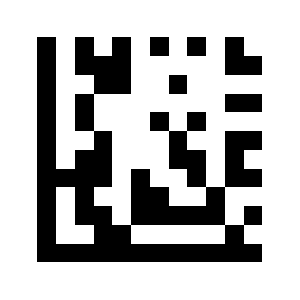
Illumination
Illumination on while scanning (default):
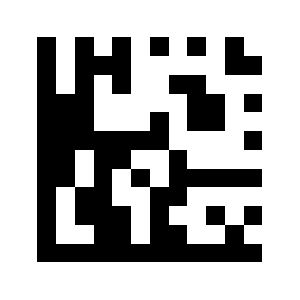
Illumination always on:
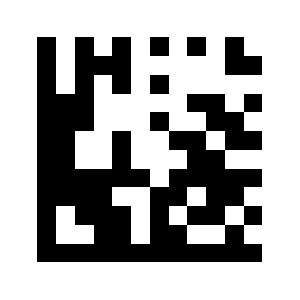
Illumination off:
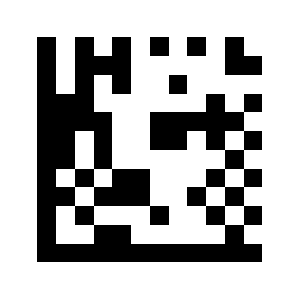
Illumination brightness
High brightness (default):
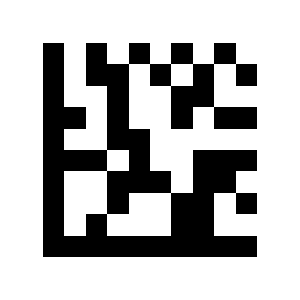
Medium brightness:
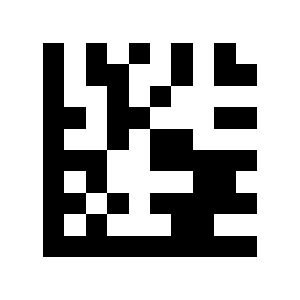
Low brightness:
Trigger settings
Scan mode
Level trigger: scanning starts while the trigger is held and ends after a successful decode or when the read timeout is reached.
Level trigger (default):
Presentation mode: scanning starts when image changes are detected and ends when the read timeout is reached.
Presentation mode:
Continuous scan: scans one or more barcodes continuously; press and release the trigger to start or stop. Repeated reads of the same barcode are controlled by the same symbol timeout.
Continuous scan:
Same barcode read mode
In scan modes that support it, you can configure how repeated reads of the same barcode are handled.
By default the same barcode is not read again within 500 ms. The same symbol timeout can be set from 0 to 5000 ms; 0 disables the timeout.
Suppress repeated reads: a barcode read again within the suppression period is ignored and the timer restarts.
Interval read: a barcode read again within the interval is ignored; it is output again after the interval expires.
Do not repeat the same barcode: the same barcode is never output twice.
Suppress repeated reads (default):
Interval read:
Do not repeat the same barcode:
Same symbol timeout (ms):
Example — suppress repeated reads within 100 ms: scan Start Setup, Suppress repeated reads, Same symbol timeout, then the decimal digits 1, 0, 0, and End Setup.
Example — read the same barcode again after 1 second: scan Start Setup, Interval read, Same symbol timeout, then the digits 1, 0, 0, 0, and End Setup.
Presentation mode sensitivity
Low sensitivity:
Medium sensitivity (default):
High sensitivity:
Code ID
The Code ID is a short identifier of the symbology sent in front of the barcode data.
Disable Code ID (default):
Enable AIM Code ID:
Enable NETUM Code ID:
| Symbology | NETUM | AIM |
|---|---|---|
| UPC-A | A | E |
| UPC-E | E | E |
| EAN-8 | FF | E |
| EAN-13 | F | E |
| Code 128 | K | C |
| Code 39 | M | A |
| Code 93 | L | G |
| Code 32 | M | A |
| Code 11 | O | H |
| Codabar | N | F |
| Plessey | P | P |
| MSI / Plessey | a | M |
| Interleaved 2 of 5 | I | I |
| IATA 2 of 5 | Z | R |
| Matrix 2 of 5 | G | X |
| Straight 2 of 5 | S | S |
| Pharmacode | H | X |
| GS1 DataBar 14 | RS | e |
| GS1 DataBar Expanded | RX | e |
| GS1 DataBar Limited | RL | e |
| Composite CC-A | m | e |
| Composite CC-B | n | e |
| Composite CC-C | i | e |
| PDF417 | r | L |
| MicroPDF417 | s | L |
| Data Matrix | t | d |
| QR Code | u | Q |
| Micro QR | j | Q |
| Aztec | e | Z |
| MaxiCode | v | U |
Engine output format
Engine terminator
None:
Carriage return (CR) (default):
CR + LF:
TAB:
Symbology settings
Supported symbologies and factory status
| Symbology | Factory setting |
|---|---|
| UPC-A | Enabled |
| UPC-E | Enabled |
| EAN-8 | Enabled |
| EAN-13 | Enabled |
| Code 128 / GS1-128 | Enabled |
| Code 39 | Enabled |
| Code 93 | Enabled |
| Code 32 | Disabled |
| Code 11 | Disabled |
| Codabar | Enabled |
| Plessey | Disabled |
| MSI Plessey | Enabled |
| Interleaved 2 of 5 | Enabled |
| IATA 2 of 5 | Disabled |
| Matrix 2 of 5 | Disabled |
| Straight 2 of 5 | Disabled |
| Pharmacode | Disabled |
| GS1 DataBar 14 | Enabled |
| GS1 DataBar 14 Stacked | Disabled |
| GS1 DataBar Expanded | Enabled |
| GS1 DataBar Expanded Stacked | Disabled |
| GS1 DataBar Limited | Enabled |
| Composite Code-A | Disabled |
| Composite Code-B | Disabled |
| Composite Code-C | Disabled |
| PDF417 | Enabled |
| MicroPDF417 | Enabled |
| Data Matrix | Enabled |
| QR Code | Enabled |
| Micro QR | Enabled |
| Aztec | Disabled |
| MaxiCode | Disabled |
General symbology switches
Enable all barcodes:
Enable 1D barcodes only:
Enable 2D barcodes only:
1D symbologies
UPC-A
Enable UPC-A (default):
Disable UPC-A:
Transmit Leading Digit (default):
Do Not Transmit Leading Digit:
Enable Check Digit (default):
Disable Check Digit:
Enable EAN-13 Conversion:
Disable EAN-13 Conversion (default):
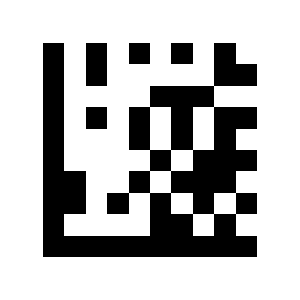
Enable UPC-A 2- or 5-digit Supplementals:
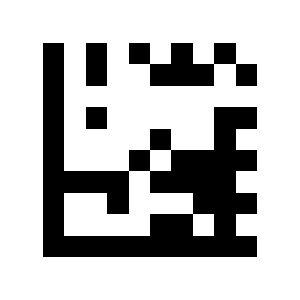
Disable UPC-A 2- or 5-digit Supplementals (default):
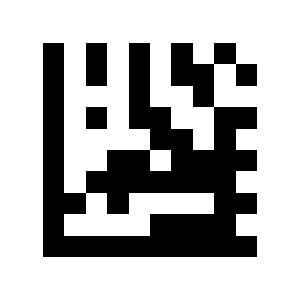
Decode UPC-A with 2- or 5-digit Supplementals Only:
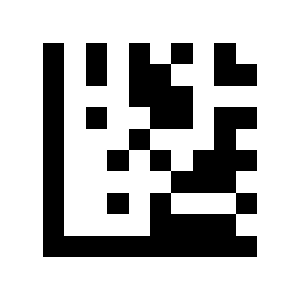
Decode UPC-A With or Without 2- or 5-digit Supplementals (default):
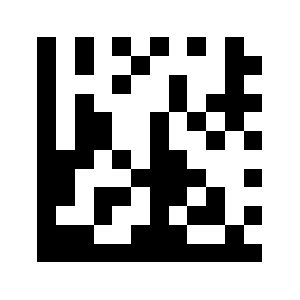
UPC-E
Enable UPC-E (default):
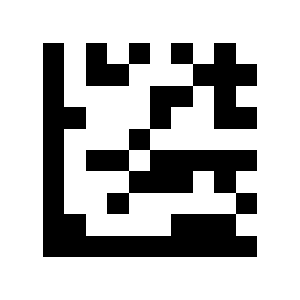
Disable UPC-E:
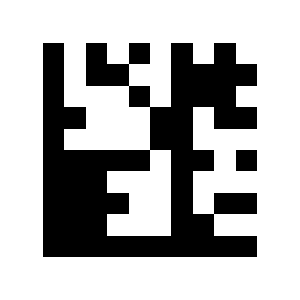
Transmit Leading Digit (default):
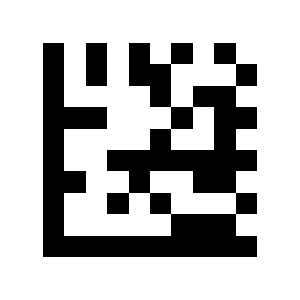
Do Not Transmit Leading Digit:
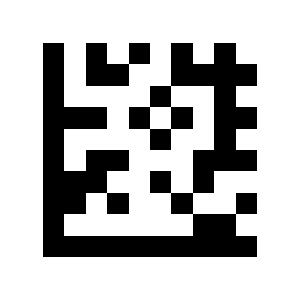
Enable Check Digit (default):
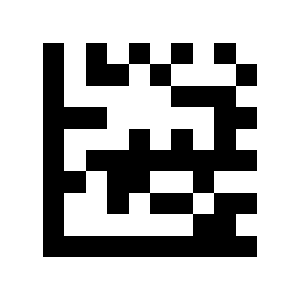
Disable Check Digit:
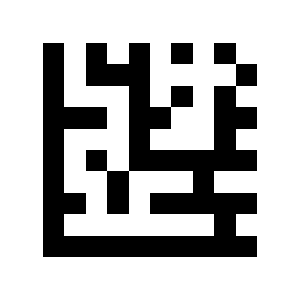
Enable UPC-A Conversion:
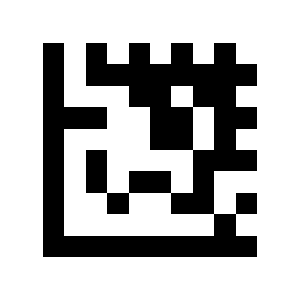
Disable UPC-A Conversion (default):
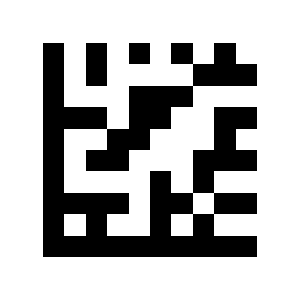
Enable UPC-E 2- or 5-digit Supplementals:
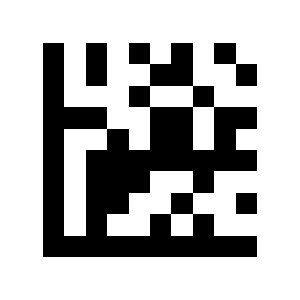
Disable UPC-E 2- or 5-digit Supplementals (default):
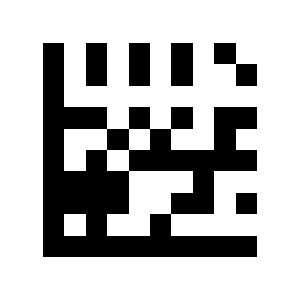
Decode UPC-E with 2- or 5-digit Supplementals Only:
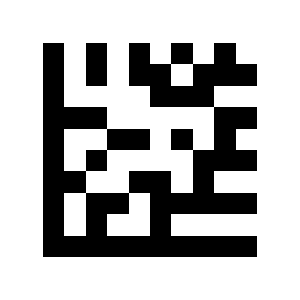
Decode UPC-E With or Without 2- or 5-digit Supplementals (default):
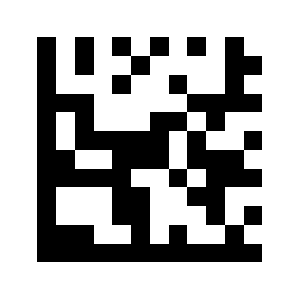
EAN-8
Enable EAN-8 (default):
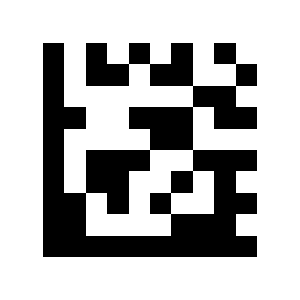
Disable EAN-8:
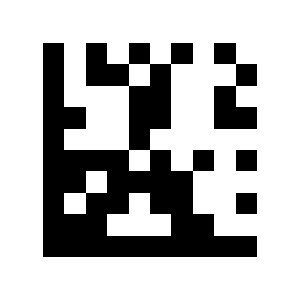
Transmit Check Digit (default):
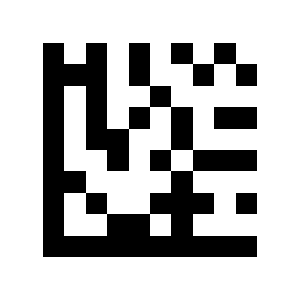
Do Not Transmit Check Digit:
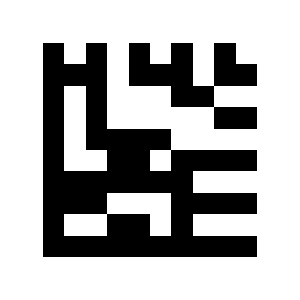
Enable EAN-13 Conversion:
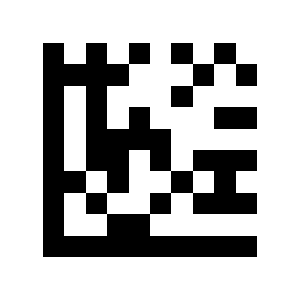
Disable EAN-13 Conversion (default):
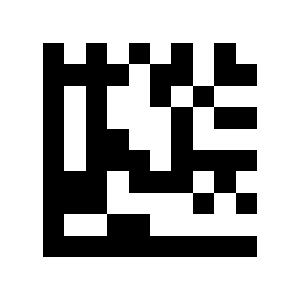
Enable EAN-8 2- or 5-digit Supplementals:
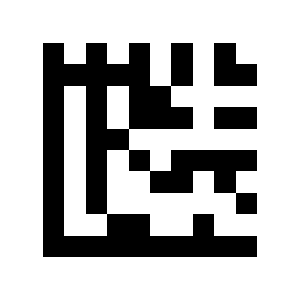
Disable EAN-8 2- or 5-digit Supplementals (default):
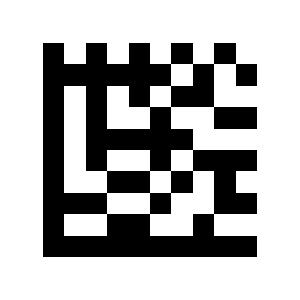
Decode EAN-8 with 2- or 5-digit Supplementals Only:
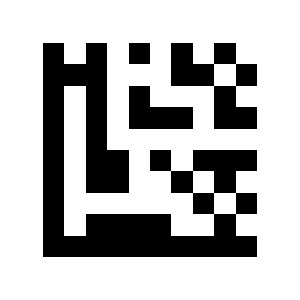
Decode EAN-8 With or Without 2- or 5-digit Supplementals (default):
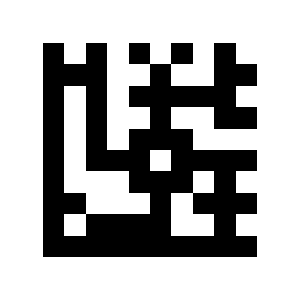
EAN-13
Enable EAN-13 (default):
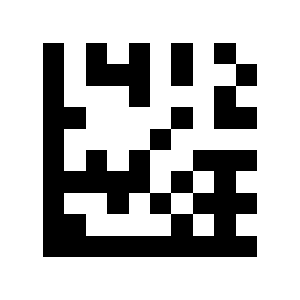
Disable EAN-13:
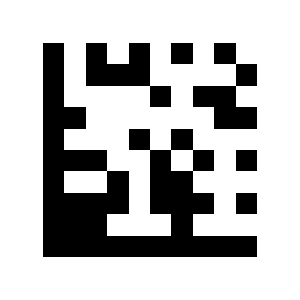
Transmit Check Digit (default):
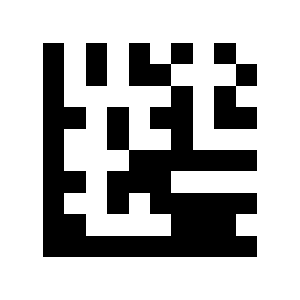
Do Not Transmit Check Digit:
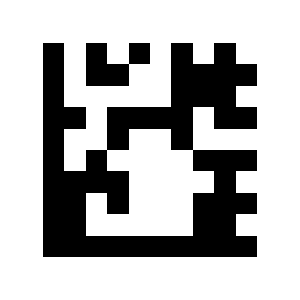
Enable ISBN Conversion:
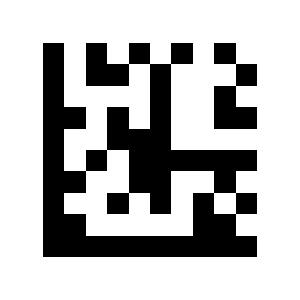
Disable ISBN Conversion (default):
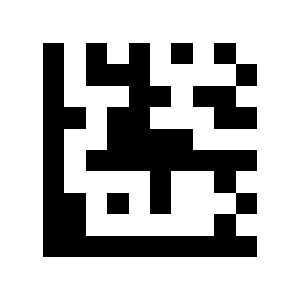
Enable ISSN Conversion:
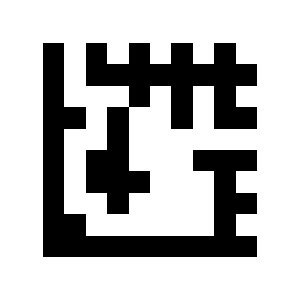
Disable ISSN Conversion (default):
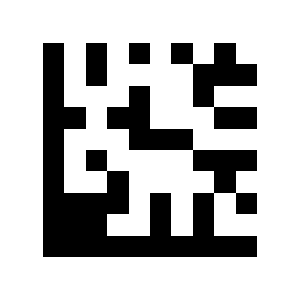
Enable EAN-13 2- or 5-digit Supplementals:
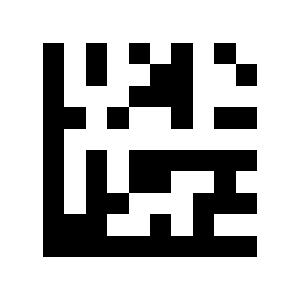
Disable EAN-13 2- or 5-digit Supplementals (default):
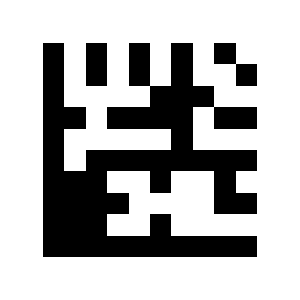
Decode EAN-13 with 2- or 5-digit Supplementals Only:
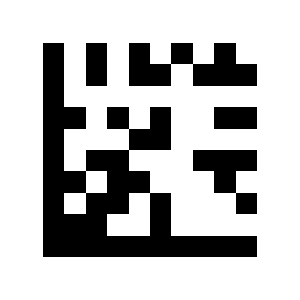
Decode EAN-13 With or Without 2- or 5-digit Supplementals (default):
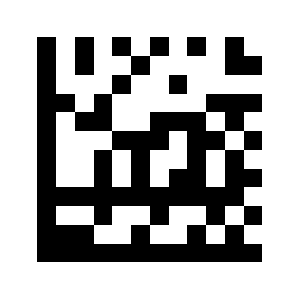
Code 128 / GS1-128
Enable Code 128 / GS1-128 (default):
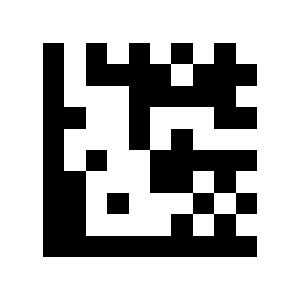
Disable Code 128 / GS1-128:
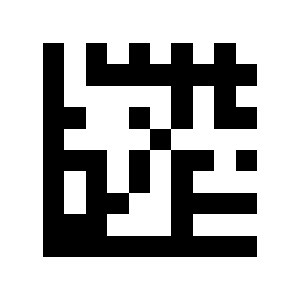
Code 39
Enable Code 39 (default):
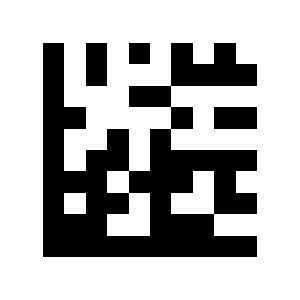
Disable Code 39:
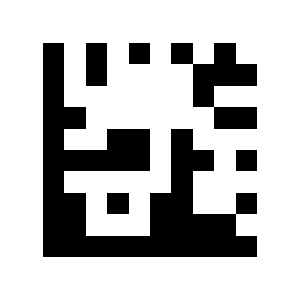
Enable Code 39 Full ASCII Function:
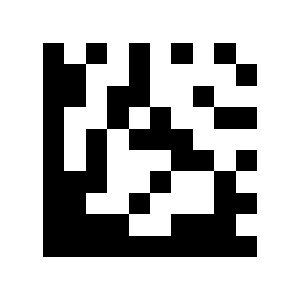
Disable Code 39 Full ASCII Function (default):
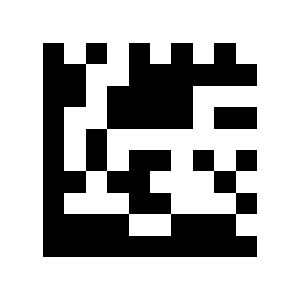
Transmit Start/Stop Characters:
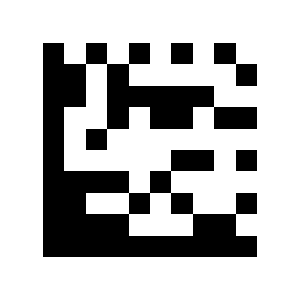
Do Not Transmit Start/Stop Characters (default):
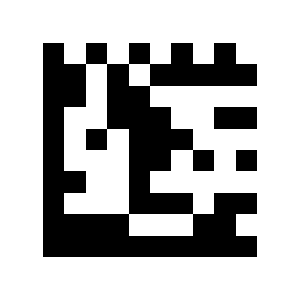
No Verification (default):
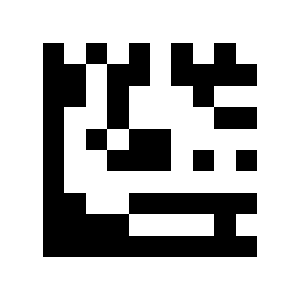
Verify Without Transmitting:
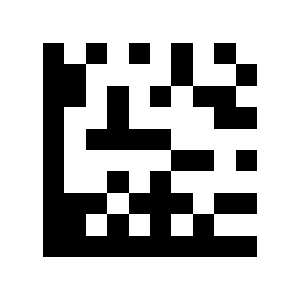
Verify and Transmit:
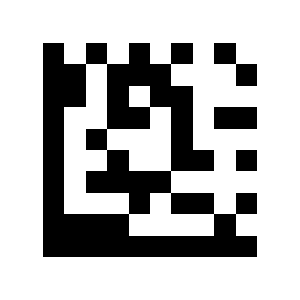
Code 93
Enable Code 93:
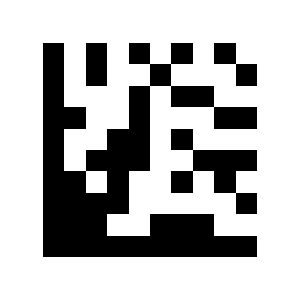
Disable Code 93 (default):
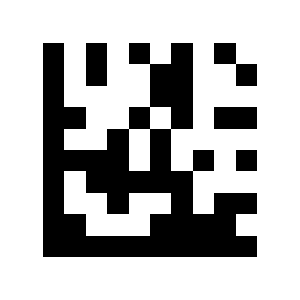
Code 32
Enable Code 32:
Disable Code 32 (default):
Code 11
Enable Code 11:
Disable Code 11 (default):
Transmit Check Digit (default):
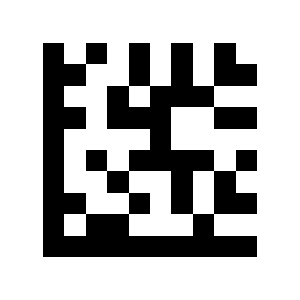
Do Not Transmit Check Digit:
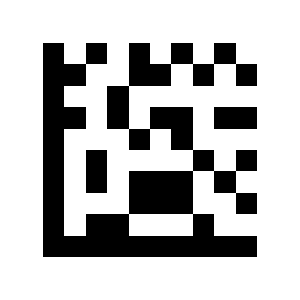
Codabar
Enable Codabar (default):
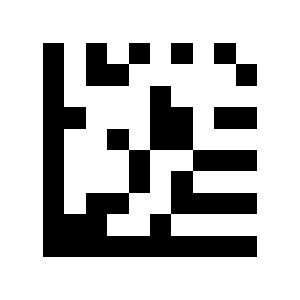
Disable Codabar:
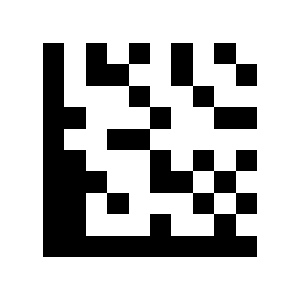
No Verification (default):
Verify Without Transmitting:
Verify and Transmit:
Transmit Start/Stop Characters:
Do Not Transmit Start/Stop Characters (default):
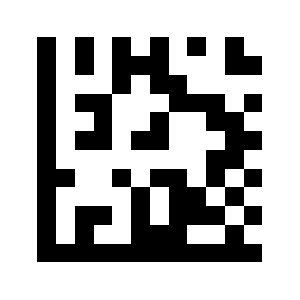
Plessey
Enable Plessey:
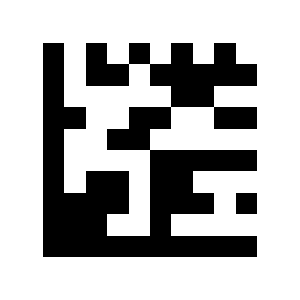
Disable Plessey (default):
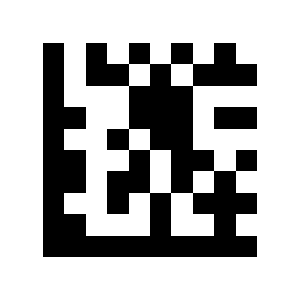
MSI Plessey
Enable MSI Plessey (default):
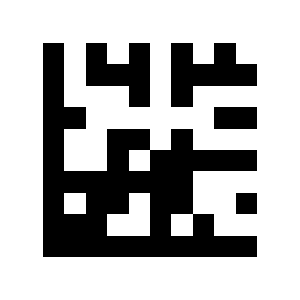
Disable MSI Plessey:
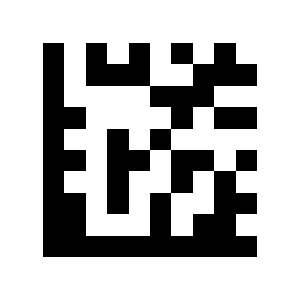
No Verification:
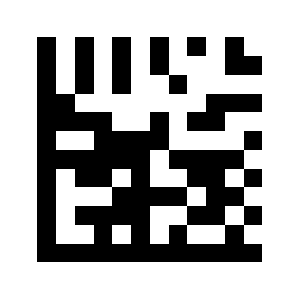
Mod 10 Verification (default):
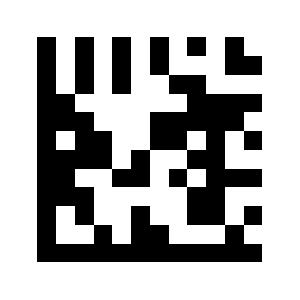
Mod 10/10 Verification:
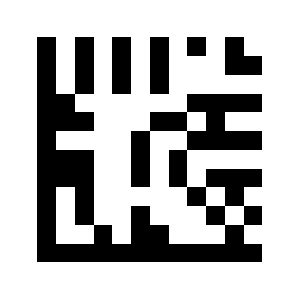
Mod 11/10 Verification:
Transmit Check Digit (default):
Do Not Transmit Check Digit:
Interleaved 2 of 5
Enable Interleaved 2 of 5 (default):
Disable Interleaved 2 of 5:
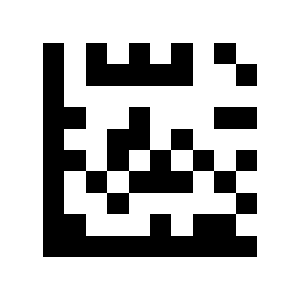
No Verification (default):
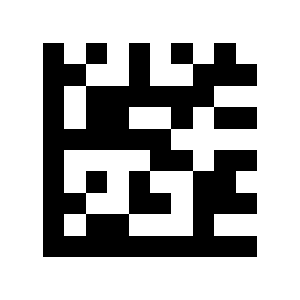
Verify and Transmit:
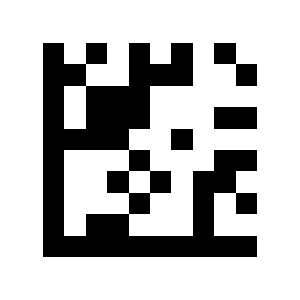
IATA 2 of 5
Enable IATA 2 of 5:
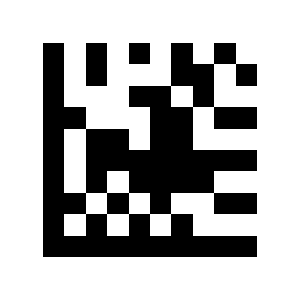
Disable IATA 2 of 5 (default):
Matrix 2 of 5
Enable Matrix 2 of 5:
Disable Matrix 2 of 5 (default):
Straight 2 of 5
Enable Straight 2 of 5:
Disable Straight 2 of 5 (default):
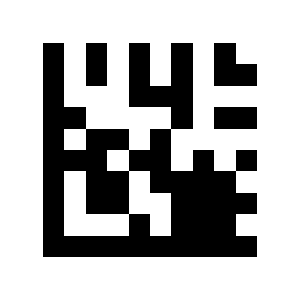
Pharmacode
Enable Pharmacode:
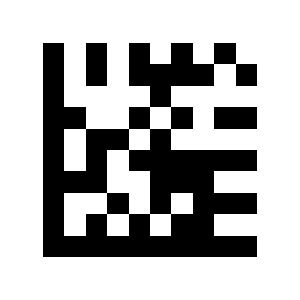
Disable Pharmacode (default):
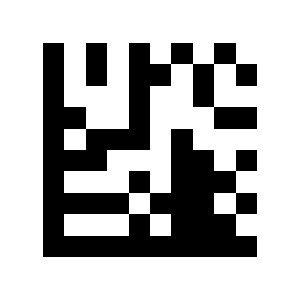
GS1 DataBar 14
Enable GS1 DataBar 14 (default):
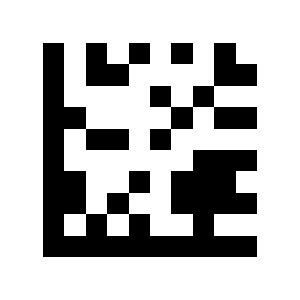
Disable GS1 DataBar 14:
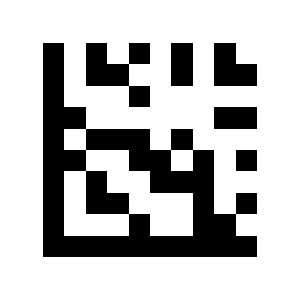
Enable GS1 DataBar 14 Stacked:
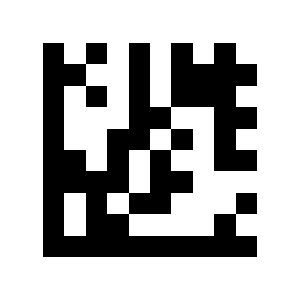
Disable GS1 DataBar 14 Stacked (default):
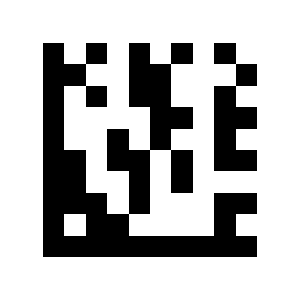
Output AI (01) Characters (default):
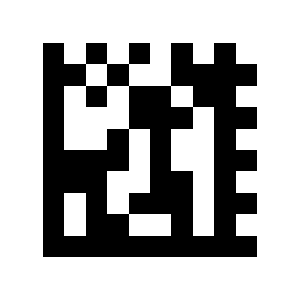
Do Not Output AI (01) Characters:
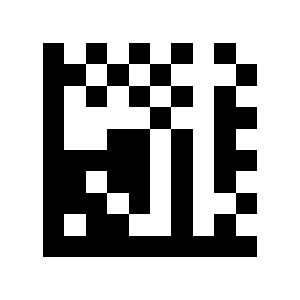
GS1 DataBar Expanded
Enable GS1 DataBar Expanded (default):
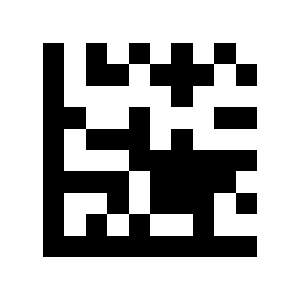
Disable GS1 DataBar Expanded:
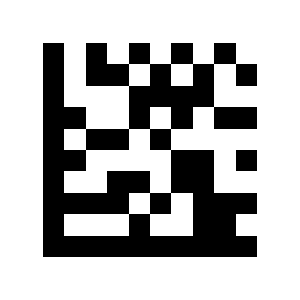
Enable GS1 DataBar Expanded Stacked:
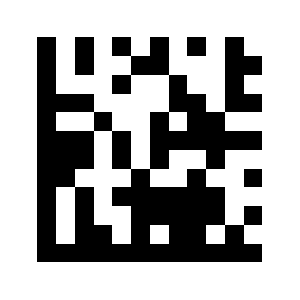
Disable GS1 DataBar Expanded Stacked (default):
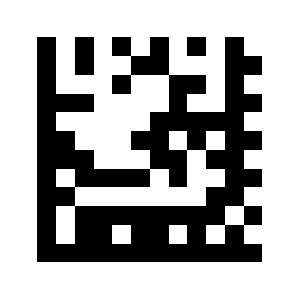
Output AI (01) Characters (default):
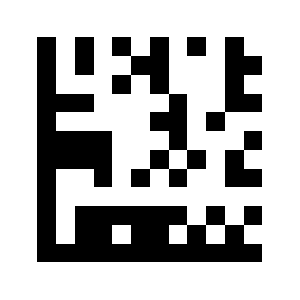
Do Not Output AI (01) Characters:
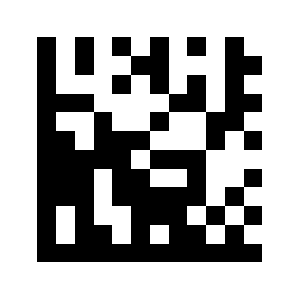
GS1 DataBar Limited
Enable GS1 DataBar Limited (default):
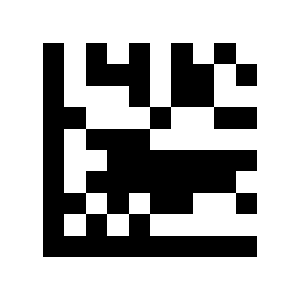
Disable GS1 DataBar Limited:
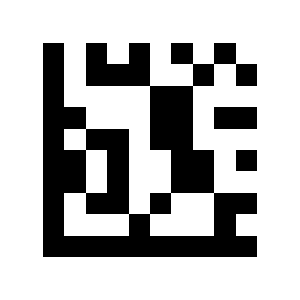
Output AI (01) Characters (default):
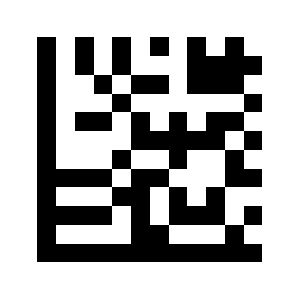
Do Not Output AI (01) Characters:
2D and composite codes
Composite Code-A
Enable Composite Code-A:
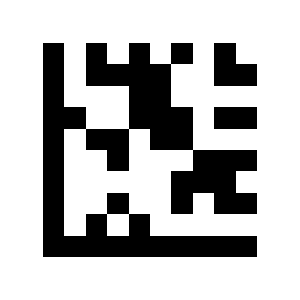
Disable Composite Code-A (default):
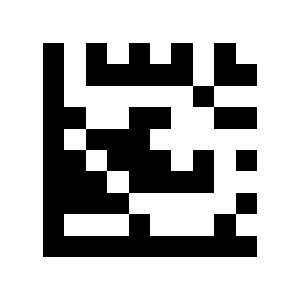
Composite Code-B
Enable Composite Code-B:
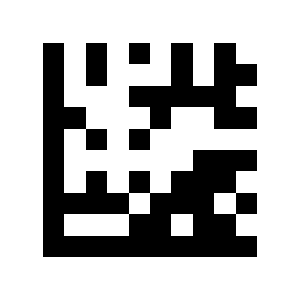
Disable Composite Code-B (default):
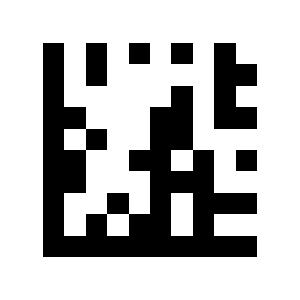
Composite Code-C
Enable Composite Code-C:
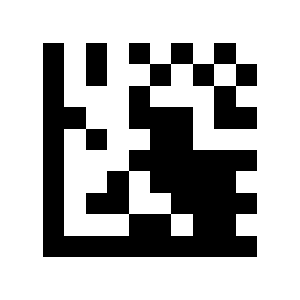
Disable Composite Code-C (default):
PDF417
Enable PDF417 (default):
Disable PDF417:
MicroPDF417
Enable MicroPDF417 (default):
Disable MicroPDF417:
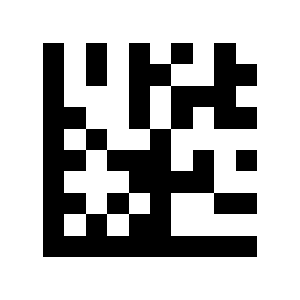
Data Matrix
Enable Data Matrix (default):
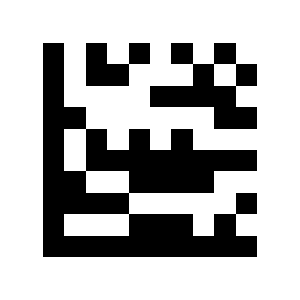
Disable Data Matrix:
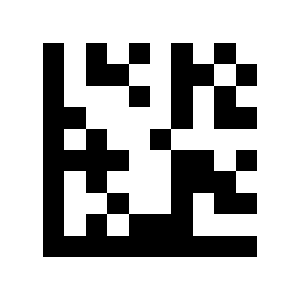
Enable mirror decode (default):
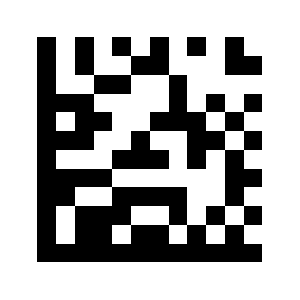
Disable mirror decode:
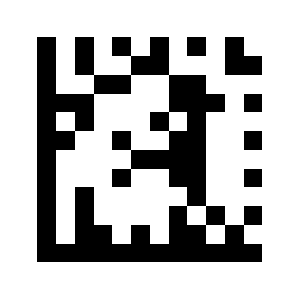
Enable rectangular Data Matrix (default):
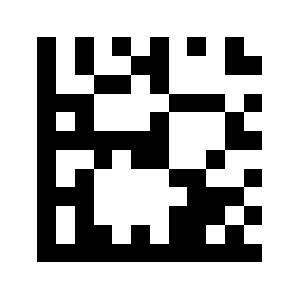
Disable rectangular Data Matrix:
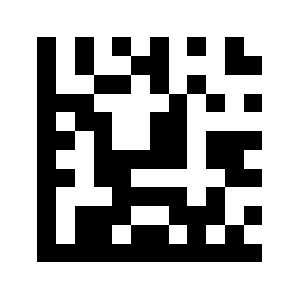
QR Code
Enable QR Code (default):
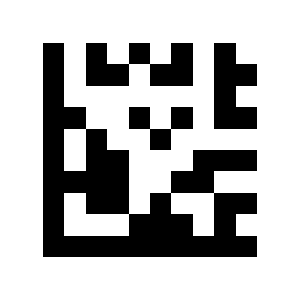
Disable QR Code:
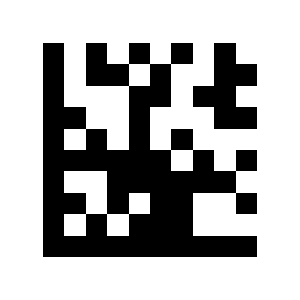
Enable mirror decode (default):
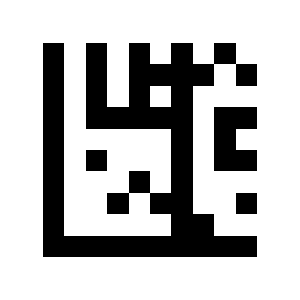
Disable mirror decode:
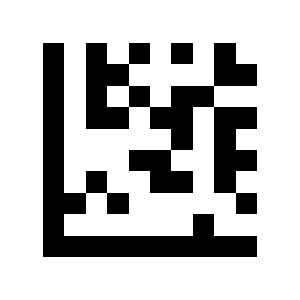
Micro QR
Enable Micro QR (default):
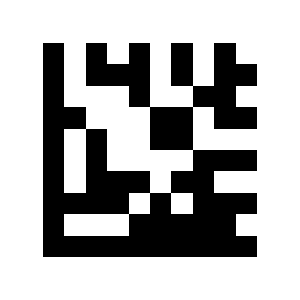
Disable Micro QR:
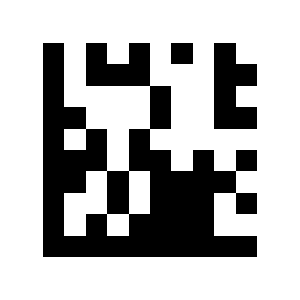
Aztec
Enable Aztec:
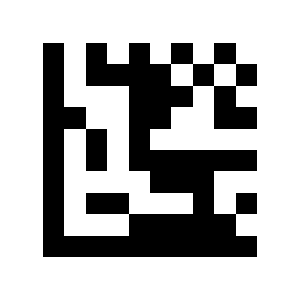
Disable Aztec (default):
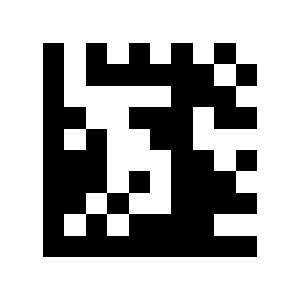
Enable mirror decode (default):
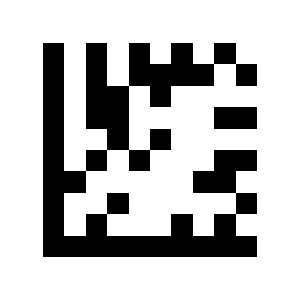
Disable mirror decode:
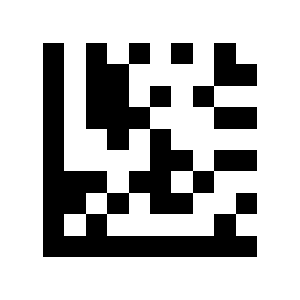
MaxiCode
Enable MaxiCode:
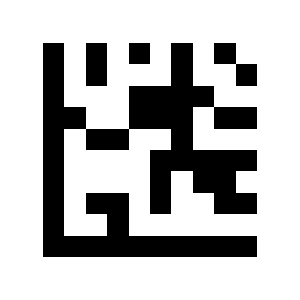
Disable MaxiCode (default):
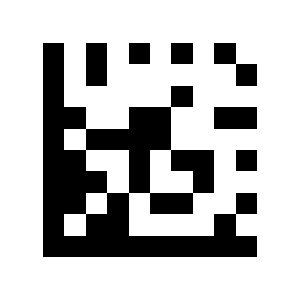
Decode length settings
The codes below limit the readable length of each symbology. After the length code, enter the length with the decimal digit codes (two digits per length), then scan End Setup.
Example — read only 14-character Code 128: scan Start Setup, the Code 128 Restrict to a single length code, the digits 1, 4, and End Setup.
Example — read Code 128 of 2 or 14 characters: scan Start Setup, the Code 128 Restrict to two different lengths code, the digits 0, 2, 1, 4, and End Setup.
Example — read Code 128 from 8 to 14 characters: scan Start Setup, the Code 128 Restrict to a length range code, the digits 0, 8, 1, 4, and End Setup.
Example — any length: scan Start Setup, the Code 128 Any length code, and End Setup.
Code 128
Restrict to a single length:
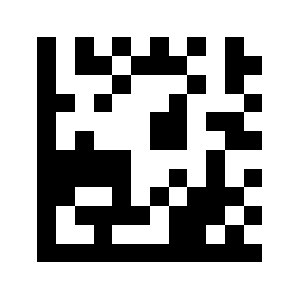
Restrict to two different lengths:
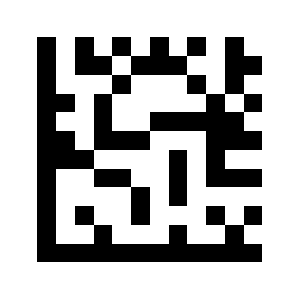
Restrict to a length range:
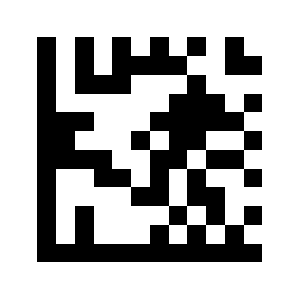
Any length (default):
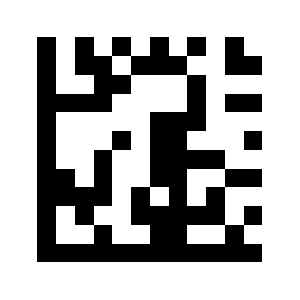
Code 39
Restrict to a single length:
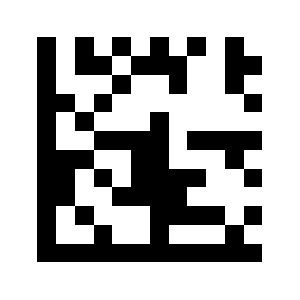
Restrict to two different lengths:
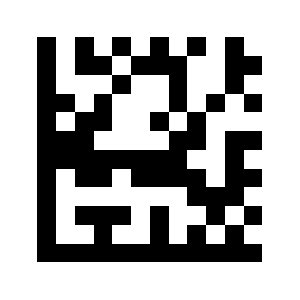
Restrict to a length range:
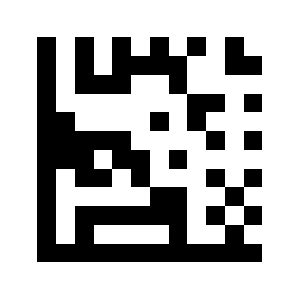
Any length (default):
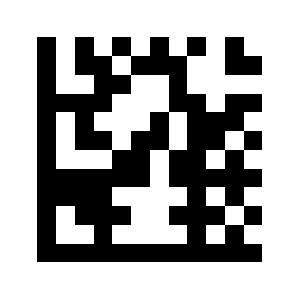
Code 93
Restrict to a single length:
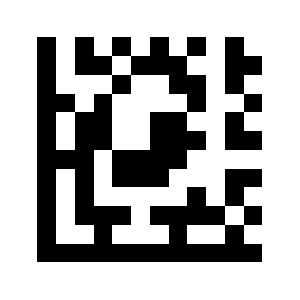
Restrict to two different lengths:
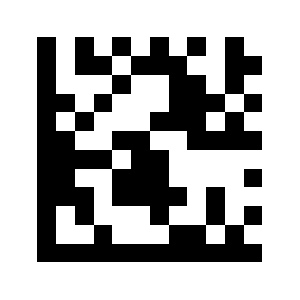
Restrict to a length range:
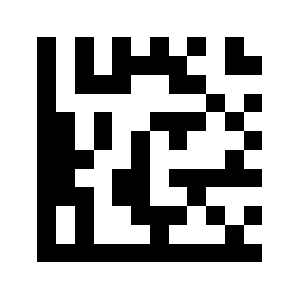
Any length (default):
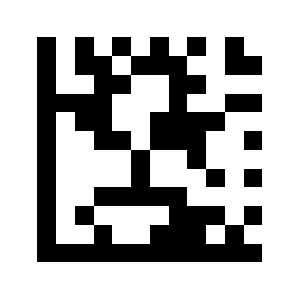
Codabar
Restrict to a single length:
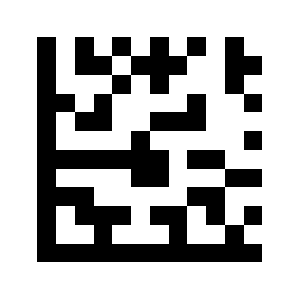
Restrict to two different lengths:
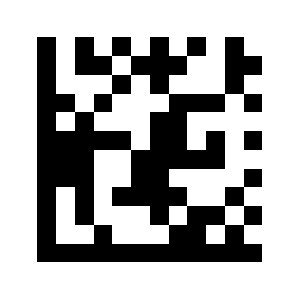
Restrict to a length range:
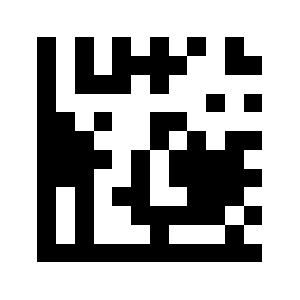
Any length (default):
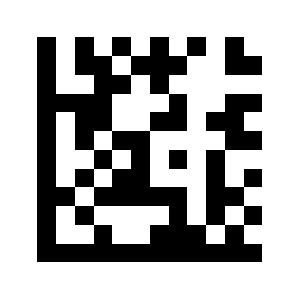
Interleaved 2 of 5
Restrict to a single length:
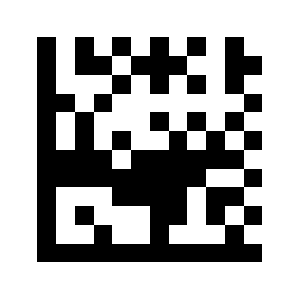
Restrict to two different lengths:
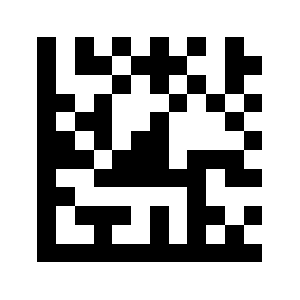
Restrict to a length range:
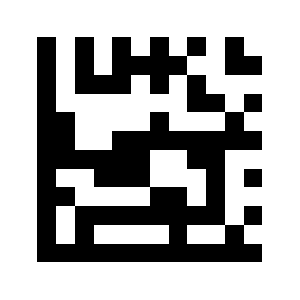
Any length (default):
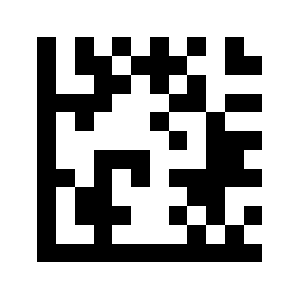
Code 11
Restrict to a single length:
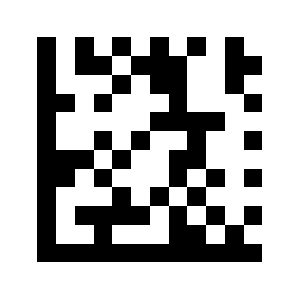
Restrict to two different lengths:
Restrict to a length range:
Any length (default):
MSI Plessey
Restrict to a single length:
Restrict to two different lengths:
Restrict to a length range:
Any length (default):
Matrix 2 of 5
Restrict to a single length:
Restrict to two different lengths:
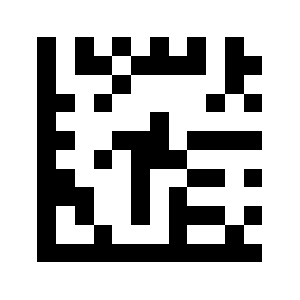
Restrict to a length range:
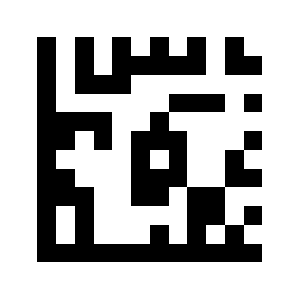
Any length (default):
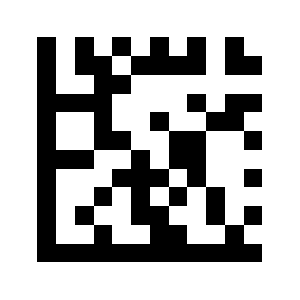
Decimal digits
Use these codes to enter numeric values (same symbol timeout, decode lengths) in scan-engine settings.
0:
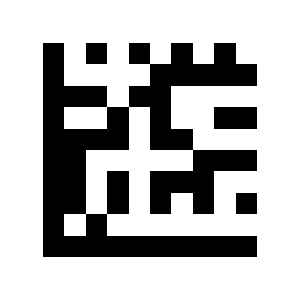
1:
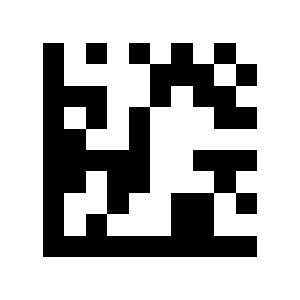
2:
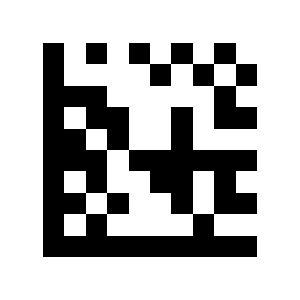
3:
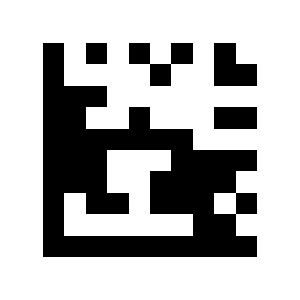
4:
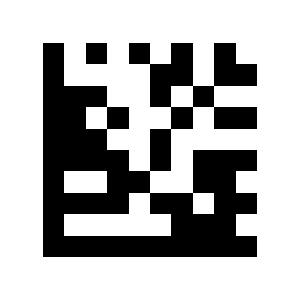
5:
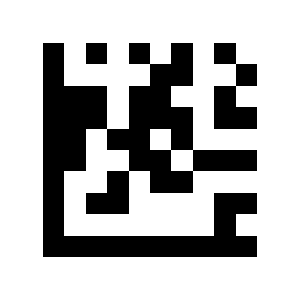
6:
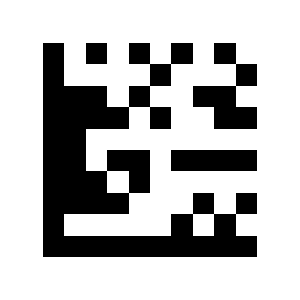
7:
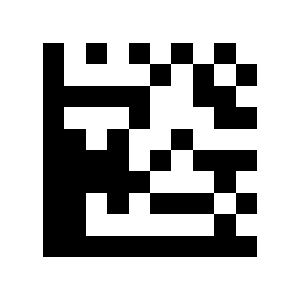
8:
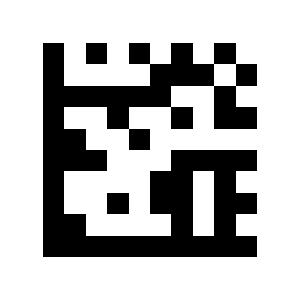
9:
Character table (scan-engine prefix / suffix characters)
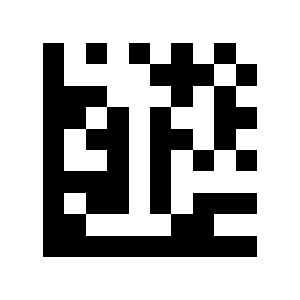
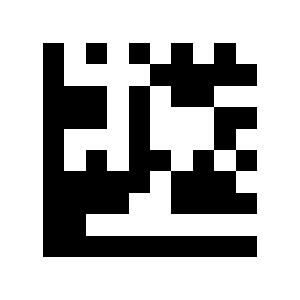
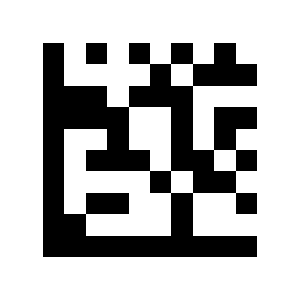
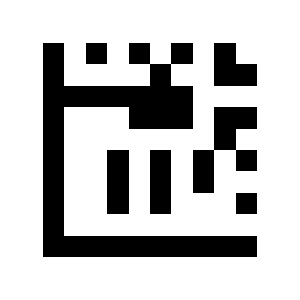
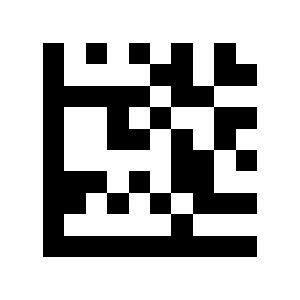
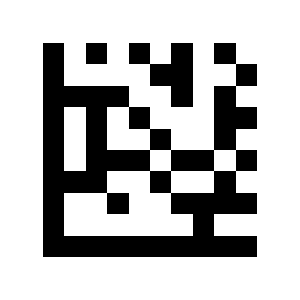
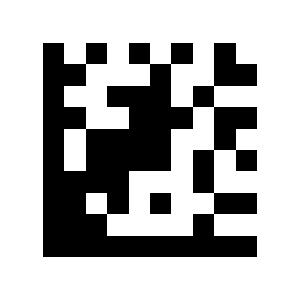
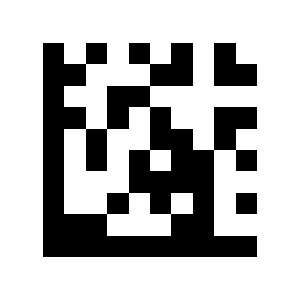
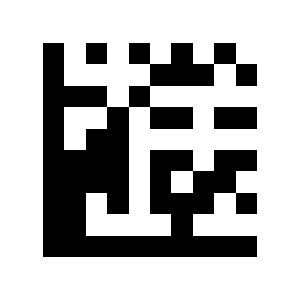
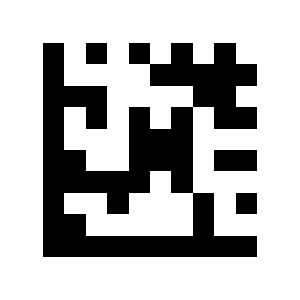
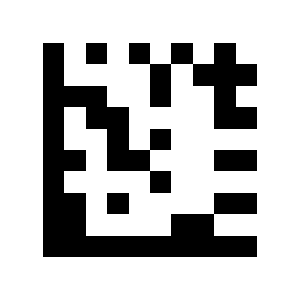
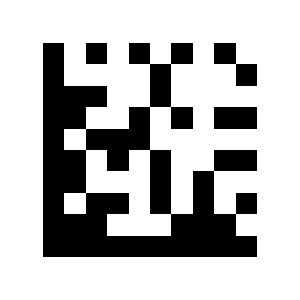
These Data Matrix codes enter single characters in scan-engine settings. Control characters are mapped to keys as shown in the first table.
Control characters (function key mapping)
| Hex | Dec | Key | Ctrl char mode | Alt + Unicode mode | Code |
|---|---|---|---|---|---|
| 00 | 0 | Null | Ctrl+@ | Alt + 000 | |
| 01 | 1 | Home | Ctrl+A | Alt + 001 | |
| 02 | 2 | End | Ctrl+B | Alt + 002 | |
| 03 | 3 | Up Arrow | Ctrl+C | Alt + 003 | |
| 04 | 4 | Down Arrow | Ctrl+D | Alt + 004 | |
| 05 | 5 | Left Arrow | Ctrl+E | Alt + 005 | |
| 06 | 6 | Right Arrow | Ctrl+F | Alt + 006 | |
| 07 | 7 | Null | Ctrl+G | Alt + 007 | |
| 08 | 8 | Backspace | Alt + 008 |  | |
| 09 | 9 | TAB | Alt + 009 |  | |
| 0A | 10 | Null | Ctrl+J | Alt + 010 | |
| 0B | 11 | Null | Ctrl+K | Alt + 011 | |
| 0C | 12 | Null | Ctrl+L | Alt + 012 | |
| 0D | 13 | Enter | Enter |  | |
| 0E | 14 | Page Up | Ctrl+N | Alt + 014 | |
| 0F | 15 | Page Down | Ctrl+O | Alt + 015 | |
| 10 | 16 | F11 | Ctrl+P | Alt + 016 | |
| 11 | 17 | Null | Ctrl+Q | Alt + 017 | |
| 12 | 18 | Null | Ctrl+R | Alt + 018 | |
| 13 | 19 | Null | Ctrl+S | Alt + 019 | |
| 14 | 20 | Null | Ctrl+T | Alt + 020 | |
| 15 | 21 | F12 | Ctrl+U | Alt + 021 | |
| 16 | 22 | F1 | Ctrl+V | Alt + 022 | |
| 17 | 23 | F2 | Ctrl+W | Alt + 023 | |
| 18 | 24 | F3 | Ctrl+X | Alt + 024 | |
| 19 | 25 | F4 | Ctrl+Y | Alt + 025 | |
| 1A | 26 | F5 | Ctrl+Z | Alt + 026 | |
| 1B | 27 | F6 | Ctrl+[ | Alt + 027 | |
| 1C | 28 | F7 | Ctrl+\ | Alt + 028 | |
| 1D | 29 | F8 | Ctrl+] | Alt + 029 | |
| 1E | 30 | F9 | Ctrl+^ | Alt + 030 | |
| 1F | 31 | F10 | Ctrl+_ | Alt + 031 |
Printable characters
Space: 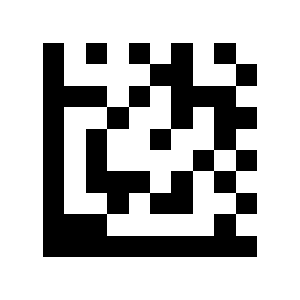
!: 
": 
#: 
$: 
%: 
&: 
': 
(: 
): 
*: 
+: 
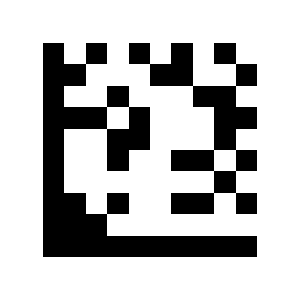
,: 
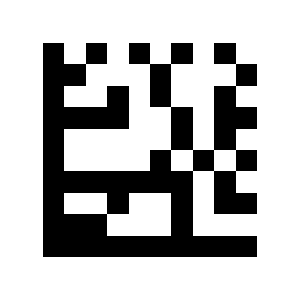
-: 
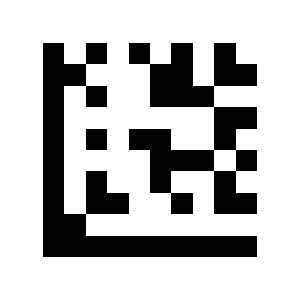
.: 
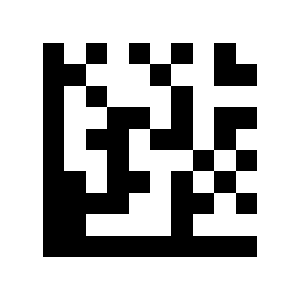
/: 
0:
1:
2:
3:
4:
5:
6:
7:
8:
9:
:: 
;: 
<: 
=: 
>: 
?: 
@: 
A: 
B: 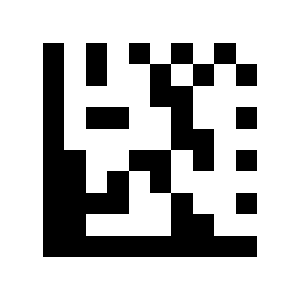
C: 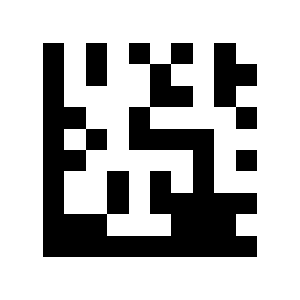
D: 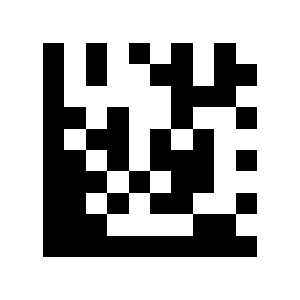
E: 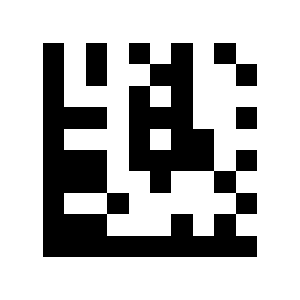
F: 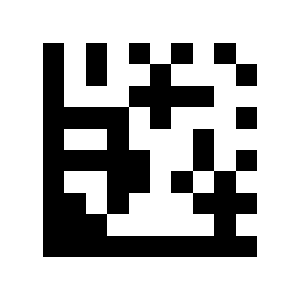
G: 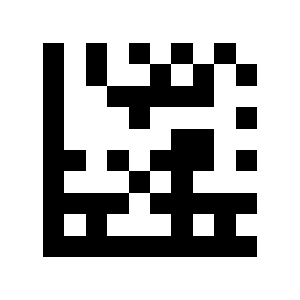
H: 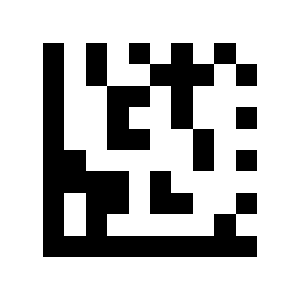
I: 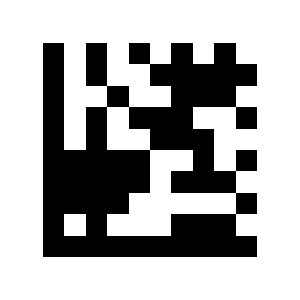
J: 
K: 
L: 
M: 
N: 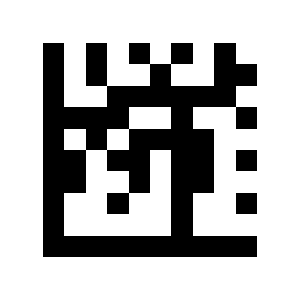
O: 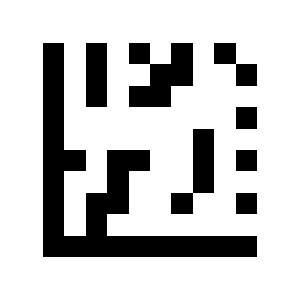
P: 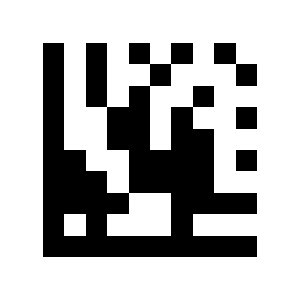
Q: 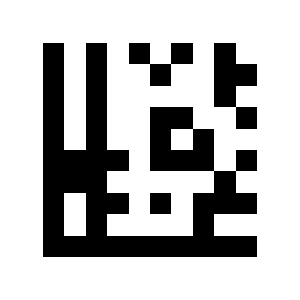
R: 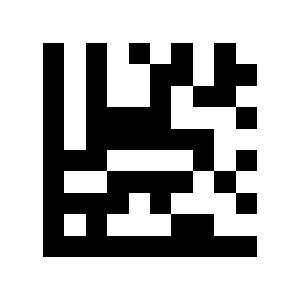
S: 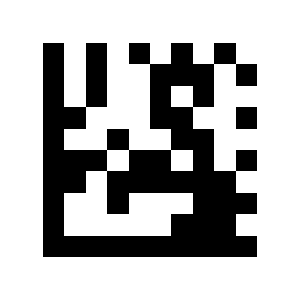
T: 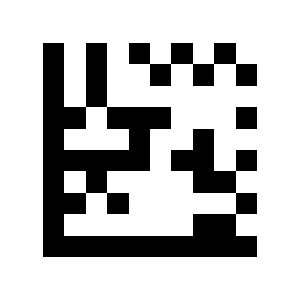
U: 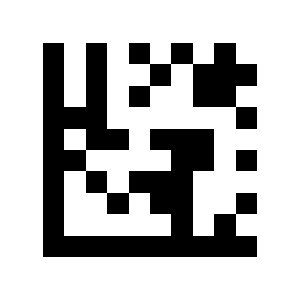
V: 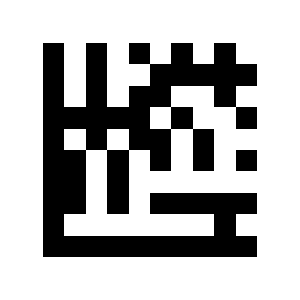
W: 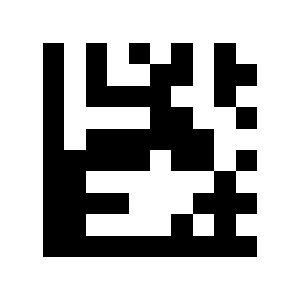
X: 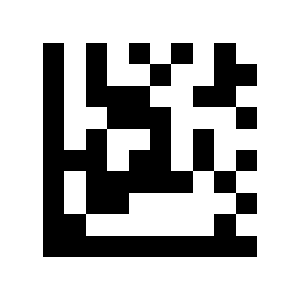
Y: 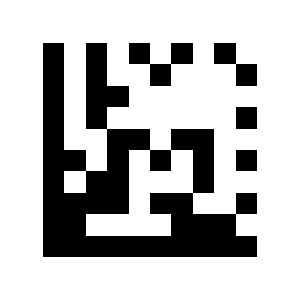
Z: 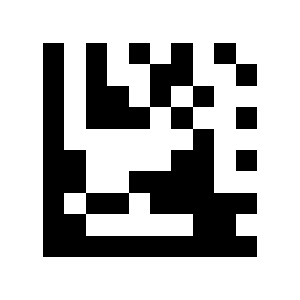
[: 
\: 
]: ![Code: ]](/img/products/HD9500/codes/s22.svg)
^: 
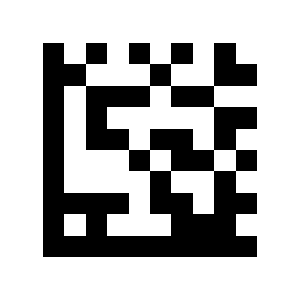
_: 
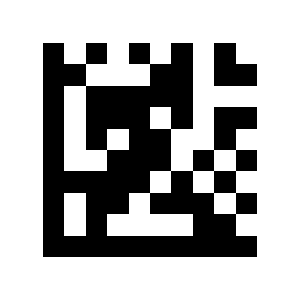
`: 
A: 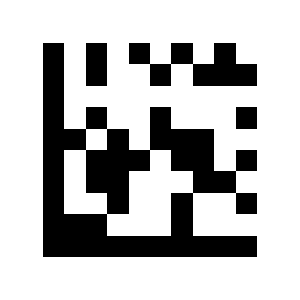
B: 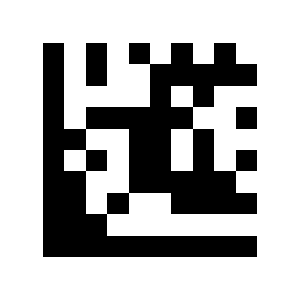
C: 
D: 
E: 
F: 
G: 
H: 
I: 
J: 
K: 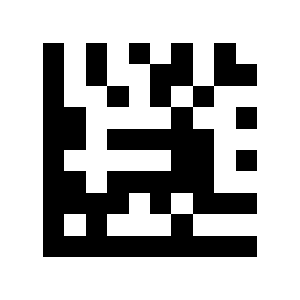
L: 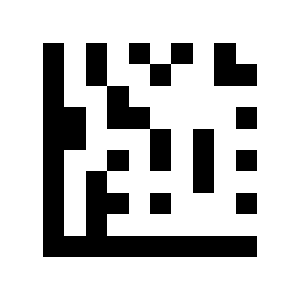
M: 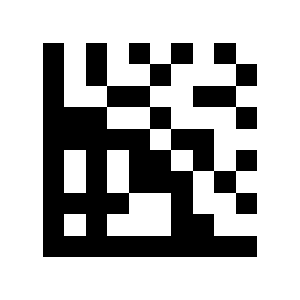
N: 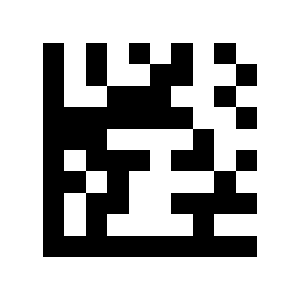
O: 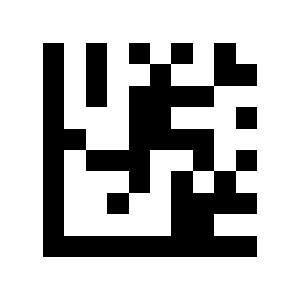
P: 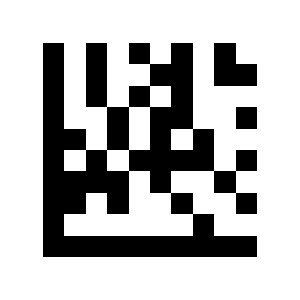
Q: 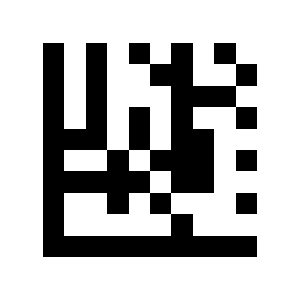
R: 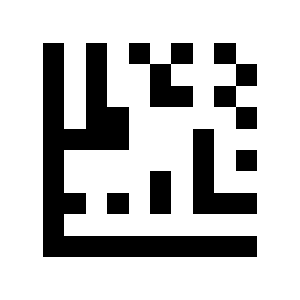
S: 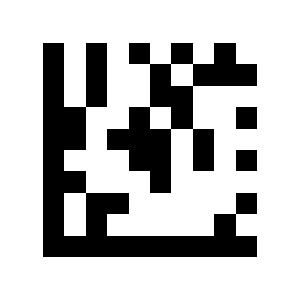
T: 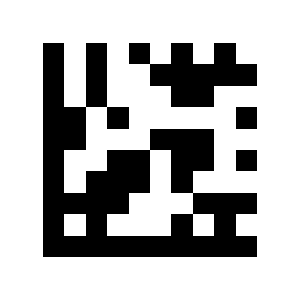
U: 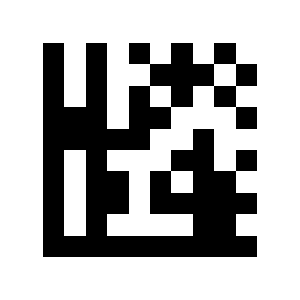
V: 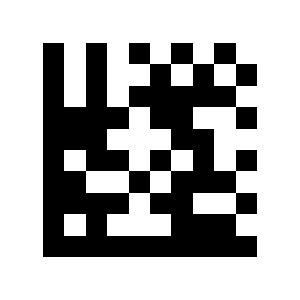
W: 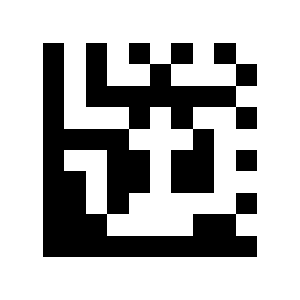
X: 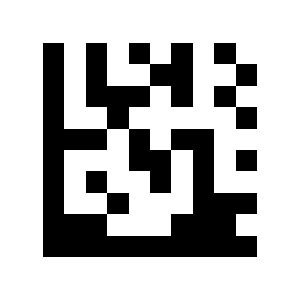
Y: 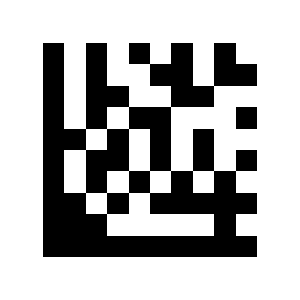
Z: 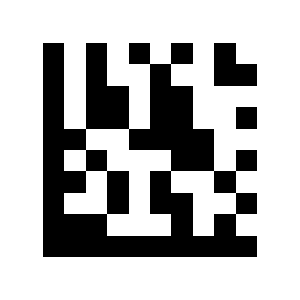
{: 
|: 
}: 
~: 
Delete: 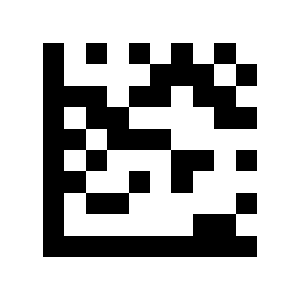
Function keys
The supplier manual does not contain working codes for F2 and F10 (the printed symbols encode other values), so they are not included here.
Insert: 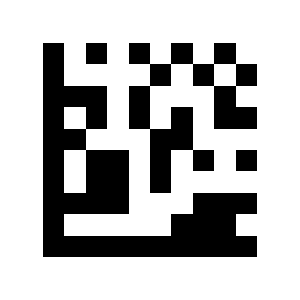
Delete:
Home: 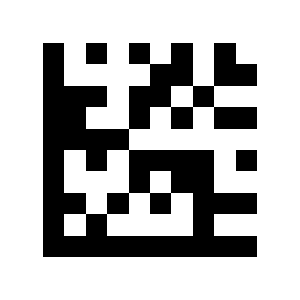
End: 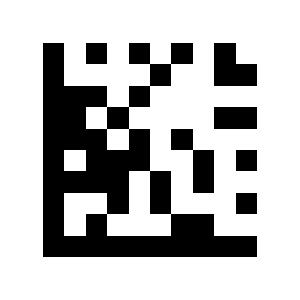
Up Arrow: 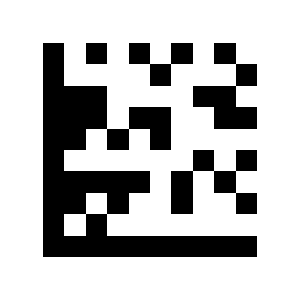
Down Arrow: 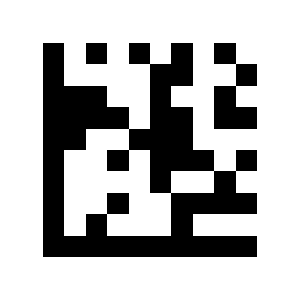
Left Arrow: 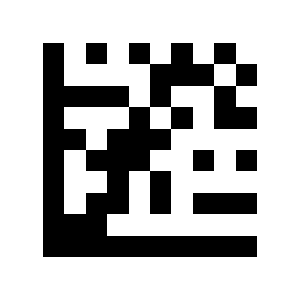
Right Arrow: 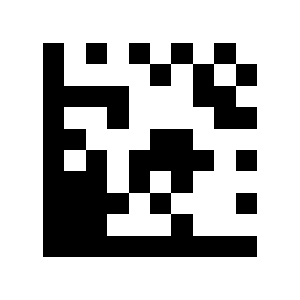
Shift: 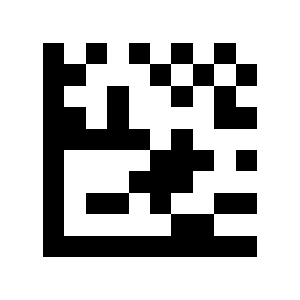
ESC: 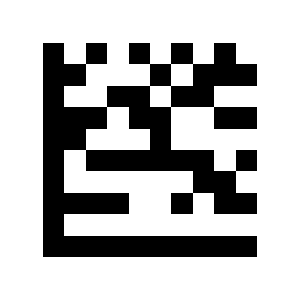
Page Up: 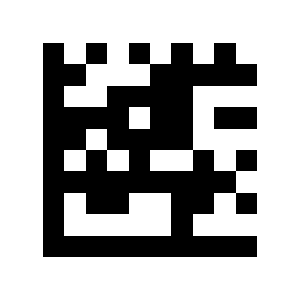
Page Down: 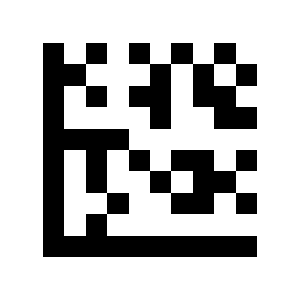
F1: 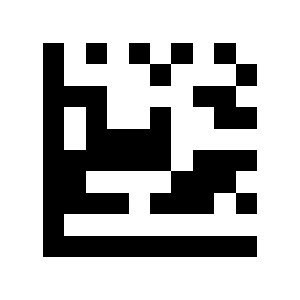
F3: 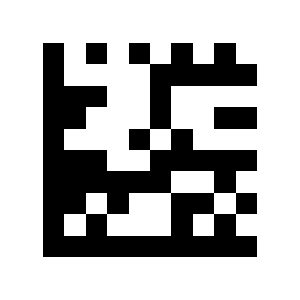
F4: 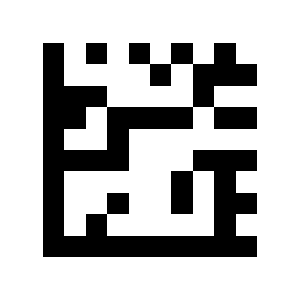
F5: 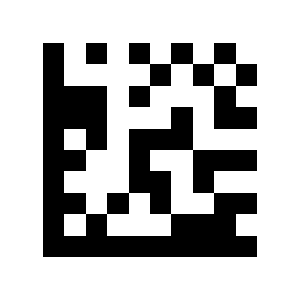
F6: 
F7: 
F8: 
F9: 
F11: 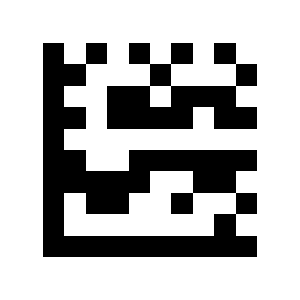
F12: 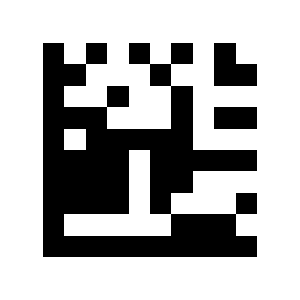
Character reference tables
Use these tables to find the hexadecimal values for the numeric barcodes when adding prefixes and suffixes in the "Data editing" section.
Control characters 00H–1FH
| Hex | Code | Config0 / Config3 (default) | Config1 / Config4 | Config2 / Config5 (Windows) |
|---|---|---|---|---|
| 00H | NUL | NUL | Ctrl+@ | ALT+000 |
| 01H | SOH | NUL | Ctrl+A | ALT+001 |
| 02H | STX | NUL | Ctrl+B | ALT+002 |
| 03H | ETX | NUL | Ctrl+C | ALT+003 |
| 04H | EOT | NUL | Ctrl+D | ALT+004 |
| 05H | ENQ | NUL | Ctrl+E | ALT+005 |
| 06H | ACK | NUL | Ctrl+F | ALT+006 |
| 07H | BEL | NUL | Ctrl+G | ALT+007 |
| 08H | BS | Backspace | Ctrl+H | ALT+008 |
| 09H | HT | TAB | TAB / Ctrl+I | ALT+009 |
| 0AH | LF | NUL / k:enter | Ctrl+J | ALT+010 |
| 0BH | VT | TAB | Ctrl+K | ALT+011 |
| 0CH | FF | NUL | Ctrl+L | ALT+012 |
| 0DH | CR | Enter | Enter / Ctrl+M | Enter / ALT+013 |
| 0EH | SO | NUL | Ctrl+N | ALT+014 |
| 0FH | SI | NUL | Ctrl+O | ALT+015 |
| 10H | DLE | NUL | Ctrl+P | ALT+016 |
| 11H | DC1 | NUL | Ctrl+Q | ALT+017 |
| 12H | DC2 | NUL | Ctrl+R | ALT+018 |
| 13H | DC3 | NUL | Ctrl+S | ALT+019 |
| 14H | DC4 | NUL | Ctrl+T | ALT+020 |
| 15H | NAK | NUL | Ctrl+U | ALT+021 |
| 16H | SYN | NUL | Ctrl+V | ALT+022 |
| 17H | ETB | NUL | Ctrl+W | ALT+023 |
| 18H | CAN | NUL | Ctrl+X | ALT+024 |
| 19H | EM | NUL | Ctrl+Y | ALT+025 |
| 1AH | SUB | NUL | Ctrl+Z | ALT+026 |
| 1BH | ESC | ESC | Ctrl+[ | ALT+027 |
| 1CH | FS | NUL | Ctrl+\ | ALT+028 |
| 1DH | GS | NUL | Ctrl+] | ALT+029 |
| 1EH | RS | NUL | Ctrl+^ | ALT+030 |
| 1FH | US | NUL | Ctrl+- | ALT+031 |
On macOS the Ctrl key corresponds to the Command key.
ASCII characters 20H–7FH
| Hex | Character | Hex | Character | Hex | Character | Hex | Character |
|---|---|---|---|---|---|---|---|
| 20H | Space | 38H | 8 | 50H | P | 68H | h |
| 21H | ! | 39H | 9 | 51H | Q | 69H | i |
| 22H | " | 3AH | : | 52H | R | 6AH | j |
| 23H | # | 3BH | ; | 53H | S | 6BH | k |
| 24H | $ | 3CH | < | 54H | T | 6CH | l |
| 25H | % | 3DH | = | 55H | U | 6DH | m |
| 26H | & | 3EH | > | 56H | V | 6EH | n |
| 27H | ' | 3FH | ? | 57H | W | 6FH | o |
| 28H | ( | 40H | @ | 58H | X | 70H | p |
| 29H | ) | 41H | A | 59H | Y | 71H | q |
| 2AH | * | 42H | B | 5AH | Z | 72H | r |
| 2BH | + | 43H | C | 5BH | [ | 73H | s |
| 2CH | , | 44H | D | 5CH | \ | 74H | t |
| 2DH | - | 45H | E | 5DH | ] | 75H | u |
| 2EH | . | 46H | F | 5EH | ^ | 76H | v |
| 2FH | / | 47H | G | 5FH | _ | 77H | w |
| 30H | 0 | 48H | H | 60H | ` | 78H | x |
| 31H | 1 | 49H | I | 61H | a | 79H | y |
| 32H | 2 | 4AH | J | 62H | b | 7AH | z |
| 33H | 3 | 4BH | K | 63H | c | 7BH | { |
| 34H | 4 | 4CH | L | 64H | d | 7CH | | |
| 35H | 5 | 4DH | M | 65H | e | 7DH | } |
| 36H | 6 | 4EH | N | 66H | f | 7EH | ~ |
| 37H | 7 | 4FH | O | 67H | g | 7FH | Delete |
Function keys and modifiers 80H–9DH
| Hex | Key | Hex | Key |
|---|---|---|---|
| 80H | F1 | 8FH | Delete |
| 81H | F2 | 90H | End |
| 82H | F3 | 91H | Page Down |
| 83H | F4 | 92H | Right Arrow |
| 84H | F5 | 93H | Left Arrow |
| 85H | F6 | 94H | Down Arrow |
| 86H | F7 | 95H | Up Arrow |
| 87H | F8 | 96H | Print Screen |
| 88H | F9 | 97H | Ctrl |
| 89H | F10 | 98H | Shift |
| 8AH | F11 | 99H | Left Alt |
| 8BH | F12 | 9AH | Right Alt |
| 8CH | Insert | 9BH | 1 s delay |
| 8DH | Home | 9CH | Win / GUI |
| 8EH | Page Up | 9DH | Keystroke |
When Ctrl, Shift, Alt or GUI is set as a prefix or suffix, it is sent in combination with the next character (not supported with the ALT and Thai layouts). The character after Keystroke is sent directly as the key value.