Wall mount for one monitor with a gas spring, SolidHand-CGW01
GTIN: 5907614668501 · SKU: SolidHand-CGW01
The SolidHand-CGW01 holds one monitor of 17 to 32 inches weighing up to 9 kg on an aluminium arm fixed to a wall plate. The gas spring balances the weight of the screen, so it moves with a light push and stays wherever you leave it, tilts ±45°, swings ±90° on the arm and rotates ±180° to portrait. The monitor cable runs hidden inside the arm, and the four extension brackets in the kit adapt the head to monitors with a wider VESA pattern.
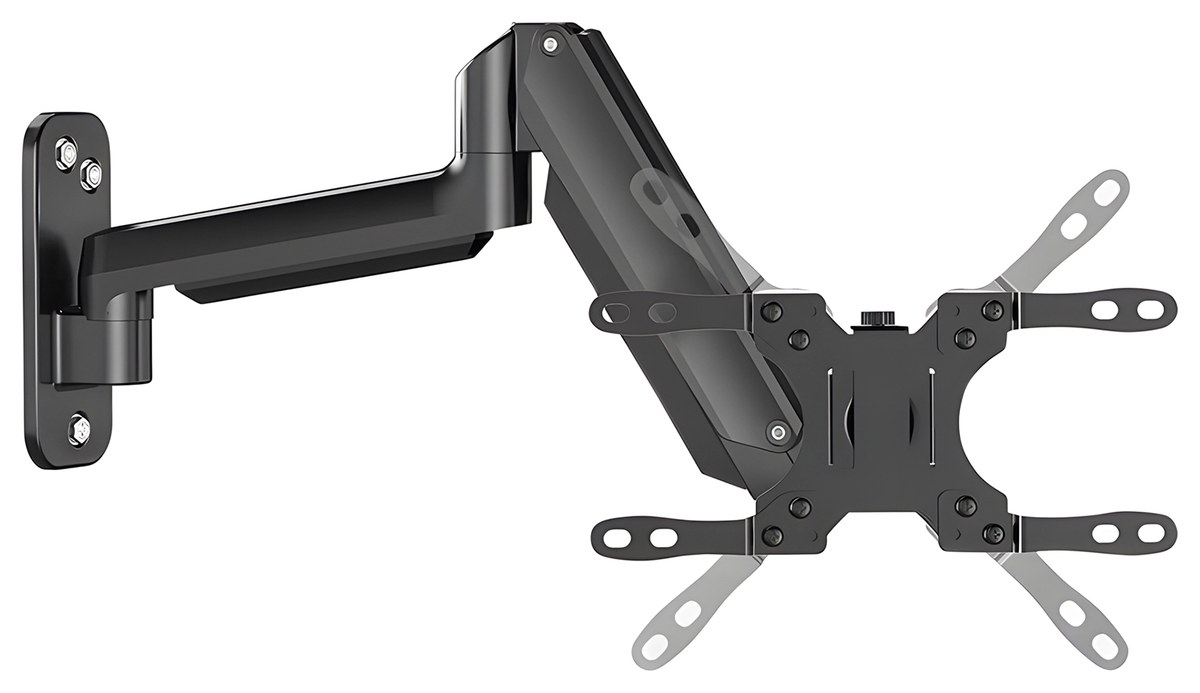
Table of contents
Specifications
- Colour: black
- Material: aluminium
- Surface finish: powder coating
- Number of monitors: 1
- Monitor size: 17–32"
- VESA pattern: 75 × 75 mm, 100 × 100 mm
- Load: up to 9 kg
- Height adjustment: gas spring assisted
- Arm swivel: +90° / −90°
- Monitor rotation: +180° / −180°
- Monitor tilt: +45° / −45°
- Mounting: wall
- Package dimensions: 38.5 × 23.2 × 7 cm
- Weight of the mount: 1.5 kg
- Weight with packaging: 1.9 kg
Kit contents
- Monitor mount — wall plate with the gas-spring arm and the VESA head
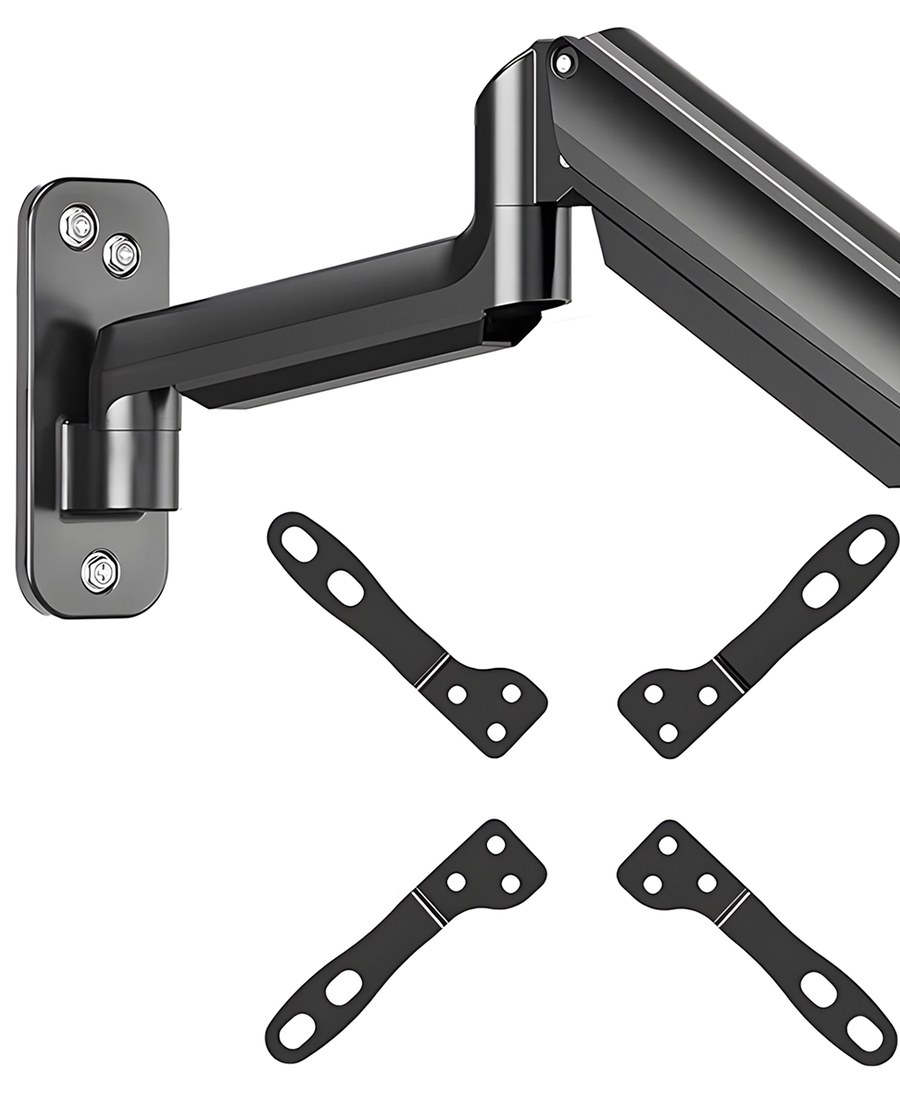
- VESA extension brackets (× 4)
- Mounting screws and washers
- User manual
Check that you have received all the parts before you start. If anything is missing or damaged, contact us — do not use damaged or defective parts.
Before you start
Installation takes about twenty minutes. Prepare the following:
- A second person — hanging the monitor on the arm is a two-person job
- A drill with a bit suited to your wall, a spirit level and a pencil
- A screwdriver or a wrench for the wall screws, a screwdriver for the monitor screws and an Allen key for the spring adjustment
- A check that the monitor is 17–32", weighs no more than 9 kg and has VESA 75 × 75 or 100 × 100 holes — or a wider pattern that the extension brackets cover
- A solid wall — concrete, brick or plasterboard with a stud behind the plate; a hollow wall needs heavy-duty anchors
- A check that no cables or pipes run through the wall where you are going to drill
Safety instructions
- Caution: using the mount with a load above the rated capacity makes it unstable and can lead to injury.
- Follow the installation instructions exactly. Incorrect installation can damage the mount or cause serious personal injury.
- Make sure the wall will safely carry the combined weight of the mount, the monitor and all mounting hardware.
- Use the supplied mounting screws and do not overtighten them — overtightening can damage the mount or the monitor.
- Small parts: the product contains small parts that can be a choking hazard if swallowed. Keep them away from children.
- Indoor use: the product is intended for indoor use only, in dry rooms. Keep it away from water, damp and extreme temperatures — using it outdoors can lead to failure and injury.
- Do not use additional tools or modify parts that did not come with the mount.
- Take care when tightening the screws with a tool, so the mount and the monitor are not damaged.
- If the mount is not used for a longer time, store it in a dry, cool place away from damp and heat.
Installation
Step 1 — Choose the spot on the wall
The mount is designed for permanent wall mounting. Pick the position before you drill:
- Height — the top of the screen should sit at about eye level of a seated user; the arm swings ±90° and extends into the room, so leave room on both sides for the screen
- Wall — concrete, brick or a stud behind the plate; for plasterboard without a stud use heavy-duty anchors
- Cables — the monitor cable runs inside the arm to the wall, so keep the power and signal sockets within reach of the wall plate
Step 2 — Fix the wall plate
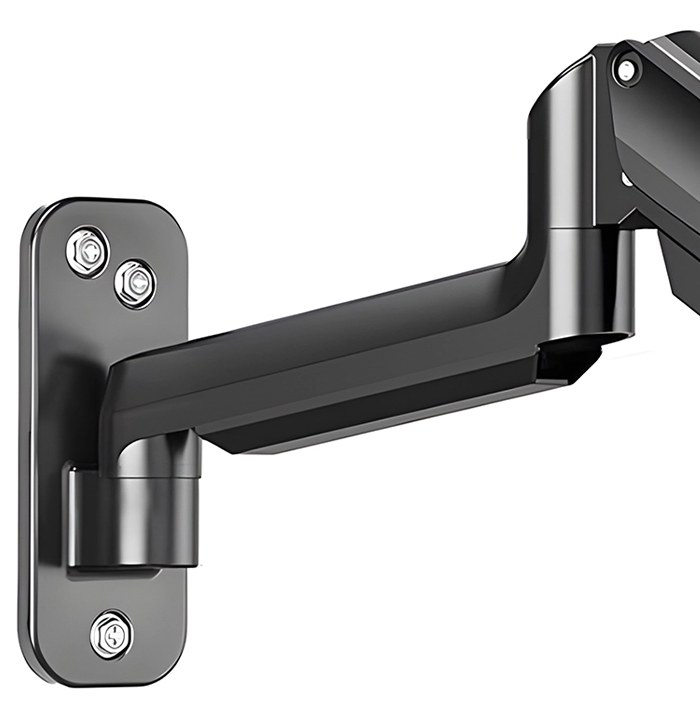
- Hold the wall plate against the wall, level it with the spirit level and mark the mounting holes with the pencil.
- Drill the holes with a bit suited to the wall and insert plugs or anchors matching the wall type.
- Fit the supplied screws with the washers through the plate and tighten them until the plate sits flat and does not move.
- Check that the arm turns freely on the pivot of the wall plate — it should swing ±90° without touching the wall.
Do not overtighten the wall screws. The plate must carry the arm and the monitor — if it moves or the screws do not bite, use stronger anchors before you go on.
Step 3 — Mount the monitor
The VESA head on the arm matches the 75 × 75 mm and 100 × 100 mm patterns directly. For a monitor with a wider hole spacing, first screw the four extension brackets to the head so they reach the holes on the back of the screen.
- Match the holes of the VESA head — or of the extension brackets — to the pattern on the back of the monitor.
- With a second person holding the monitor against the head, screw it on with the supplied screws and washers — tighten crosswise, without overtightening.
- Check that the monitor sits flat on the head and does not rock.
Do not let go of the screen until all four screws are tightened. The monitor must be within 17–32" and 9 kg — a lighter or heavier screen cannot be balanced by the gas spring.
Step 4 — Set the gas-spring tension
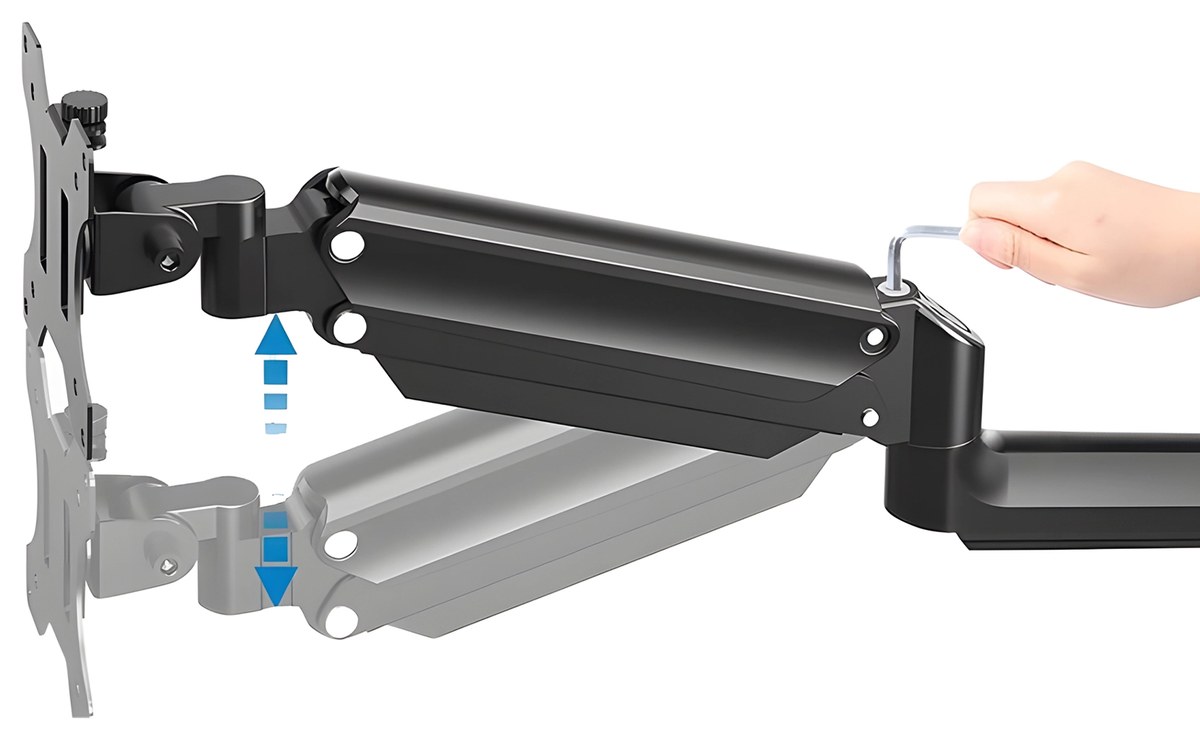
The adjustment screw of the gas spring is in the arm joint next to the head, marked + and −. Adjust it only with the monitor mounted:
- Press the arm down to a horizontal position and let go.
- If the screen drops, turn the screw with the Allen key towards + to increase the force; if it rises on its own, turn towards −.
- Adjust in small steps until the screen stays wherever you leave it and moves with a light push.
The spring is designed for a monitor of up to 9 kg. A screen lighter or heavier than that cannot be balanced, however far the screw is turned.
Step 5 — Set the position and route the cable
- Tilt the screen ±45° and swing the arm to the angle you want — every adjustment is made by hand, without tools.
- To use the screen in portrait, turn it on the VESA head; the head rotates ±180°.
- Lay the monitor cable in the channel inside the arm and out at the wall plate, leaving enough slack for the full range of movement — a taut cable pulls on the ports every time the screen is moved.
- Move the arm through its full range once to check that nothing catches on the wall or the cable.
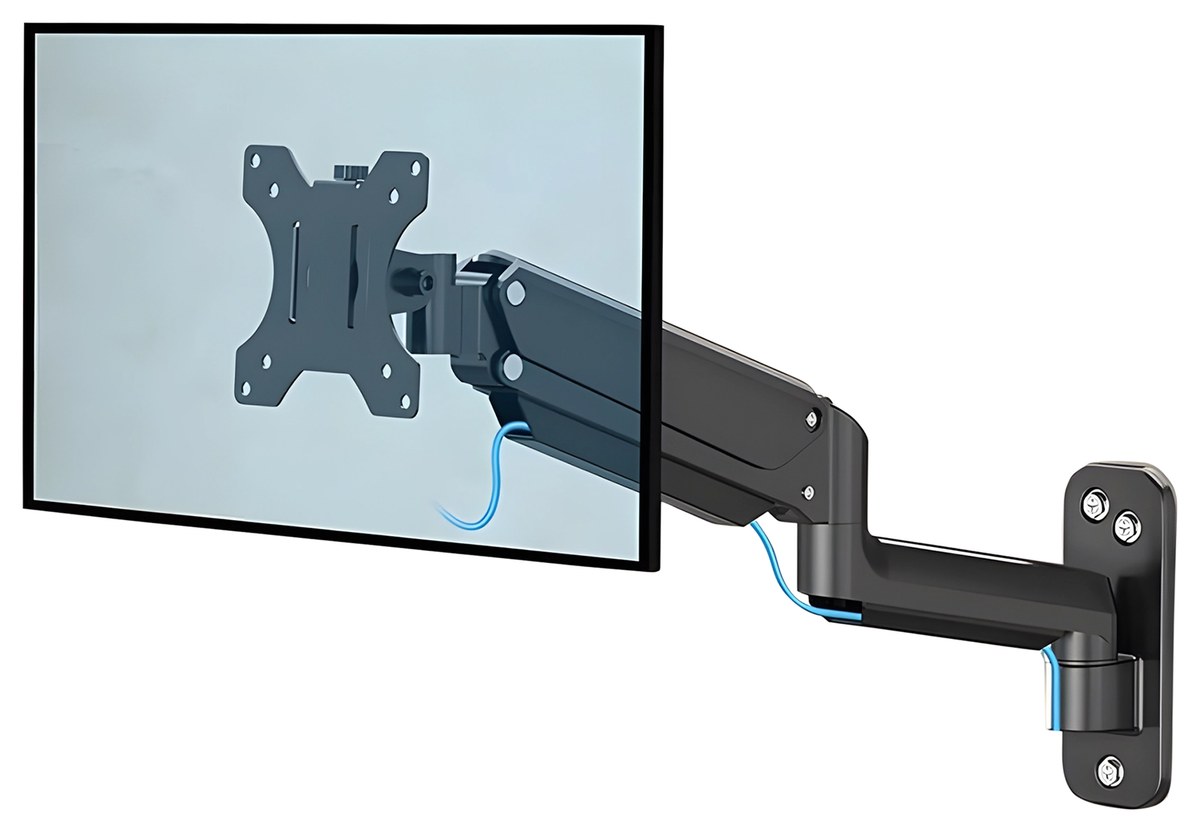
Using the mount
Once the spring is balanced, every adjustment is made by hand:
- Height — the gas spring holds the screen where you leave it
- Arm swivel — ±90°
- Screen tilt — ±45°
- Screen rotation — ±180°, for landscape or portrait
- The cable stays inside the arm, whatever position the screen is in
Care and storage
- Wipe the mount with a dry or slightly damp cloth; do not use solvents.
- Check the wall screws and the monitor screws from time to time and retighten them if they have loosened.
- If the mount is taken down and not used for a longer time, store it in a dry, cool place away from damp and sources of heat.
Frequently asked questions
Which monitors are compatible with the SolidHand-CGW01?
How does the gas spring compare to a mechanical spring arm?
Can I rotate the monitor into portrait mode?
What kind of wall is suitable for installation?
Why does the arm drop or rise on its own?
Where does the monitor cable go?
Downloads
The manufacturer’s manuals and datasheets in PDF, in case an offline copy is needed. Everything in them is on this page as well.