Working time recorder with fingerprint and RFID, CTR13
GTIN: 5906935203378 · SKU: CTR13
Table of contents
Device description
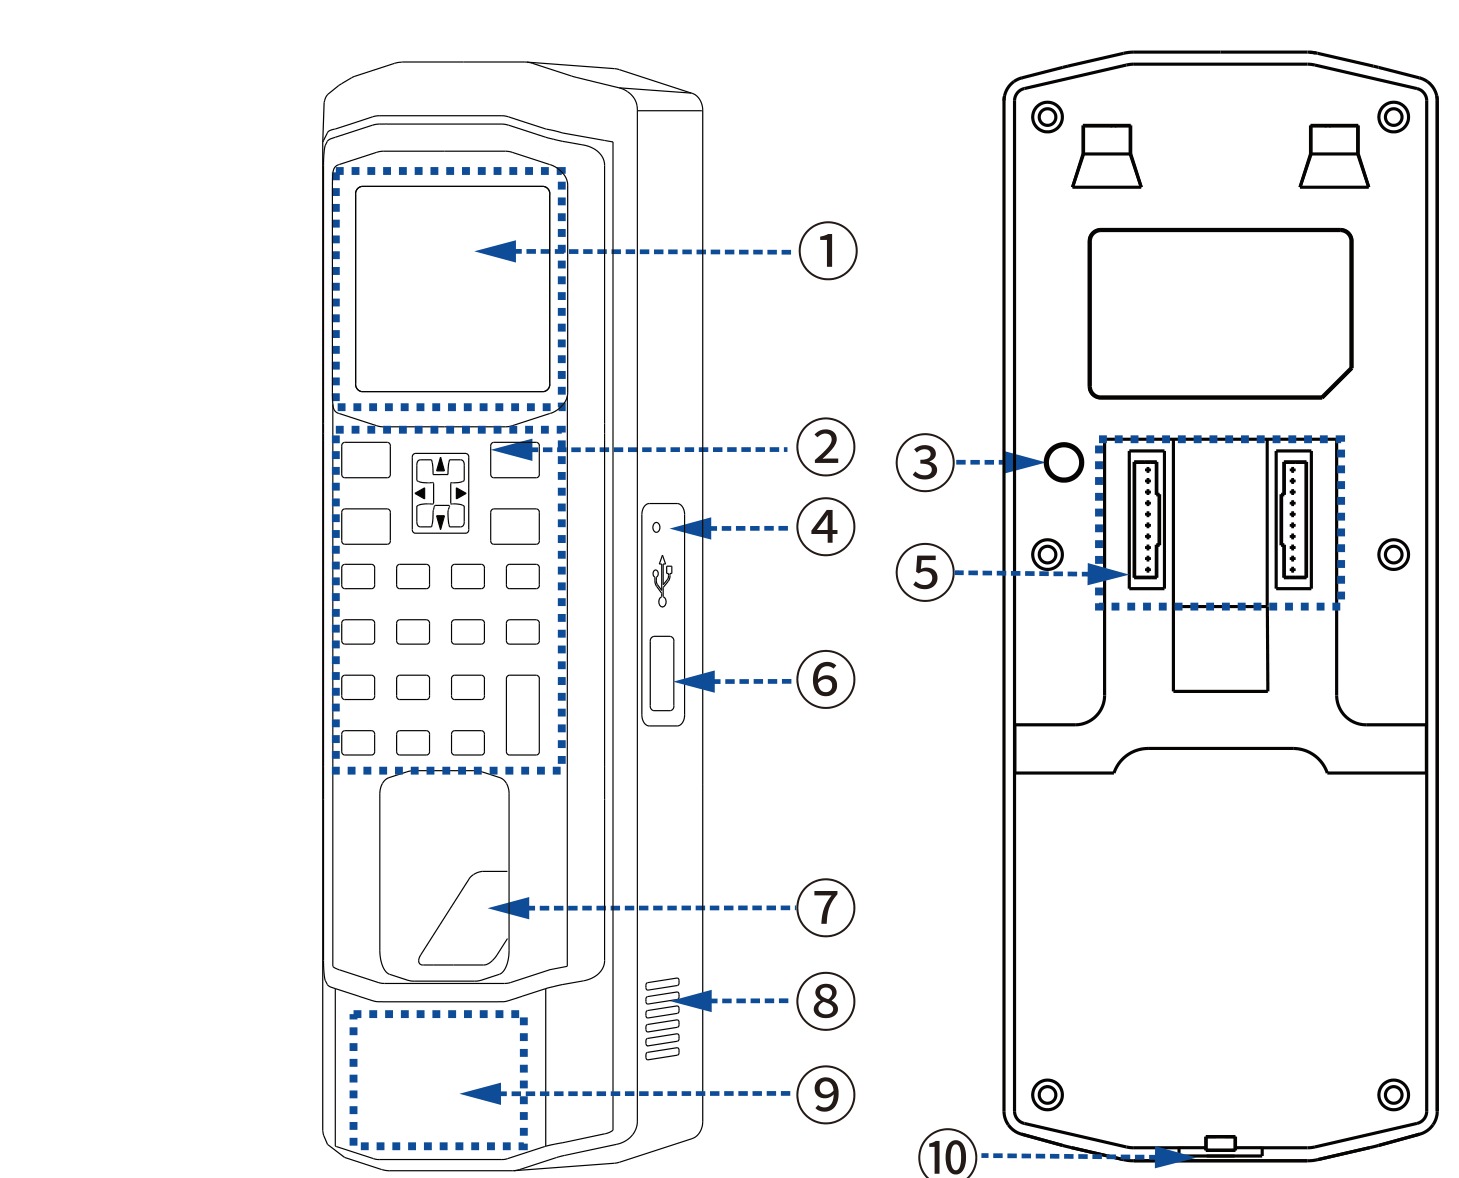
- Display — 2.4" colour TFT showing the clock, the verification result and the menu.
- Keypad — 20 keys for entering IDs, PINs, names and navigating the menu.
- Anti-tamper button — tamper switch on the side; the device detects when it is taken off the wall.
- Reset hole — pinhole for resetting the device with a thin tool.
- Access-control terminal block — screw terminals for the lock relay, door sensor, alarm, Wiegand, doorbell and power supply.
- USB port — for a flash drive to export reports or import employee data.
- Fingerprint sensor — optical, reads the finger placed on it.
- Speaker — voice prompts, bell signal and alarm sounds.
- RFID reading area — hold the 125 kHz card or key fob against this area at the bottom of the device.
- Screw hole — secures the recorder to the wall bracket.
Device mounting
Drill holes in the wall at the positions marked by the holes in the bracket and insert the wall plugs.
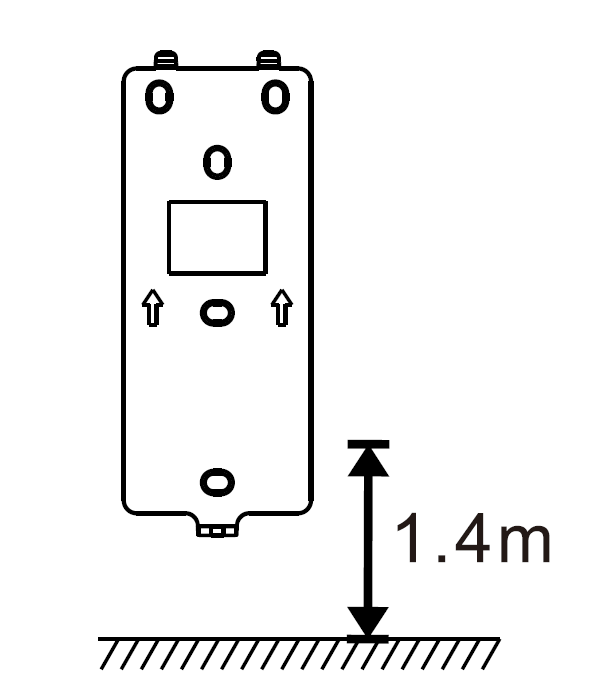
Drill holes in the wall at the positions marked by the holes in the bracket and insert the wall plugs.
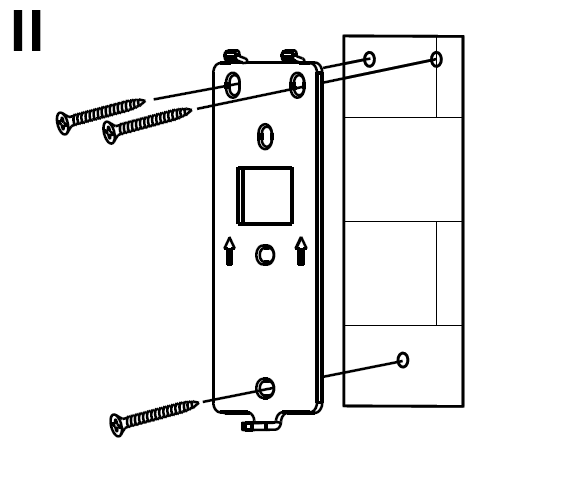
Fix the bracket to the wall with screws.
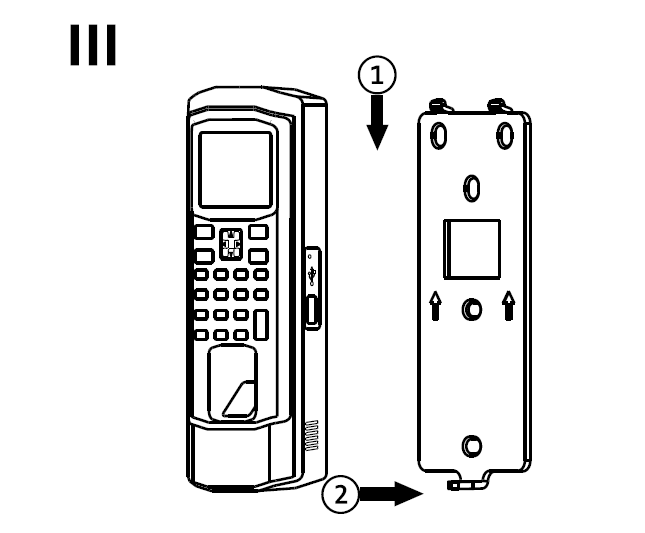
Connect the wires according to the instructions and mount the device on the bracket.
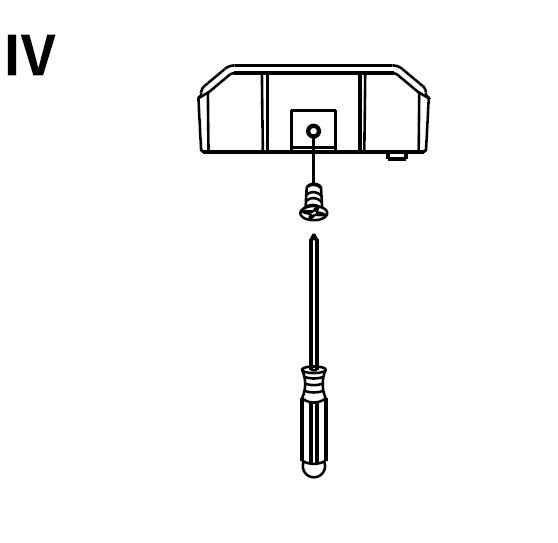
Tighten the screws at the bottom of the device to complete the installation.
Access-control interface
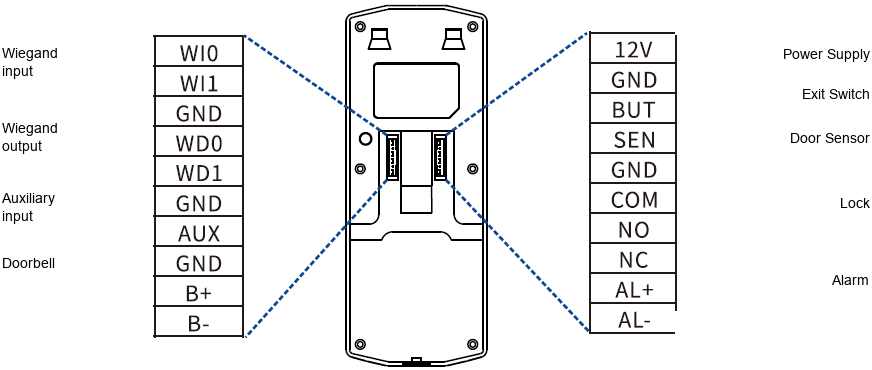
Connectivity peripheral
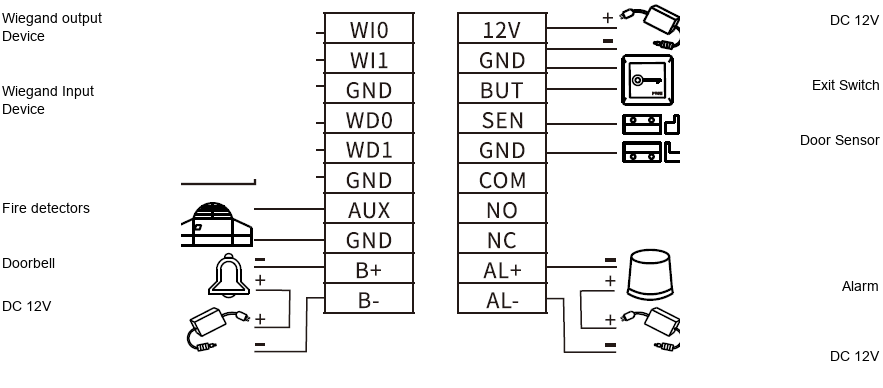
The device can be connected to door switches, door sensors, door locks, alarms, doorbells, Wiegand devices, fire detectors, etc.
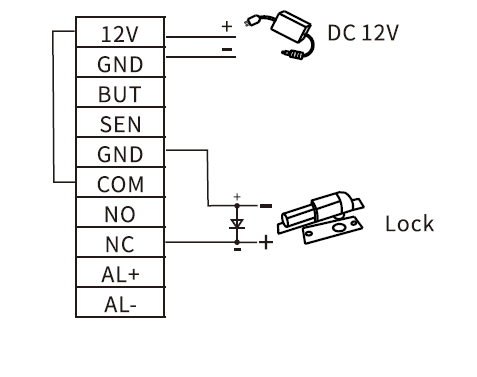
Door lock wiring
The device supports normally open (NO) and normally closed (NC) locks. A normally open lock is connected to the NO/COM terminals; a normally closed lock is connected to the NC/COM terminals.
Example: connecting a normally closed lock.
1) Separate power supplies:
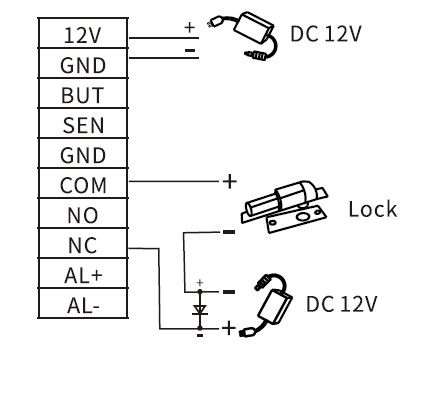
2) Shared power supply:
Recommended steps for initial use
Shift configuration – department configuration – attendance rules – employee enrollment – employee time tracking – viewing attendance reports – access control configuration
Keypad instructions
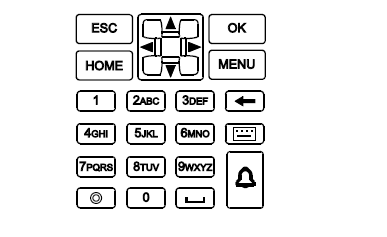
OK — confirm the current setting
ESC — cancel or exit the current setting
▲ ▼ ◄ ► — move up, down, left and right
0–9 — enter digits, letters or symbols
🔔 — external doorbell button
⊞ — change the input method
MENU — enter the menu
HOME — return to the home screen
← — delete key
⏻ — sleep key
␣ — spacebar
First startup instructions
Access-control settings
Press [MENU] to go to the main menu, then select "Access CTRL" and press [OK] to enter the Access CTRL interface.
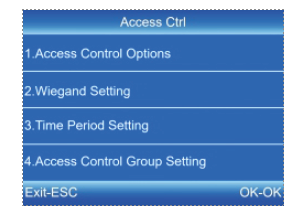
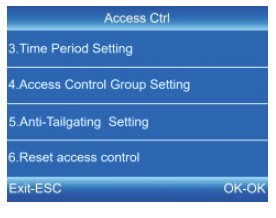
Basic access control
Access Control Options: configuration of parameters such as door locks, magnetic sensors, switches, alarms, etc.
Wiegand Setting: configuration of the Wiegand protocol parameters. WG26 and WG34 formats are supported.
Reset access control: restore access-control settings to defaults.
Professional access control (a professional access-control terminal is required).
Time Period Setting: each time period consists of seven intervals, each up to 24 hours long.
Access Control Group Setting: grouping users and managing personnel within individual groups.
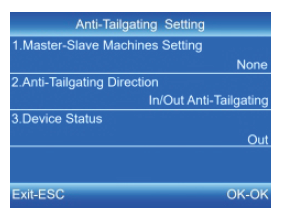
Anti-tailgating function:
Prevents multiple unauthorised entries into controlled areas. This feature requires communication between two devices via Wiegand signals.
Master-slave configuration: determines whether the device acts as the master or slave unit.
Anti-tailgating direction: configures the passback direction (anti-passback).
Device status: determines whether user verification on this device registers as entry or exit.
Attendance rules
-
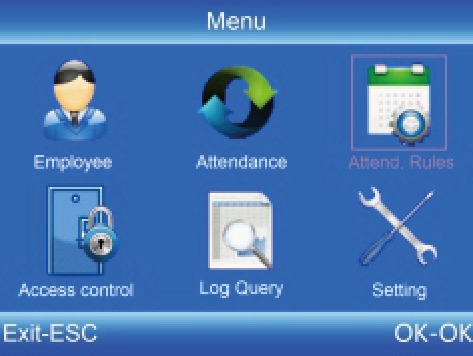
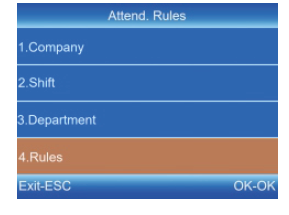
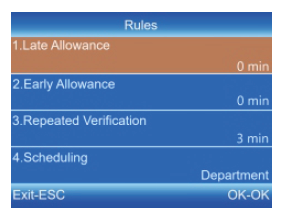
Press [MENU] to go to the main menu, select "Attend Rules" and press [OK] to enter the Rules interface.
-
After configuring the rules, press [OK] to save the settings.
View attendance report
-
Insert the USB drive into the USB port of the device.
-
Press [MENU] to go to the main menu, then use the ▼ button to select "Attendance".
-
Use the ▲▼ buttons and [OK] to select the data to download.
-
Enter the start and end date, then press [OK] to start the download.
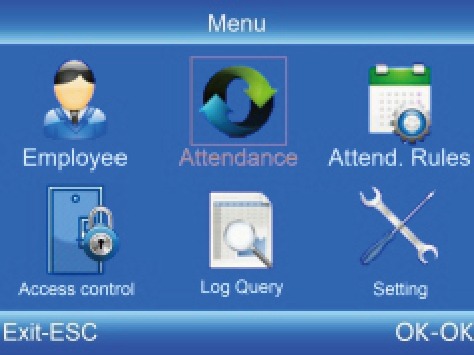
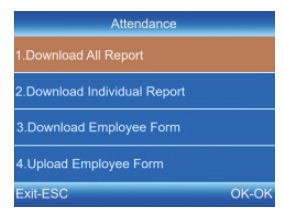
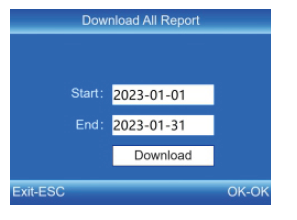
The "Employee Form" allows entering employee data, configuring shifts and assigning shifts to individual employees. After completing the configuration, the file can be uploaded to the device via USB. Use a USB drive formatted in FAT32 file system.
Employee enrollment
-
Press [MENU] to go to the main menu, use the ▼ button to select "Employee" – "Enroll", then press [OK] to enter the enrollment interface.
-
Enter the ID, name and department, then select "Enroll" to proceed to the Employee Info interface.
-
After configuring the fingerprint, card number, password and authority as required, press [ESC] to save the settings.
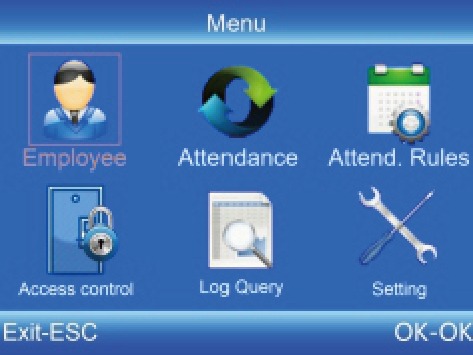
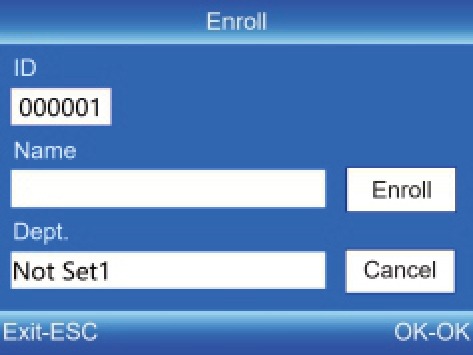
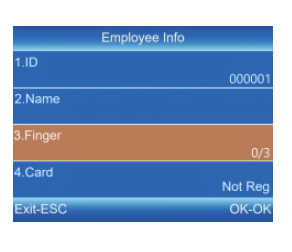
ID: Enter the employee ID. Only digits are allowed.
Name: Enter the name. It can contain a combination of digits, letters and symbols.
Fingerprint: Register a fingerprint by pressing the same finger on the fingerprint sensor three times.
Card: Register an ID card by swiping it near the reading area.
Password: Enter a password; it can consist of 1–6 digits.
Department: Press [OK] to select the department from the list.
Authority: Press [OK] to select the authority level: employee or administrator.
Shift settings
-
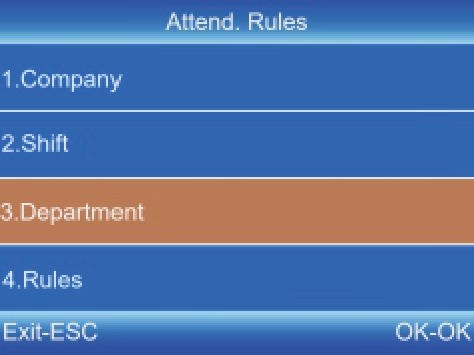
Press [MENU] to go to the main menu, then use ▼ to select "Attend. Rules" – "Shift".
-
Use ▼ to select the shift, and press [OK] to enter the editing interface.
-
Use ▲▼ to move the cursor to the desired option, then enter the working hours.
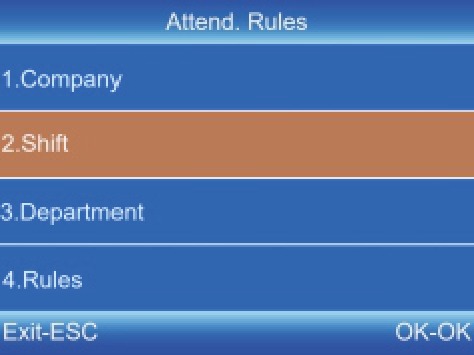
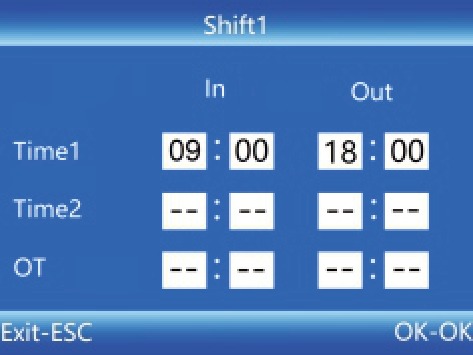
The [MENU] key doubles as a "delete" key. After deleting all the content in an input field, the symbol "−−" is displayed. All shifts support cross-day settings. Shift 1 is set by default.
Department settings
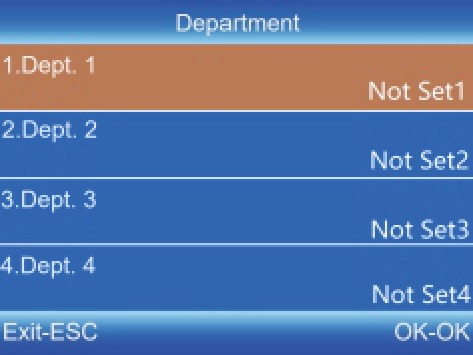
Users can edit department names (up to 16 departments can be defined).
-
Press [MENU] to go to the main menu. Use the ▼ button to select "Attend. Rules" – "Department".
-
Use the ▼ button to select the appropriate department, then press [OK] to go to the editing screen.
-
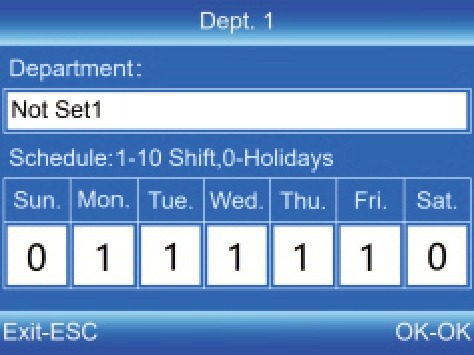
Type the department name in the text field. Press [OK] to save the name.
-
Use the ▲▼ buttons to move the cursor to the desired option and enter the shift number (work schedule).
ClockSum — attendance report software
ClockSum is a dedicated desktop application for managing attendance data collected by HDWR time recorders, including the CTR13. It allows you to import reports from the USB drive, calculate working hours, generate summaries by employee or department, and export the results to spreadsheets.
ClockSum is a separately purchased program — it is not included with the time recorder. For more information, visit clocksum.com.